

Vendors (Carriers)
This guide explains how to use the Vendors module in Pelcro to create, manage, and maintain vendor records for accounts payable workflows. It covers how to configure vendor profiles, track bills, and organize delivery routing to ensure accurate and efficient operations.
The Vendors section is part of Pelcro’s Accounts Payable (AP) – Beta functionality. It allows admin users to centrally manage vendor records that are used for creating and tracking bills within the platform.
This guide covers how to access, create, and manage vendors.
Where to Find Vendors
Navigate to:
Payables → Vendors
This section is available only to admin users.
Overview
The Vendors module allows you to:
- Maintain a centralized list of all vendors
- Create and update vendor profiles used in bill creation
- Search, filter, and sort vendors for faster access
- Ensure consistent vendor data across AP workflows
Vendor records serve as the foundation for bill creation in the AP system.
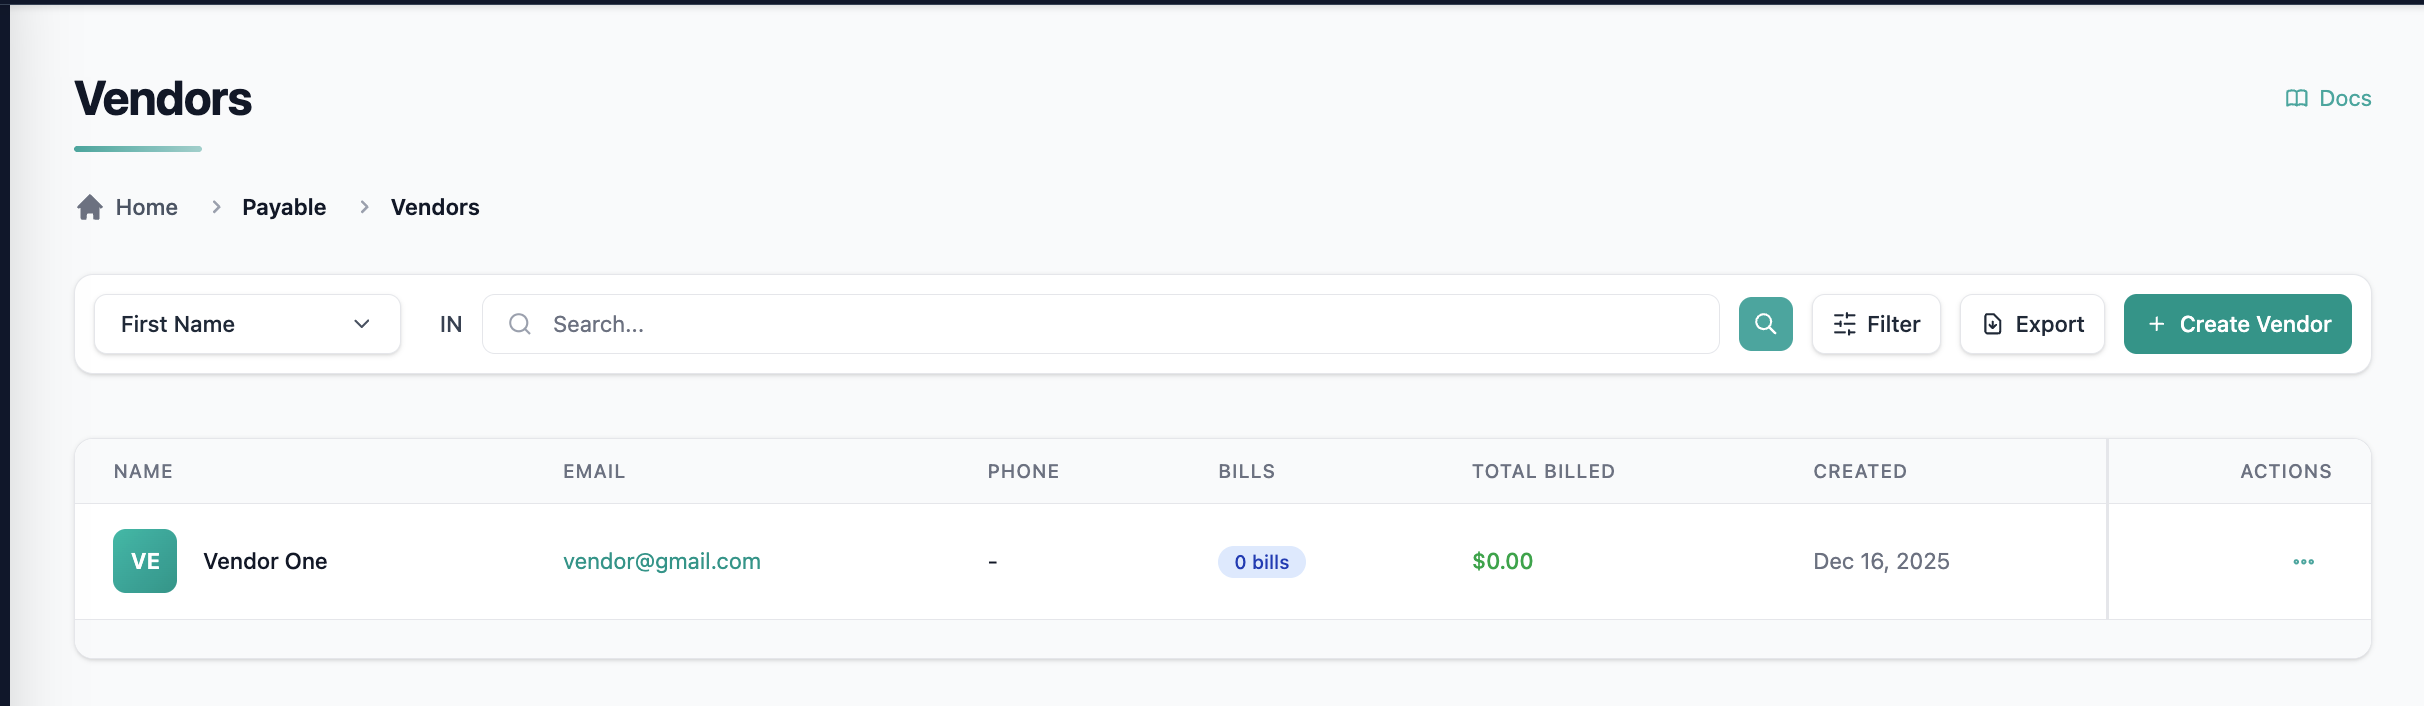
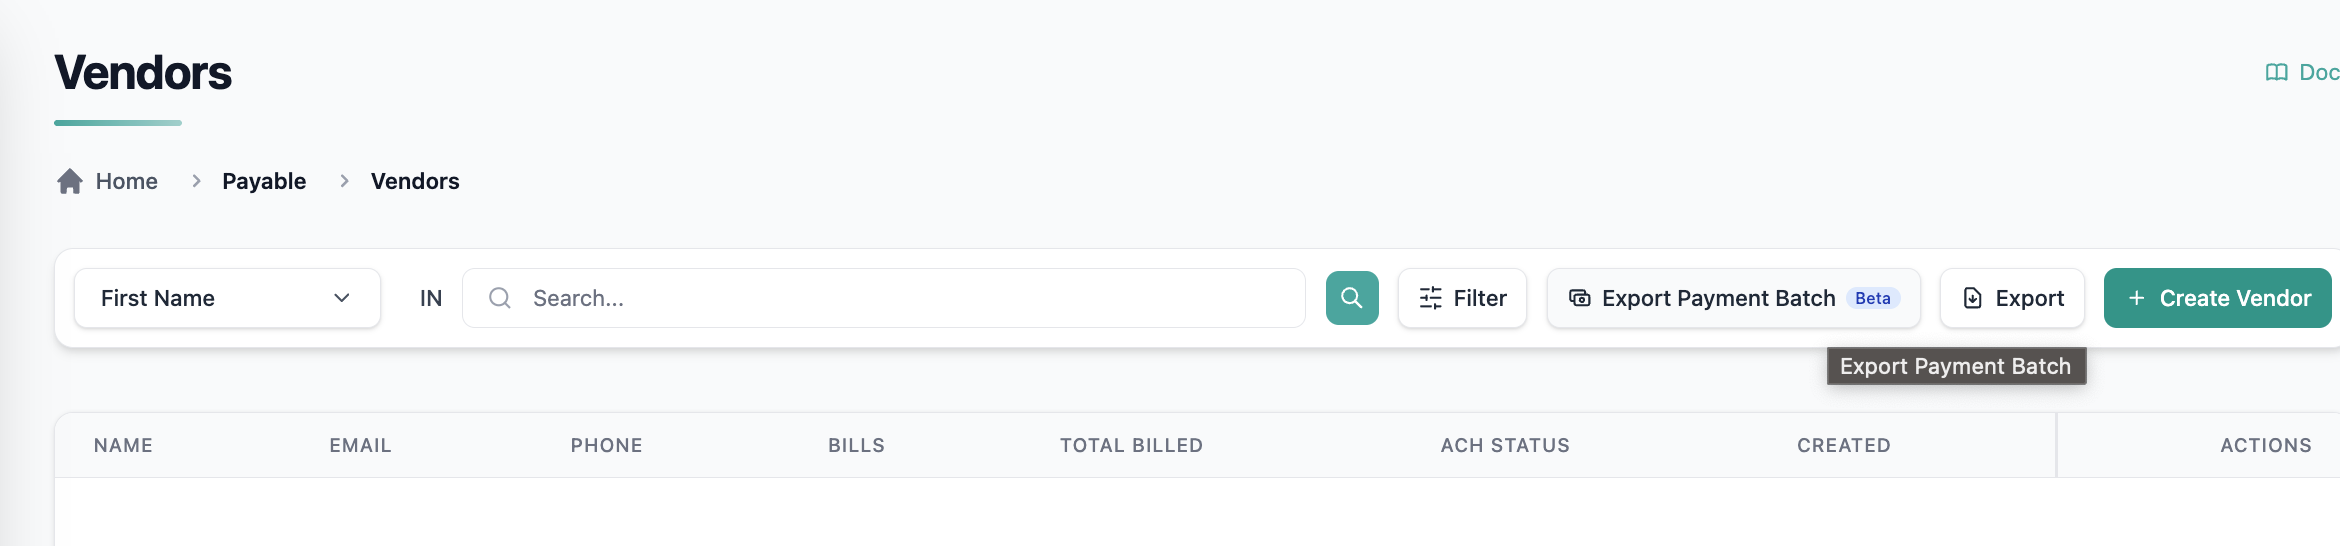
Vendors List View
The Vendors list provides:
- A table view of all vendors
- Search by vendor name or email
- Sorting and filtering options for easier navigation
From this view, admins can:
- View vendor details
- Edit existing vendors
- Delete vendors (if not restricted by usage)
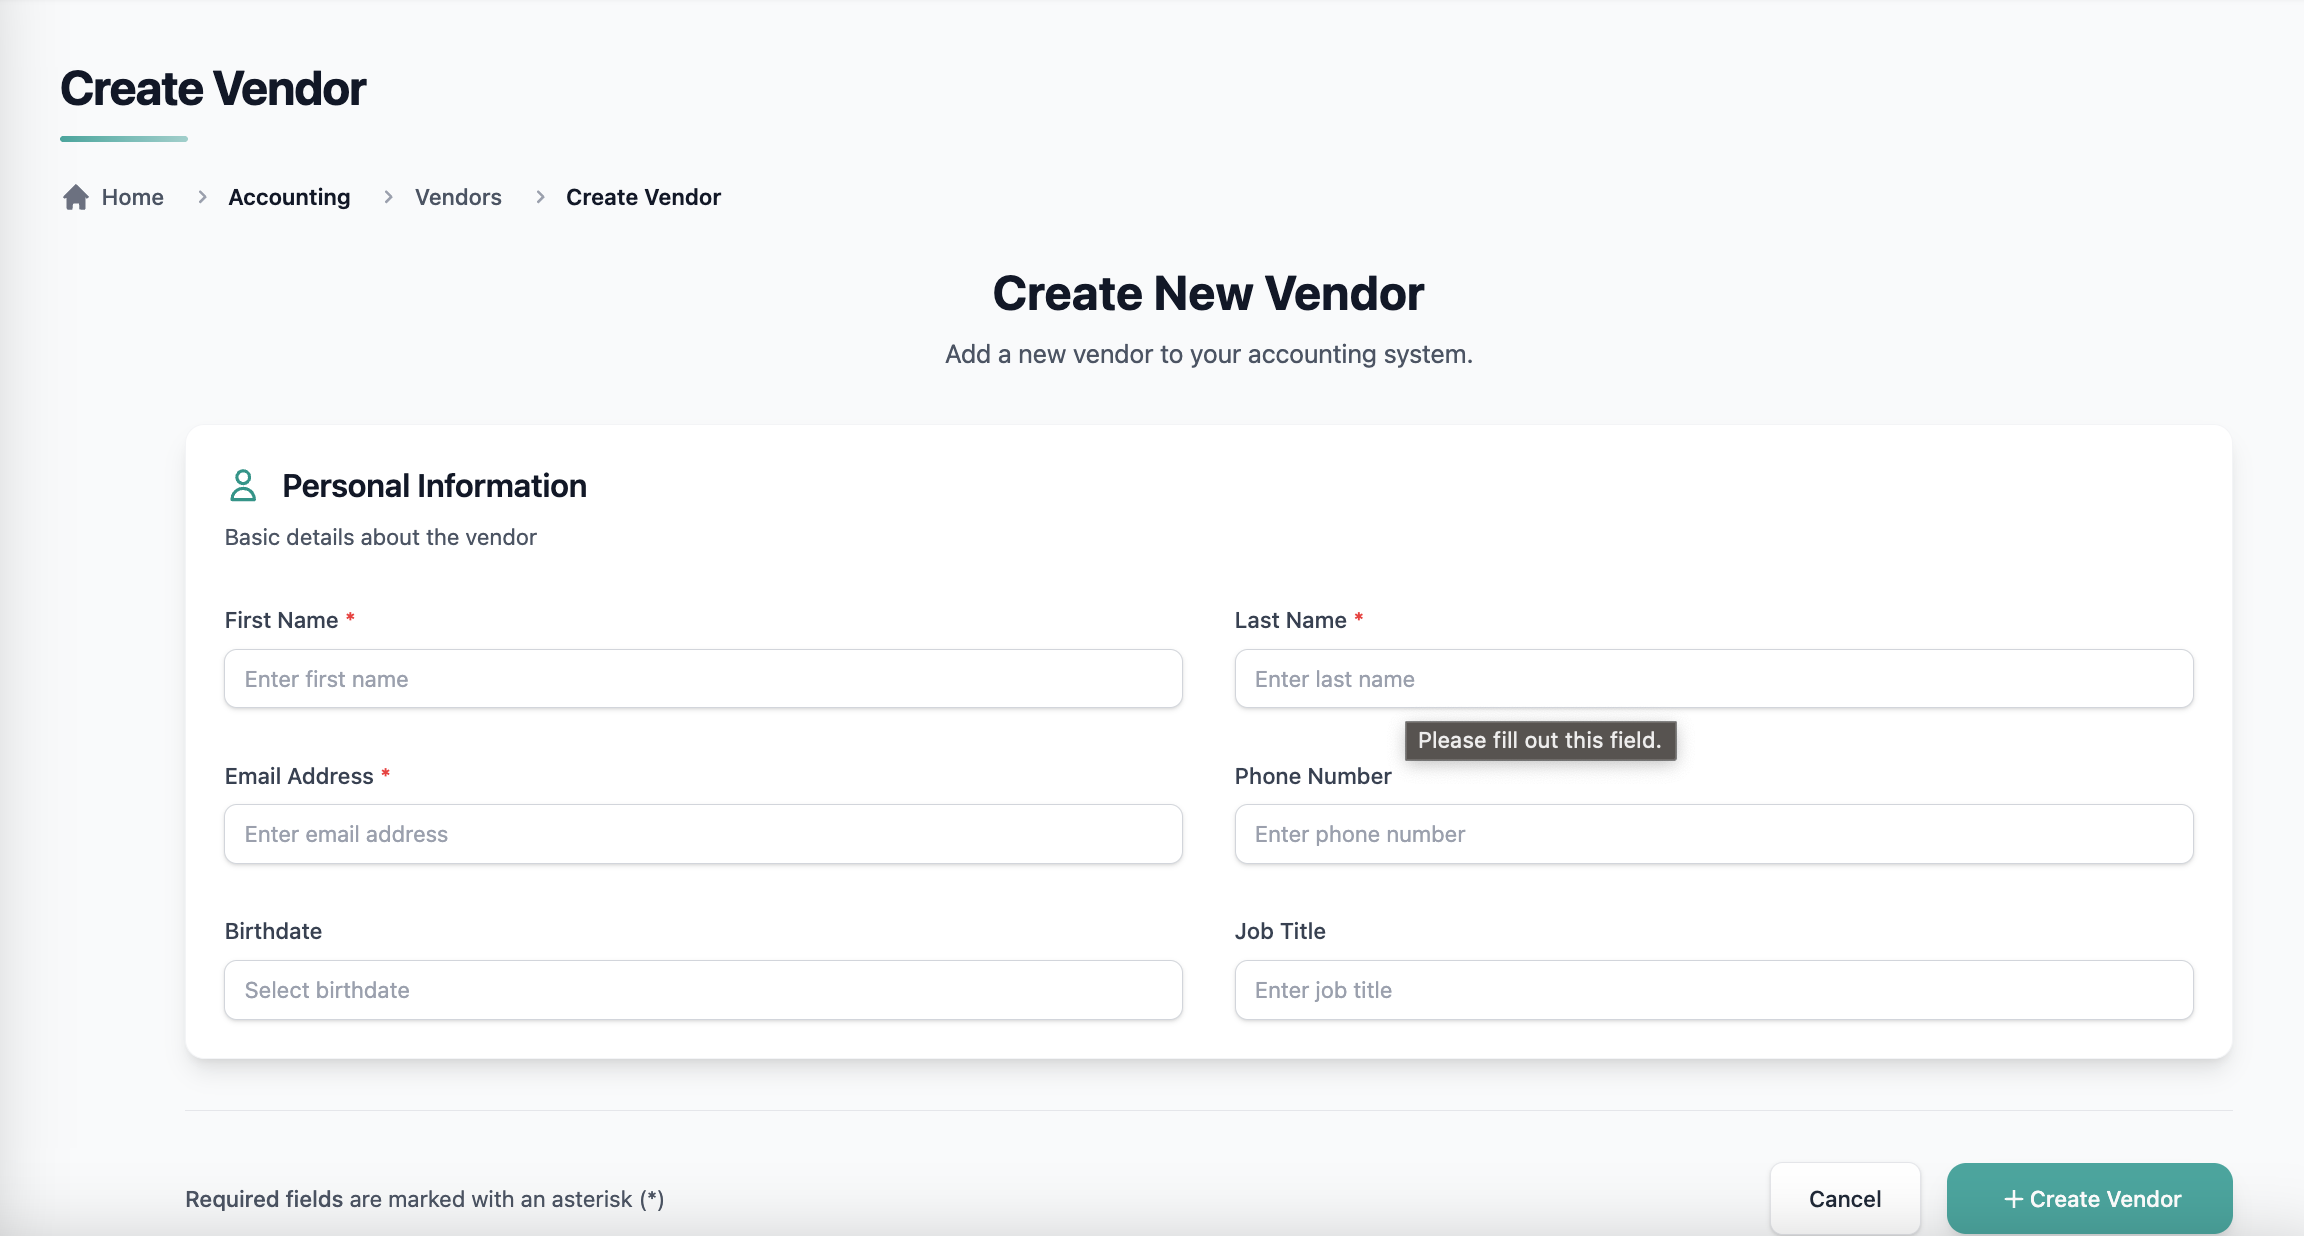
Creating a vendor
To create a vendor record that you can use in bill creation:
- Go to Accounts Payable → Vendors.
- Click Create Vendor.
- Enter the vendor’s core details.
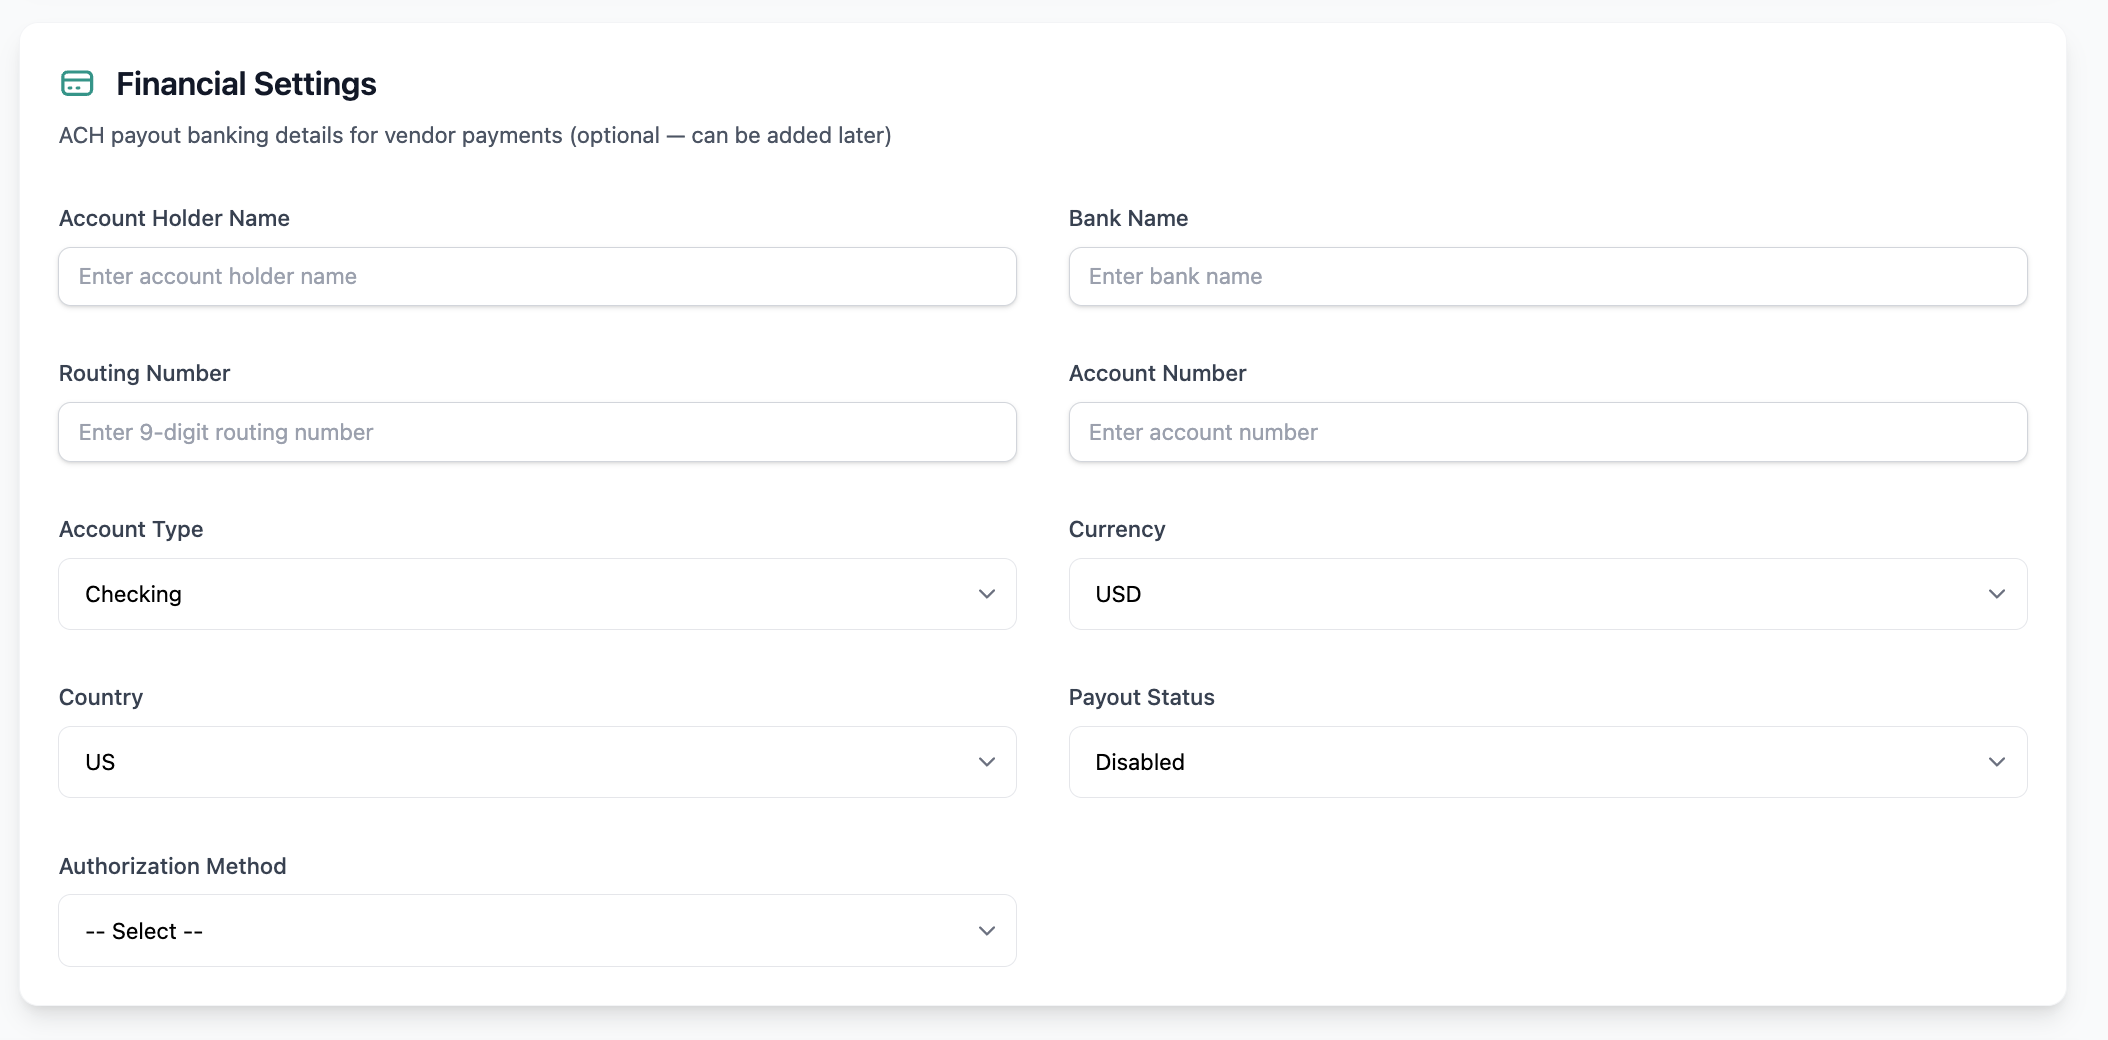
Optional: Add financial information
Add Financial Information if you want to store payout details for the vendor:
- Account holder name
- Bank name
- Routing / transit number
- Account number
- Account type (Checking or Savings)
- Currency
- Country
- Click Save.
Configure vendor routes
When creating or editing a vendor, you can define how deliveries are assigned and routed using delivery zone prompts and delivery sequencing.
Delivery Zone Prompt
The Delivery Zone Prompt defines the vendor’s delivery coverage and is used to automatically assign vendors to shipping addresses.
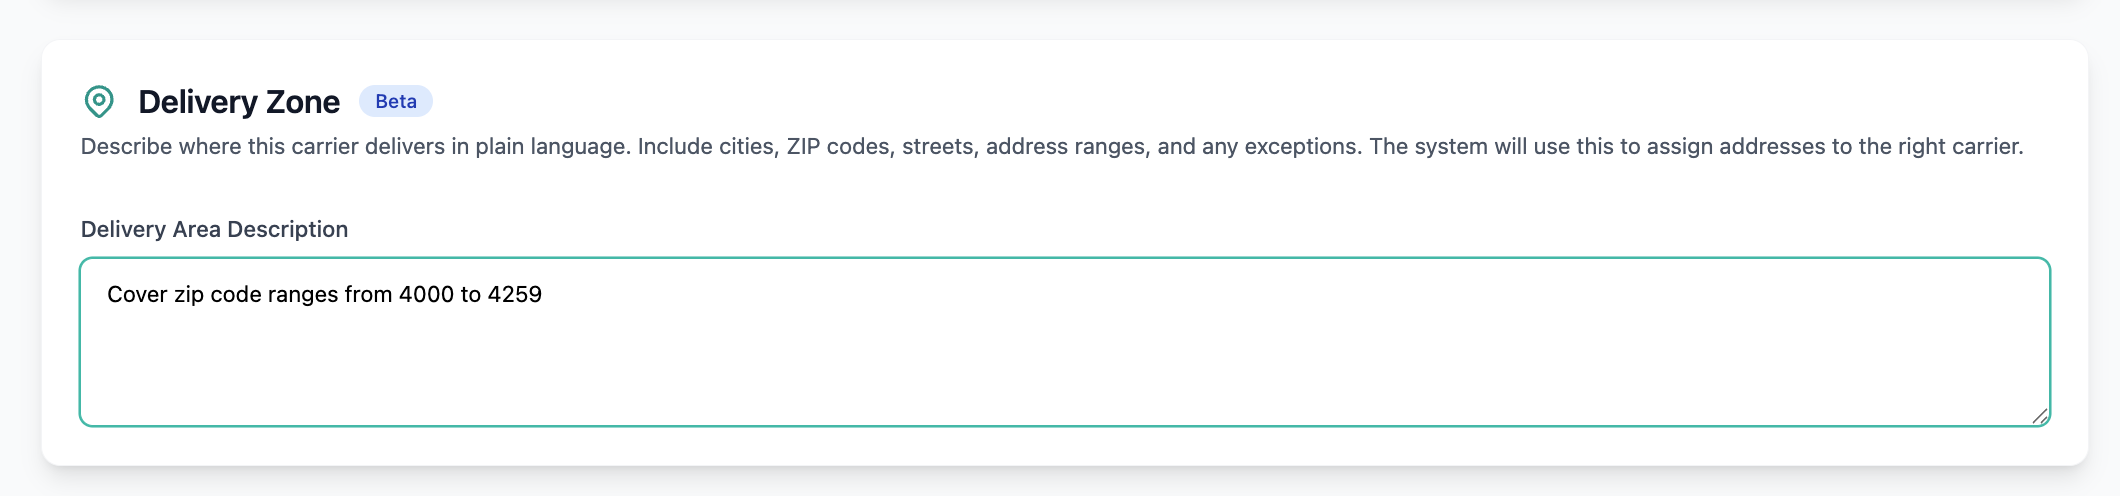
Steps
- Open the vendor record
- Add a Delivery Zone Prompt
- Describe the vendor’s service area using standard mailing formats such as:
- ZIP code ranges (e.g.,
04401–04412) - Street address ranges (e.g.,
Main St 100–399) - City or county names (e.g.,
Bangor,Penobscot County)
- ZIP code ranges (e.g.,
- Click Save
How it works
When shipping addresses are created or updated, Pelcro automatically evaluates them against vendor delivery zone prompts and assigns the matching vendor.
- Specific rules (e.g., street ranges) take priority over general ones (e.g., city-level coverage)
- If no clear match is found, the address will remain unassigned
- You can manually override the assigned vendor at any time
Examples
- Covers ZIP code ranges from
04401to04412 - Delivers to Main Street addresses from
100to399in Bangor - Covers all addresses in Penobscot County
- Delivers to Bangor and nearby ZIP codes from
04401to04412
Once a vendor is assigned to an address, you can control the order in which deliveries are performed using the Driver Delivery Sequence.
Configure Delivery Sequence
The Driver Delivery Sequence defines the order in which deliveries are performed for a driver within a route.
This value is set at the address level when creating or editing a Shipping address, and is used during vendor routing and fulfillment.
- Lower numbers are delivered first
- Higher numbers are delivered later
- If no sequence is provided, delivery order may be determined automatically
This value is included in fulfillment exports and helps preserve delivery route sequencing.
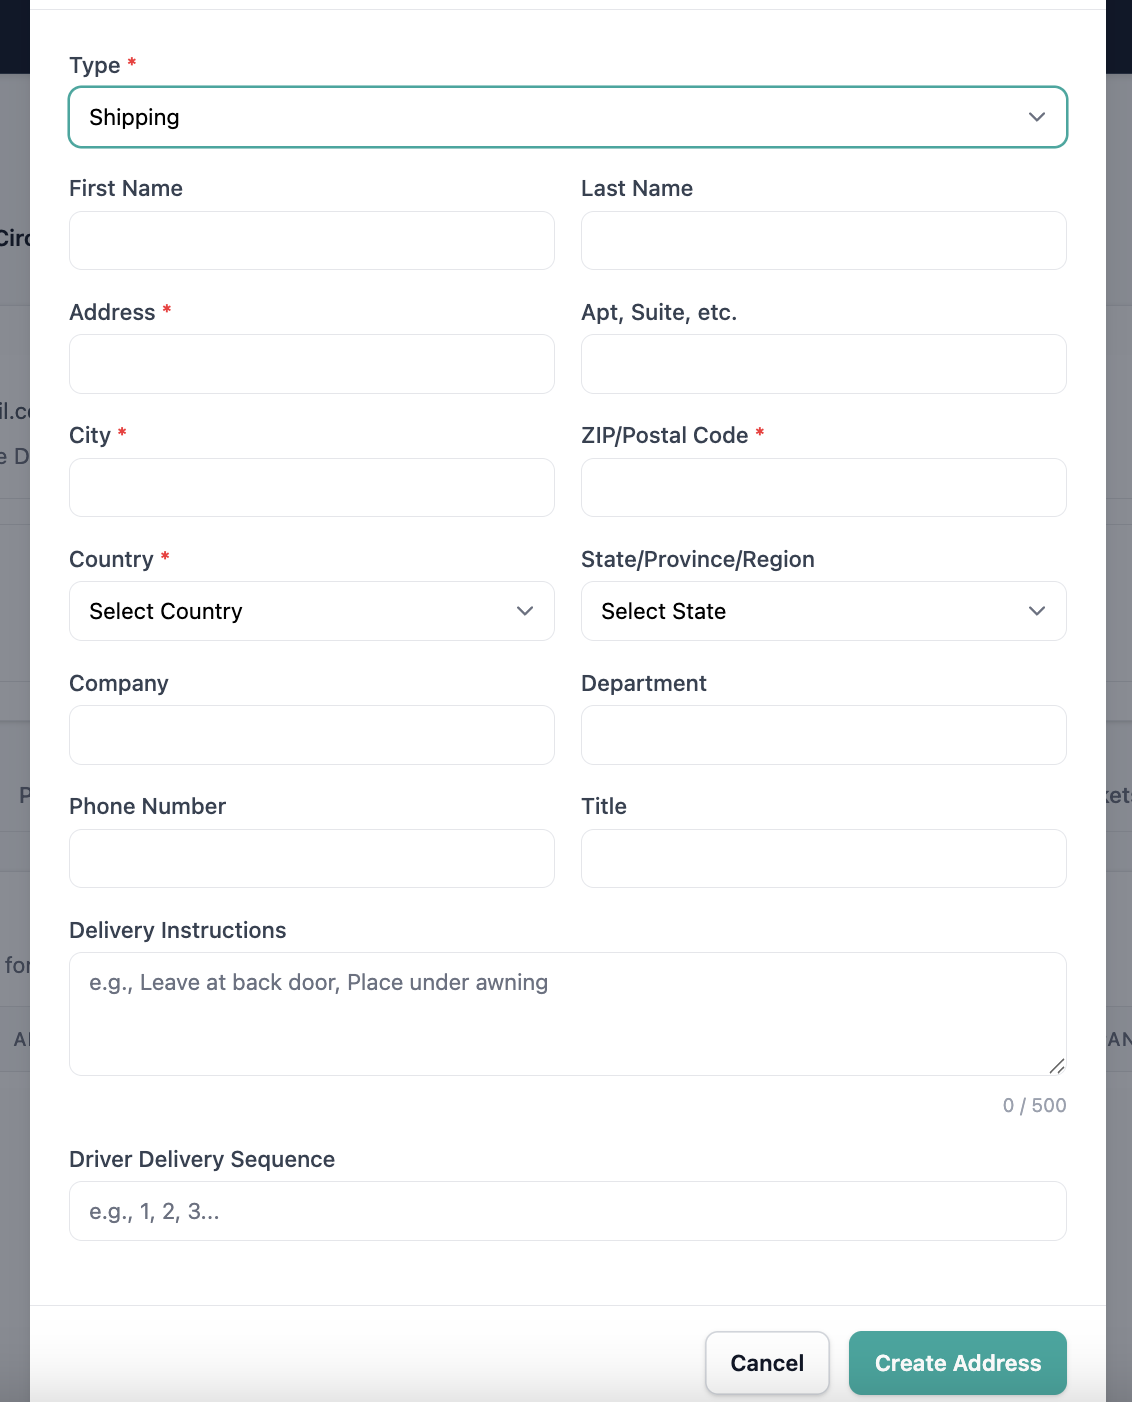
For instructions on how to set this value, see Creating an Address.
Carrier Tips
Pelcro supports recurring carrier tips for print subscriptions, allowing subscribers to optionally tip their delivery driver as part of their subscription billing cycle.
Availability Note: Carrier Tips are only available for accounts using Pelcro's native billing engine.
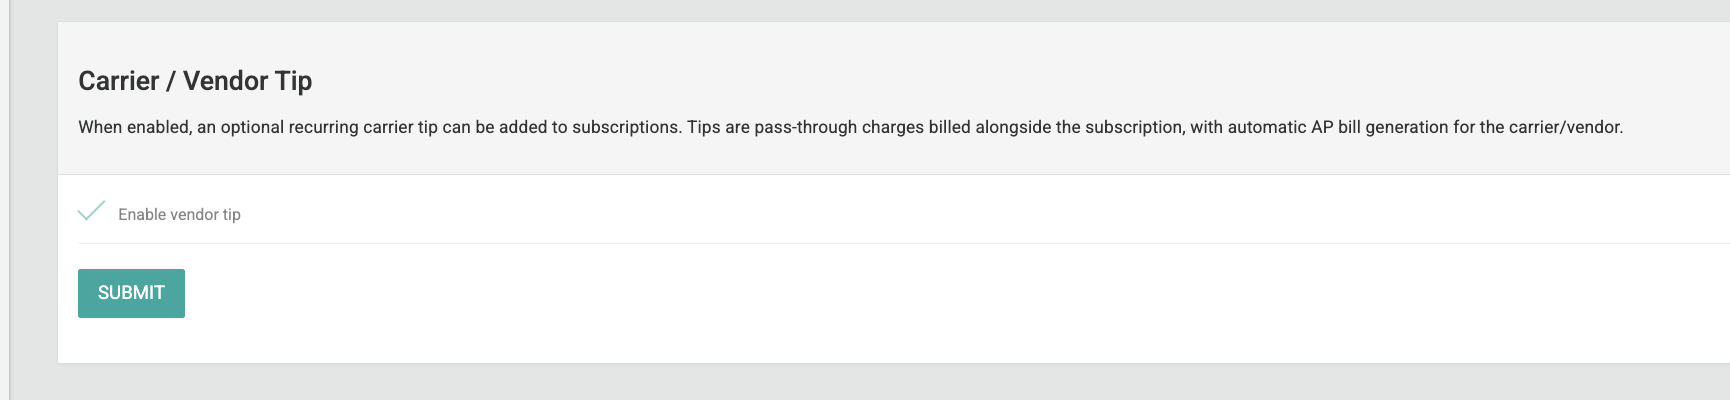
Enabling Carrier Tips
Before tips can be collected, the feature must be enabled at the platform level:
- Go to Settings → Billing
- Locate the Vendor Tips toggle
- Enable the feature
- Click Save
Once enabled, carrier tips can be configured at the subscription level from both the platform and your website.
How Carrier Tips Work
- Tips are billed as a separate line item on the subscriber's invoice alongside their subscription
- Tips are non-taxable and non-discountable by default
- The tip is applied to the vendor assigned to the subscriber's delivery address
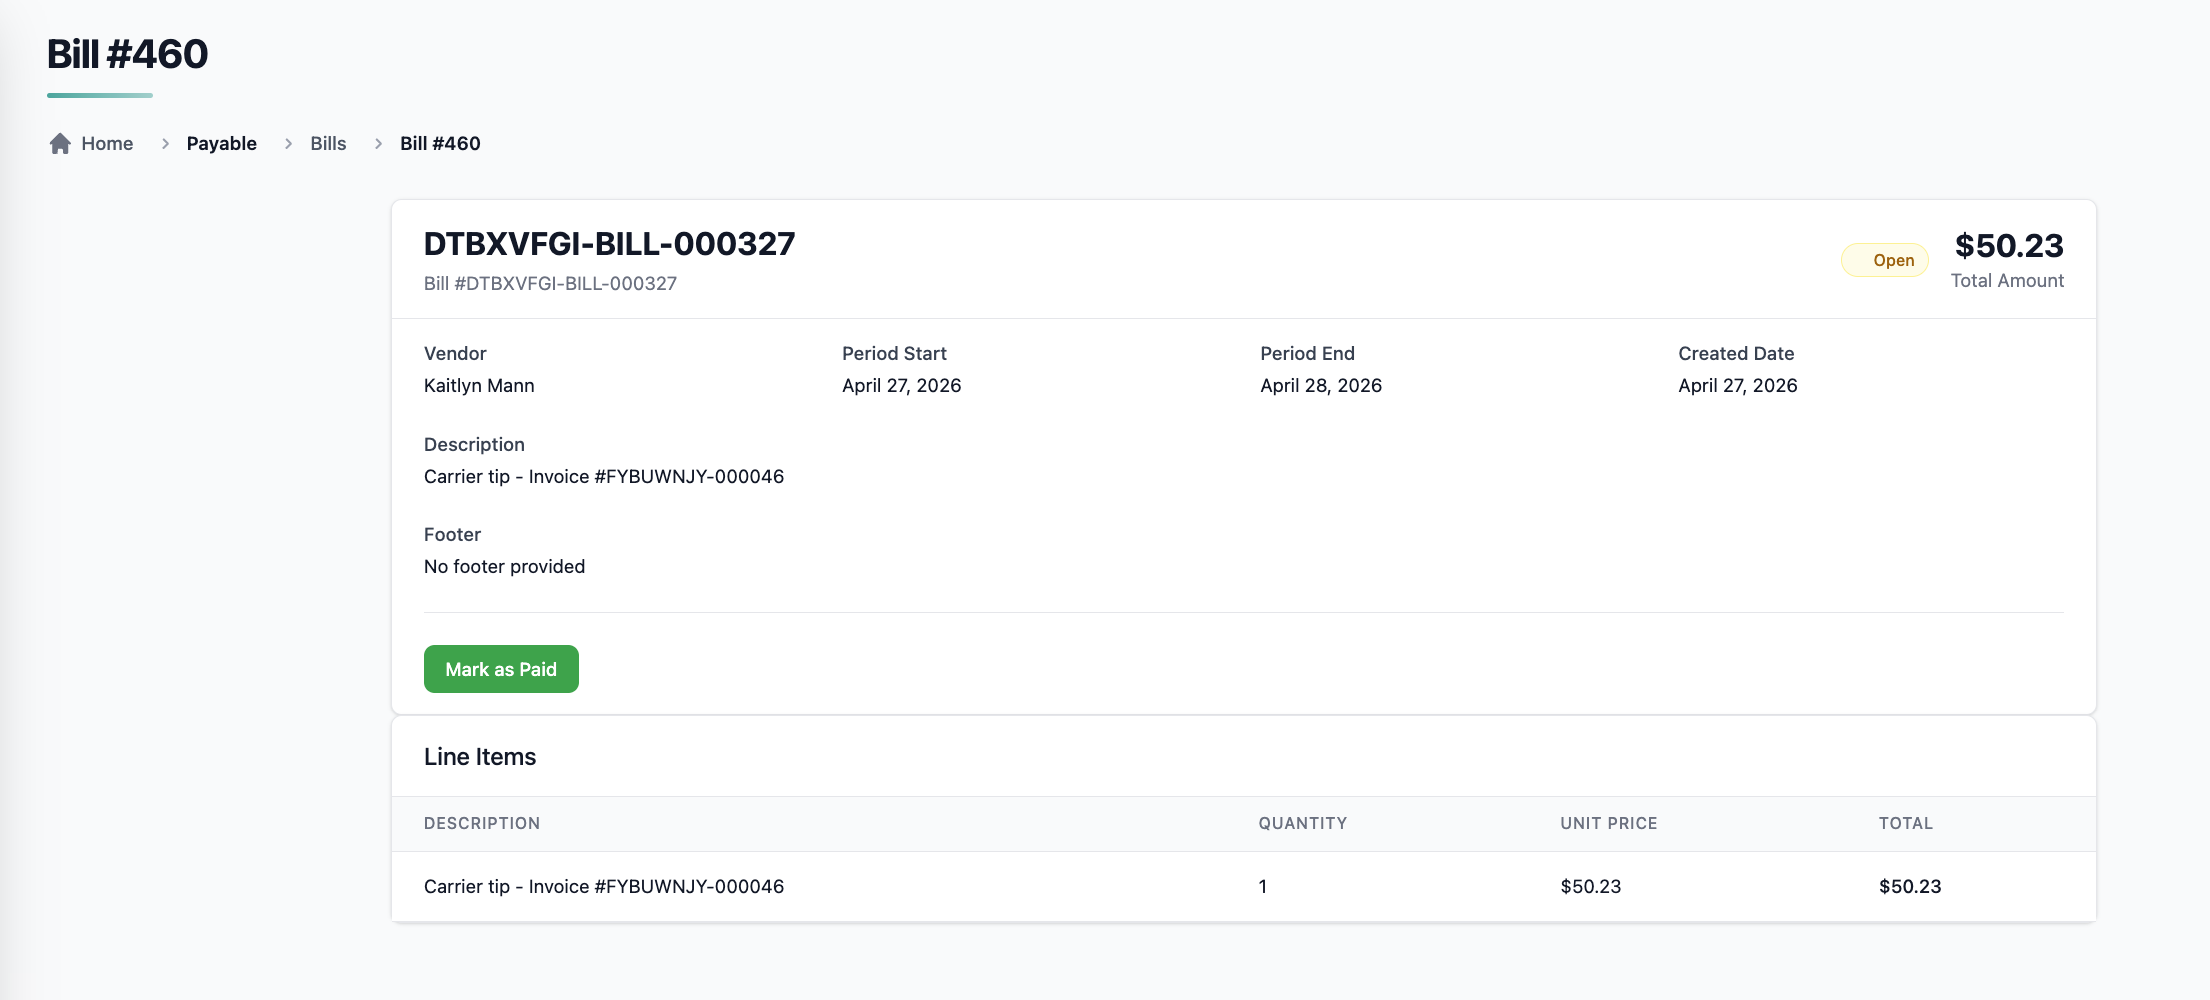
- Each tip automatically generates an AP Bill under the corresponding vendor for reconciliation
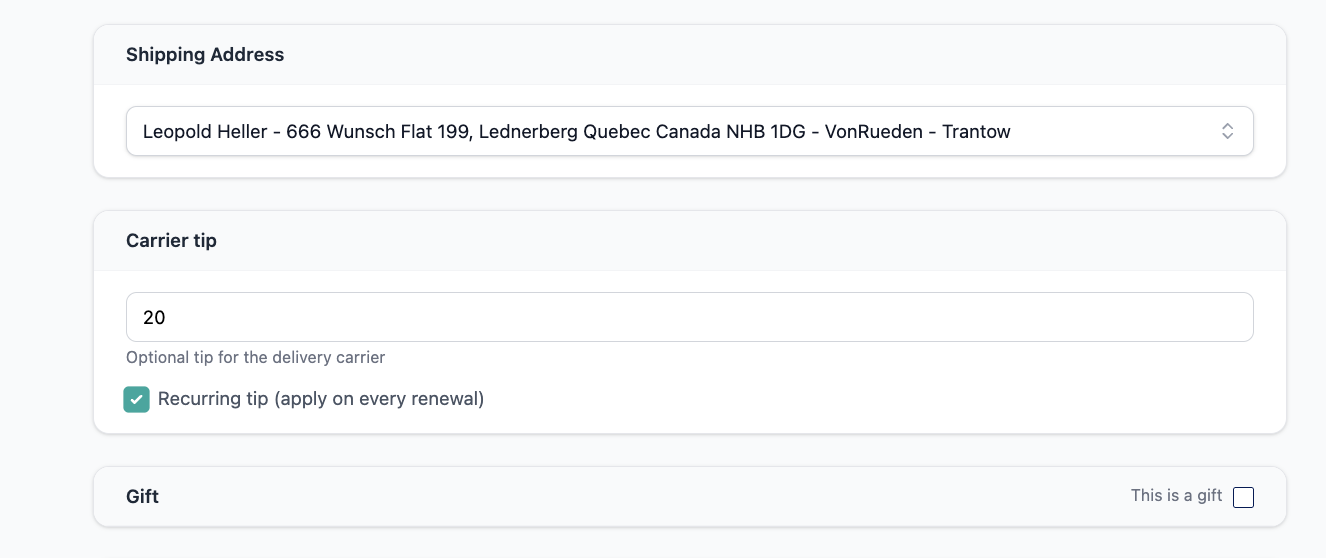
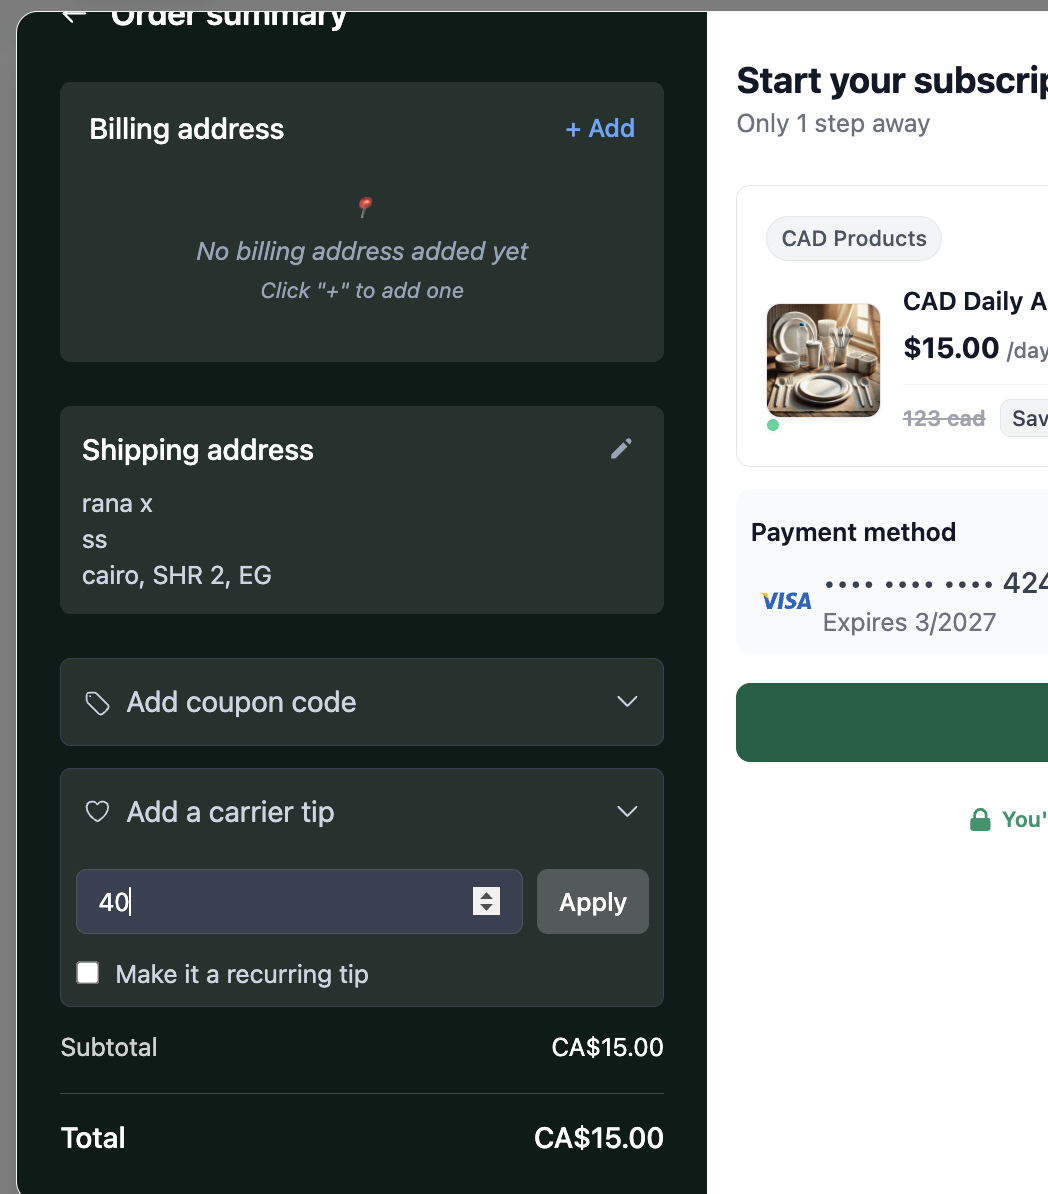
Adding a Carrier Tip from the Platform
You can configure a carrier tip when creating or renewing a subscription from the platform:
- Open the subscription creation or renewal flow
- Locate the Carrier Tip field
- Enter the tip amount
- Choose whether the tip should be recurring (charged every billing cycle) or one-time
- Complete the subscription creation or renewal
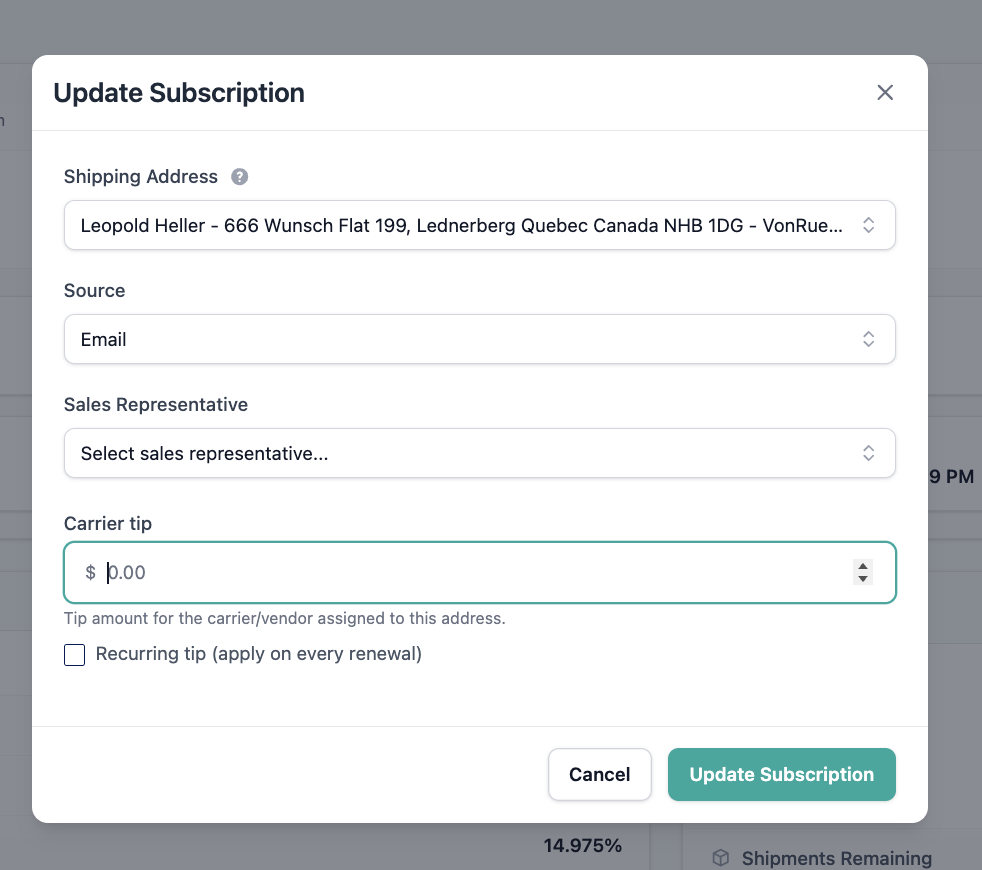
To remove a recurring tip from an existing subscription:
- Open the Subscription Details page
- Click on Update subscription
- Remove or cancel the recurring tip
Adding a Carrier Tip from the Website
Subscribers can also manage their own carrier tip directly on your website:
- During checkout or subscription management, subscribers can opt in to add a carrier tip
- They can choose to make the tip recurring or apply it as a one-time charge
Note: The carrier tip input field will only appear on checkout once a carrier has been assigned to the subscriber's delivery address.
Tip-to-Bill Flow
Once a tip is collected:
- The tip appears as a separate line item (
vendor_tip) on the subscriber's invoice - Upon successful payment, Pelcro automatically creates an AP Bill under the assigned vendor
- The bill references the source invoice for full traceability
- Publishers settle vendor payments through their existing AP workflows and mark bills as paid in Pelcro
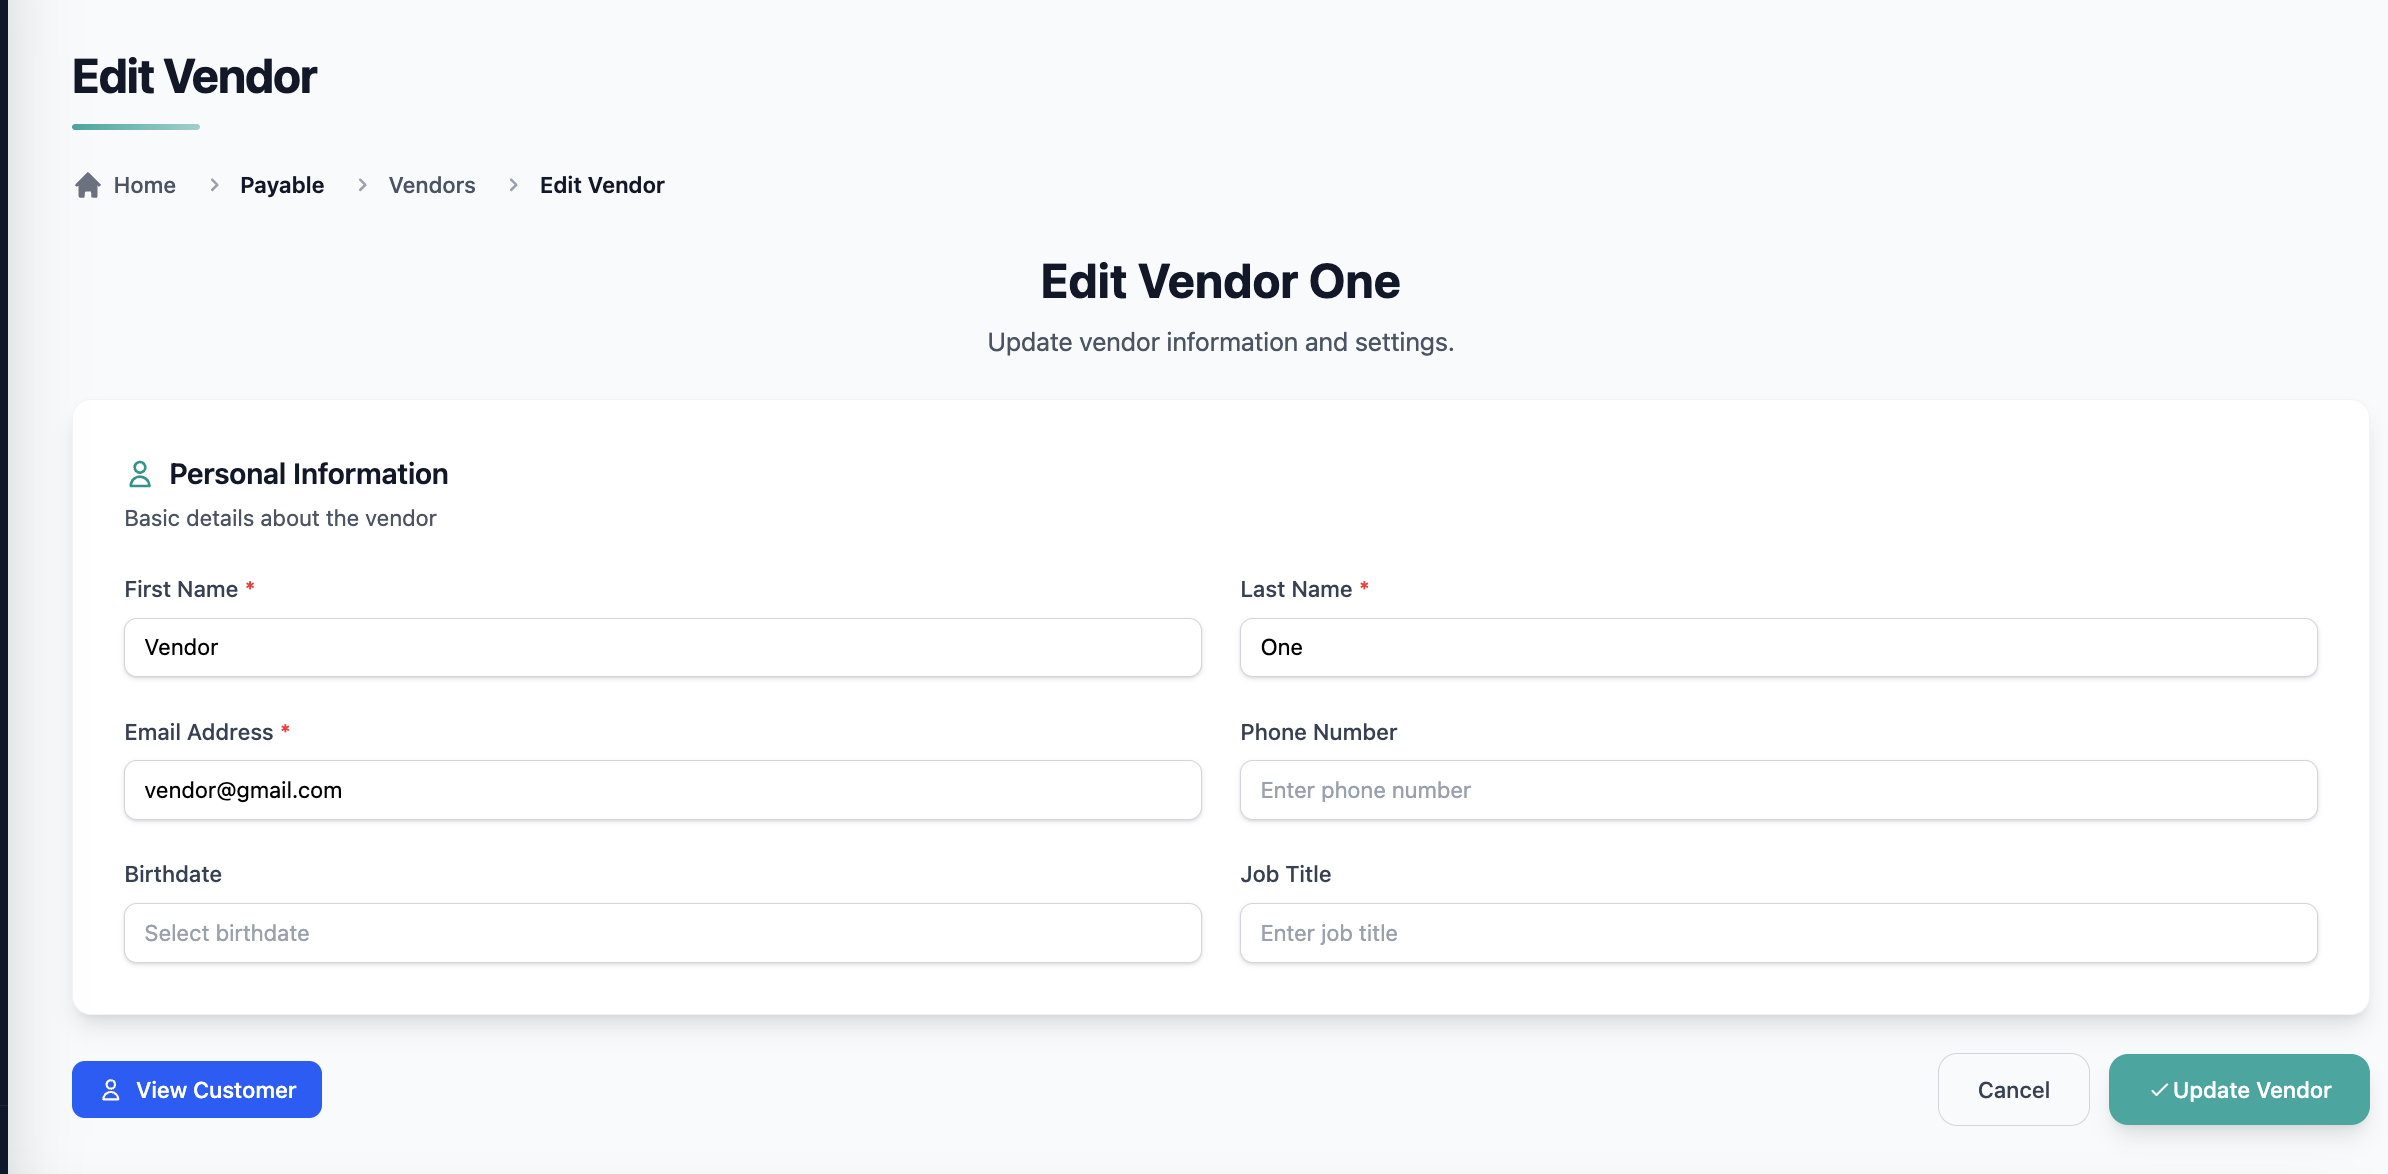
Editing a vendor
Admins can update vendor information at any time:
- Open the vendor from the list view
- Edit supported fields
- Save changes
All updates are reflected immediately and apply to future bill creation.
Deleting a vendor
Admins may delete vendors when appropriate.
Note: Deletion behavior may be restricted if the vendor is already associated with existing bills.
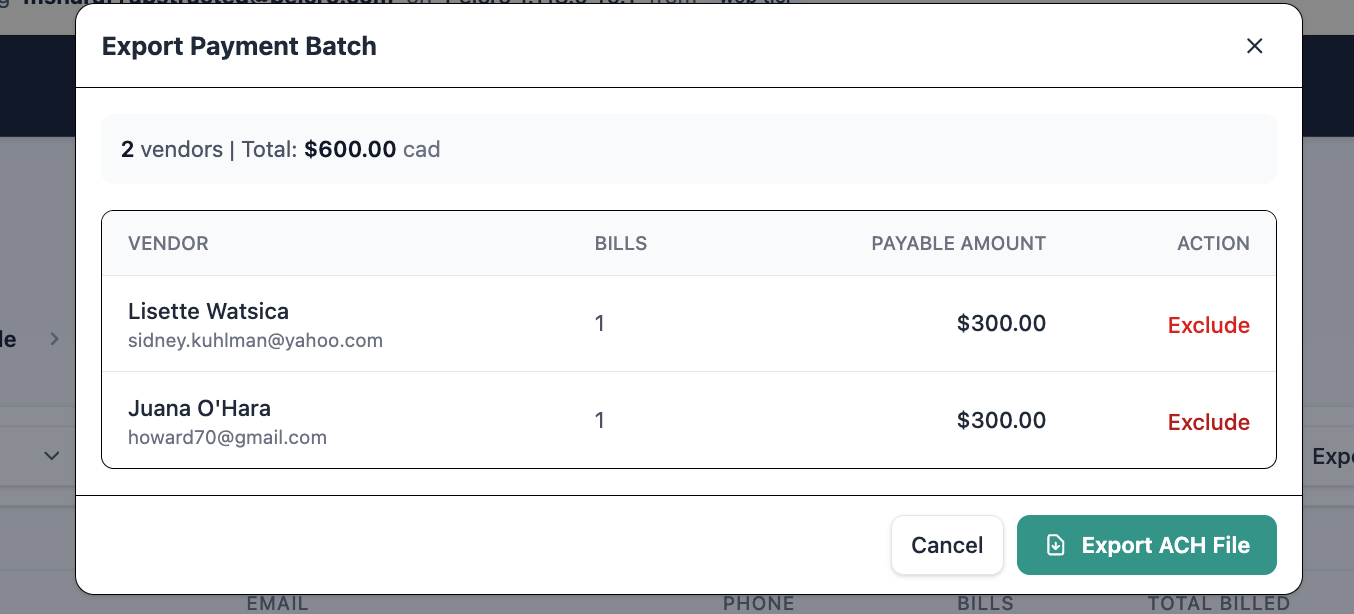
Vendor ACH / NACHA Export (Beta)
The Vendor ACH (NACHA) Export allows you to generate a payment file used by banks to process bulk vendor payouts via ACH.
This file follows the NACHA standard format, which is required for secure and compliant electronic payments between financial institutions.
How It Works
- Navigate to Accounts Payable → Vendors
- Click Export Payment Batch
- Pelcro will:
- Identify vendors eligible for payout (negative balance + ACH enabled)
- Calculate payable amounts per vendor
- Generate a payment batch
- A NACHA file is generated containing:
- Vendor banking details
- Payment amounts
- Internal reference IDs
- Download the file and upload it to your bank to process payments
Vendors without valid ACH details are automatically excluded from the export.
Requirements
To generate ACH / NACHA exports, you must configure:
1. Vendor ACH Details
Each vendor must have valid banking information:
- Account number (securely stored)
- Routing number
- Account type
- Authorization status
2. Your ACH Configuration (Required)
You must configure your company’s ACH originator details before exporting.
👉 Go to: Settings → ACH Configuration
This includes:
- Company name
- Bank routing number
- Bank name
- Federal Tax ID (EIN)
- Entry description (e.g., “VENDOR PAY”)
Without this configuration, NACHA exports cannot be generated.
Beta limitations
The Vendors module is currently in Beta and includes the following limitations:
- No vendor self-serve access
- No public OpenAPI or SDK exposure
- No accounting system integrations
- No tax or multi-currency support
What’s next
After you create vendors, you can use them to create and manage bills in Accounts Payable → Bills.
Related guide
- Bills — Create bills, add line items, generate PDFs, and manage bill statuses.
Updated 3 months ago