SendGrid
Introduction to SendGrid
SendGrid is a cloud-based SMTP provider that assists you with email delivery, by allowing you to send emails without having to maintain email servers. SendGrid manages all of the technical details, including scaling the infrastructure, ISP outreach, reputation monitoring, whitelist services, and real time analytics. The service manages various types of email including shipping notifications, friend requests, sign-up confirmations, and email newsletters. Through SendGrid, you can track email opens, unsubscribes, bounces, and spam reports.
You can visit the SendGrid website for more information on SendGrid's solutions, tools, and capabilities.
Setting Up
SendGrid Side
- Login to your SendGrid Dashboard using your registered credentials.
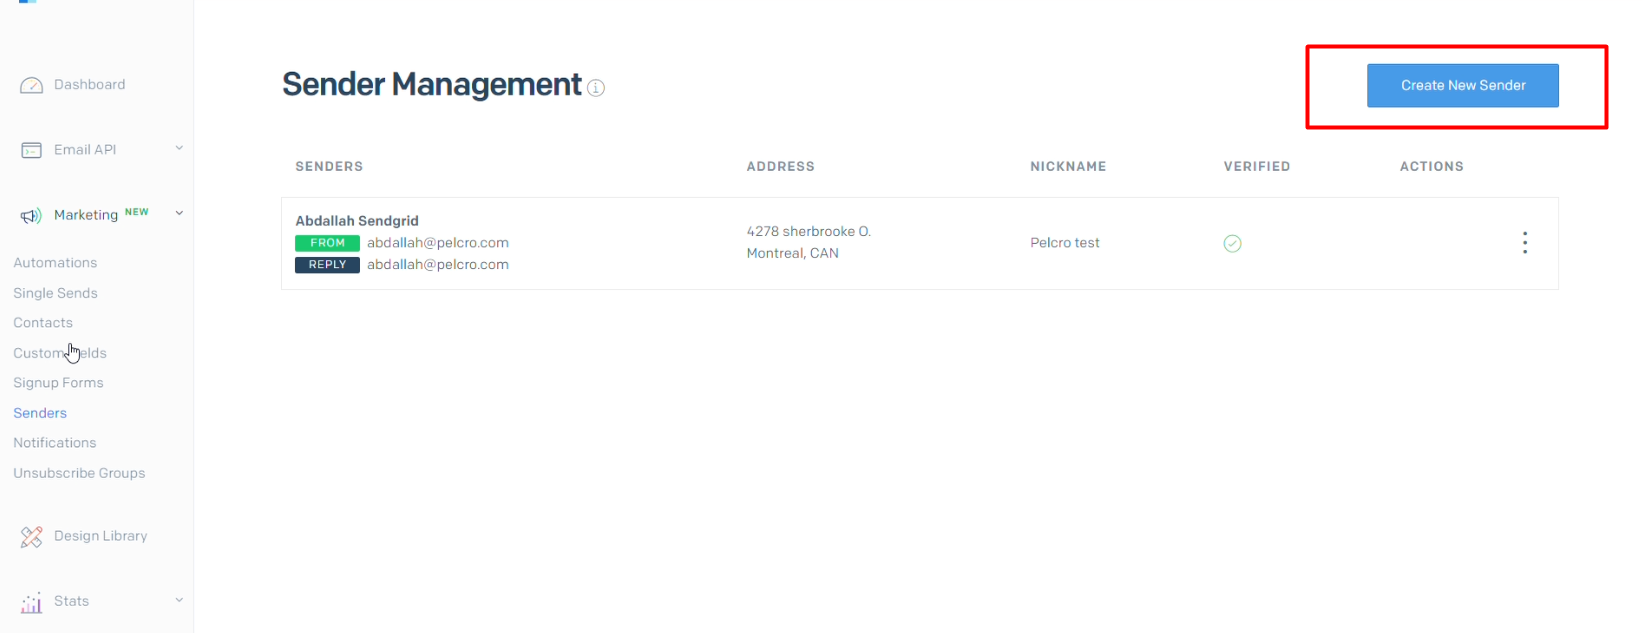
- From the left navigation menu, Choose 'Marketing' > 'Senders'.
- Once you're on the Sender Management screen, click on the 'Create New Sender' button to the top right.
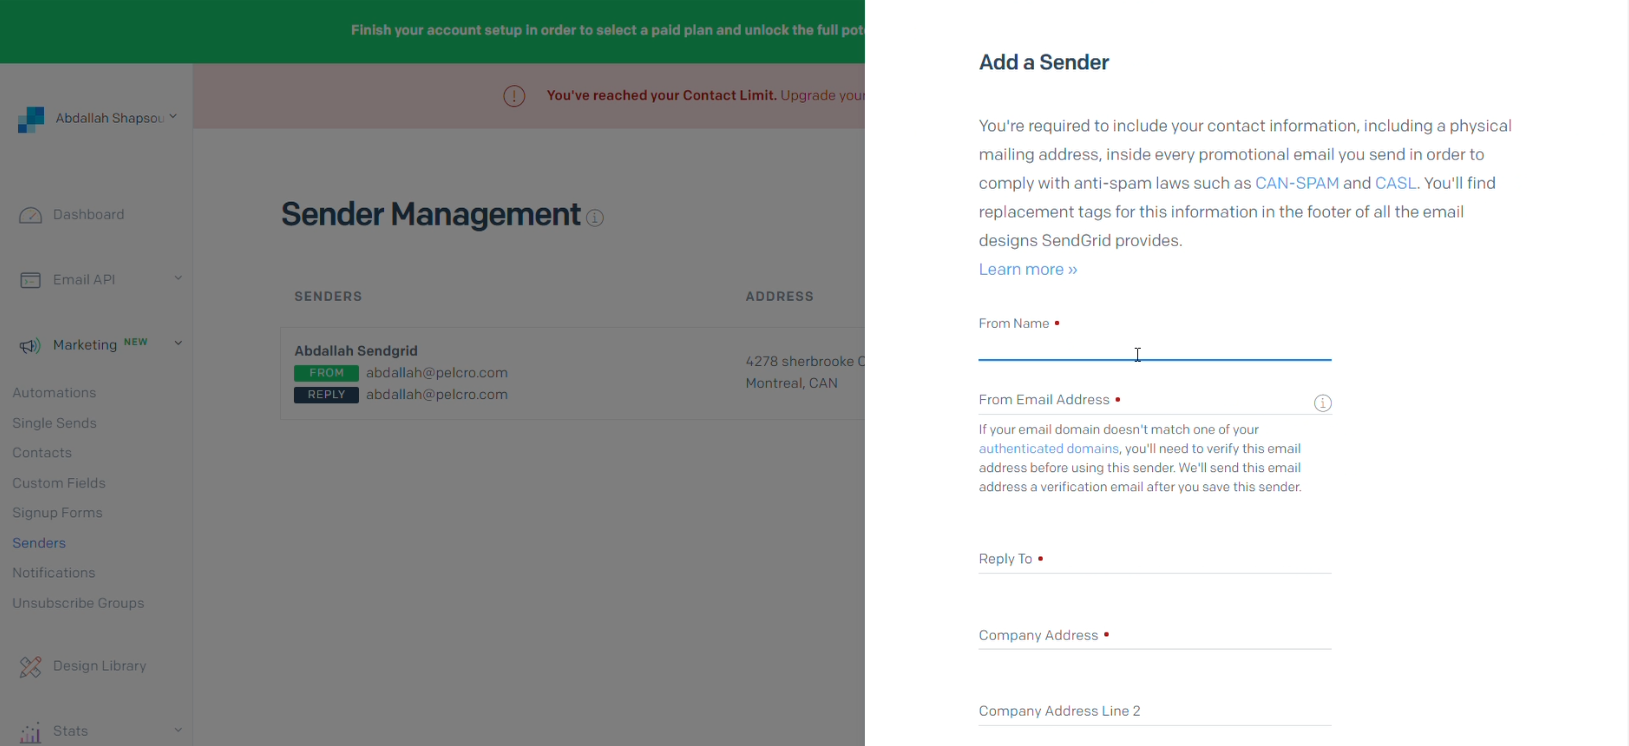
- You'll be prompted to enter the information for the sender. This includes name, contact information, physical mailing address. Note that unless the "From Email Address" field matches one of your authenticated domains, you'll need to verify the email address entered through a confirmation email.
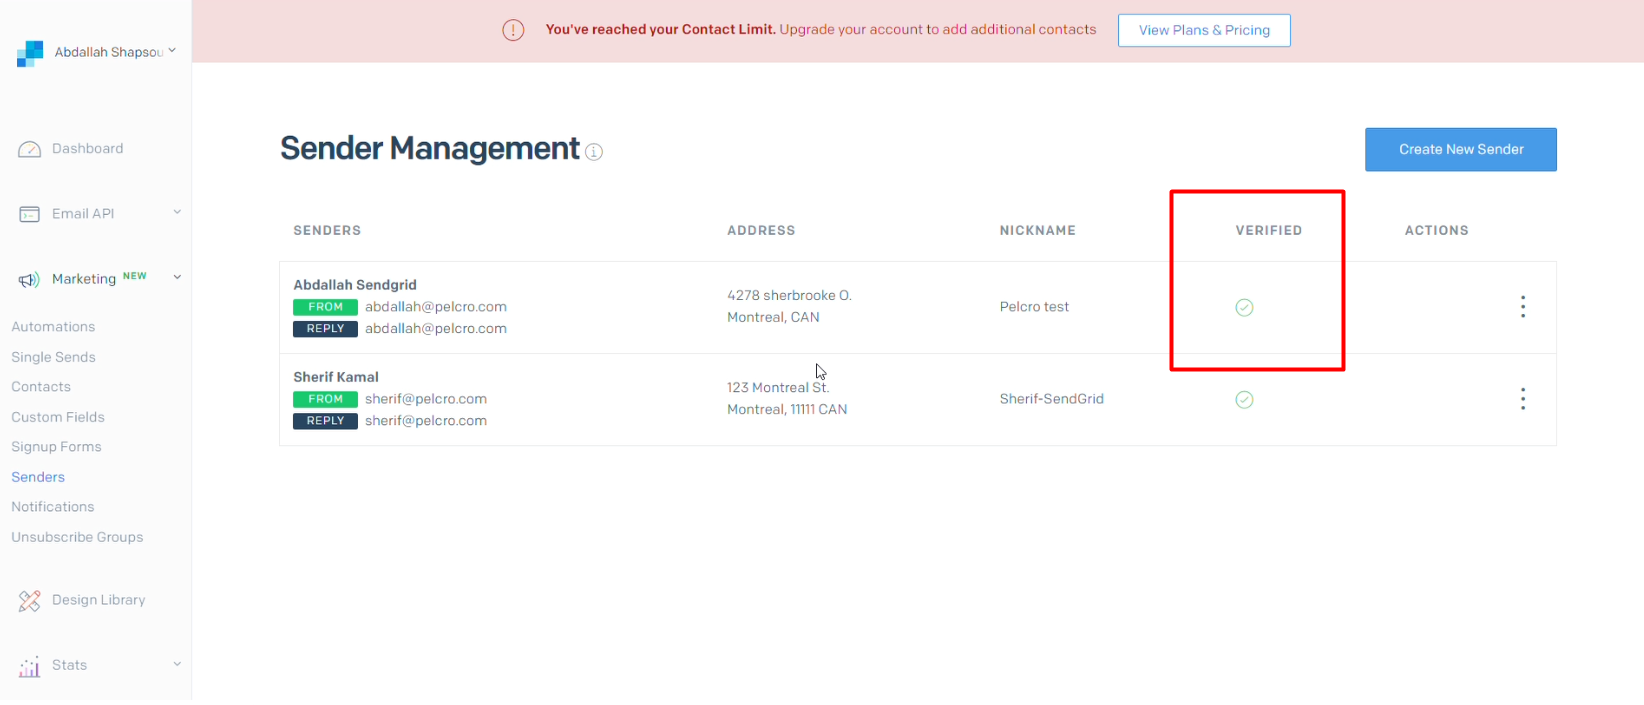
- Once you have provided the needed information, click 'Save' to submit the information. Once redirected, refresh the page and make sure that the 'Verified' column has a green tick on it.
Next, we'll need to setup API Keys
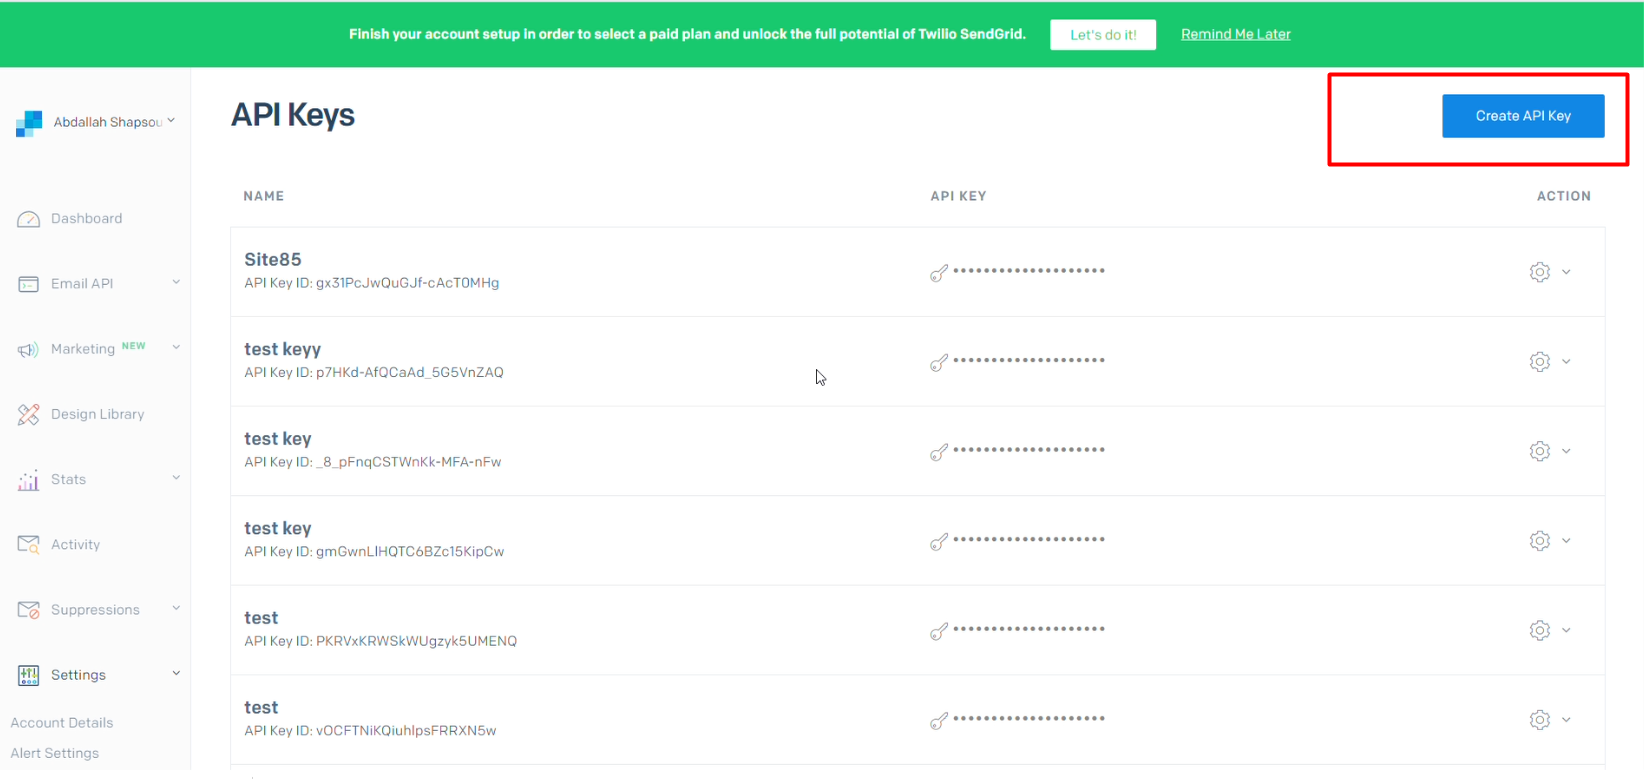
- Go to your SendGrid API Keys page.
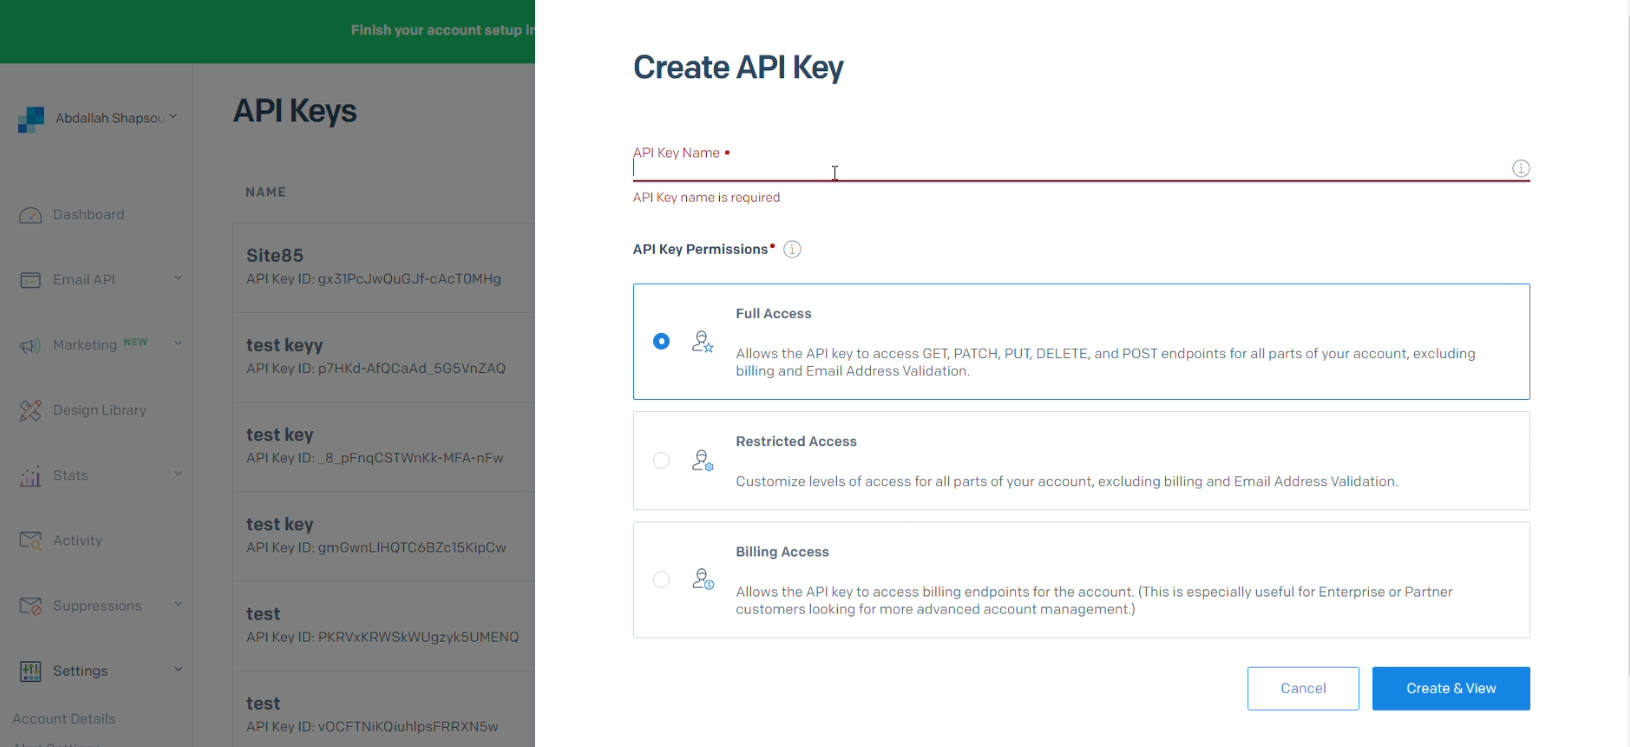
- Click 'Create API Key' button on the top right corner to create an API Key for the Pelcro integration.
- Fill in the required API Key name, and make sure to set the API Key Permissions to 'Full Access'. This allows API Key to access all of SendGrid's API endpoints for your account.
- Once done, click 'Create & View' to save the provided information and create the API Key.
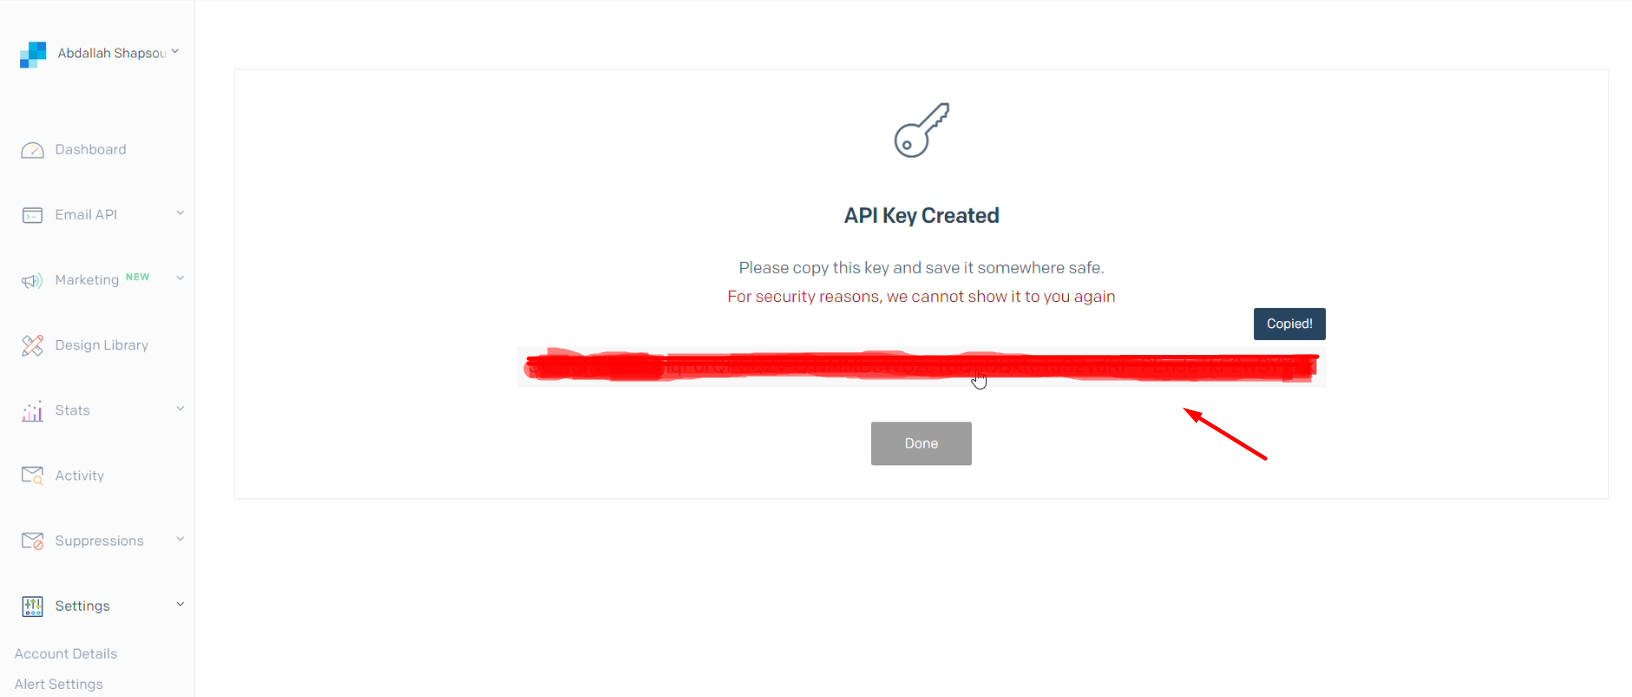
- Once created, click the generated API Key to copy. Make sure to save the key somewhere safe.
Pelcro Side
- Login to your Pelcro CRM Dashboard
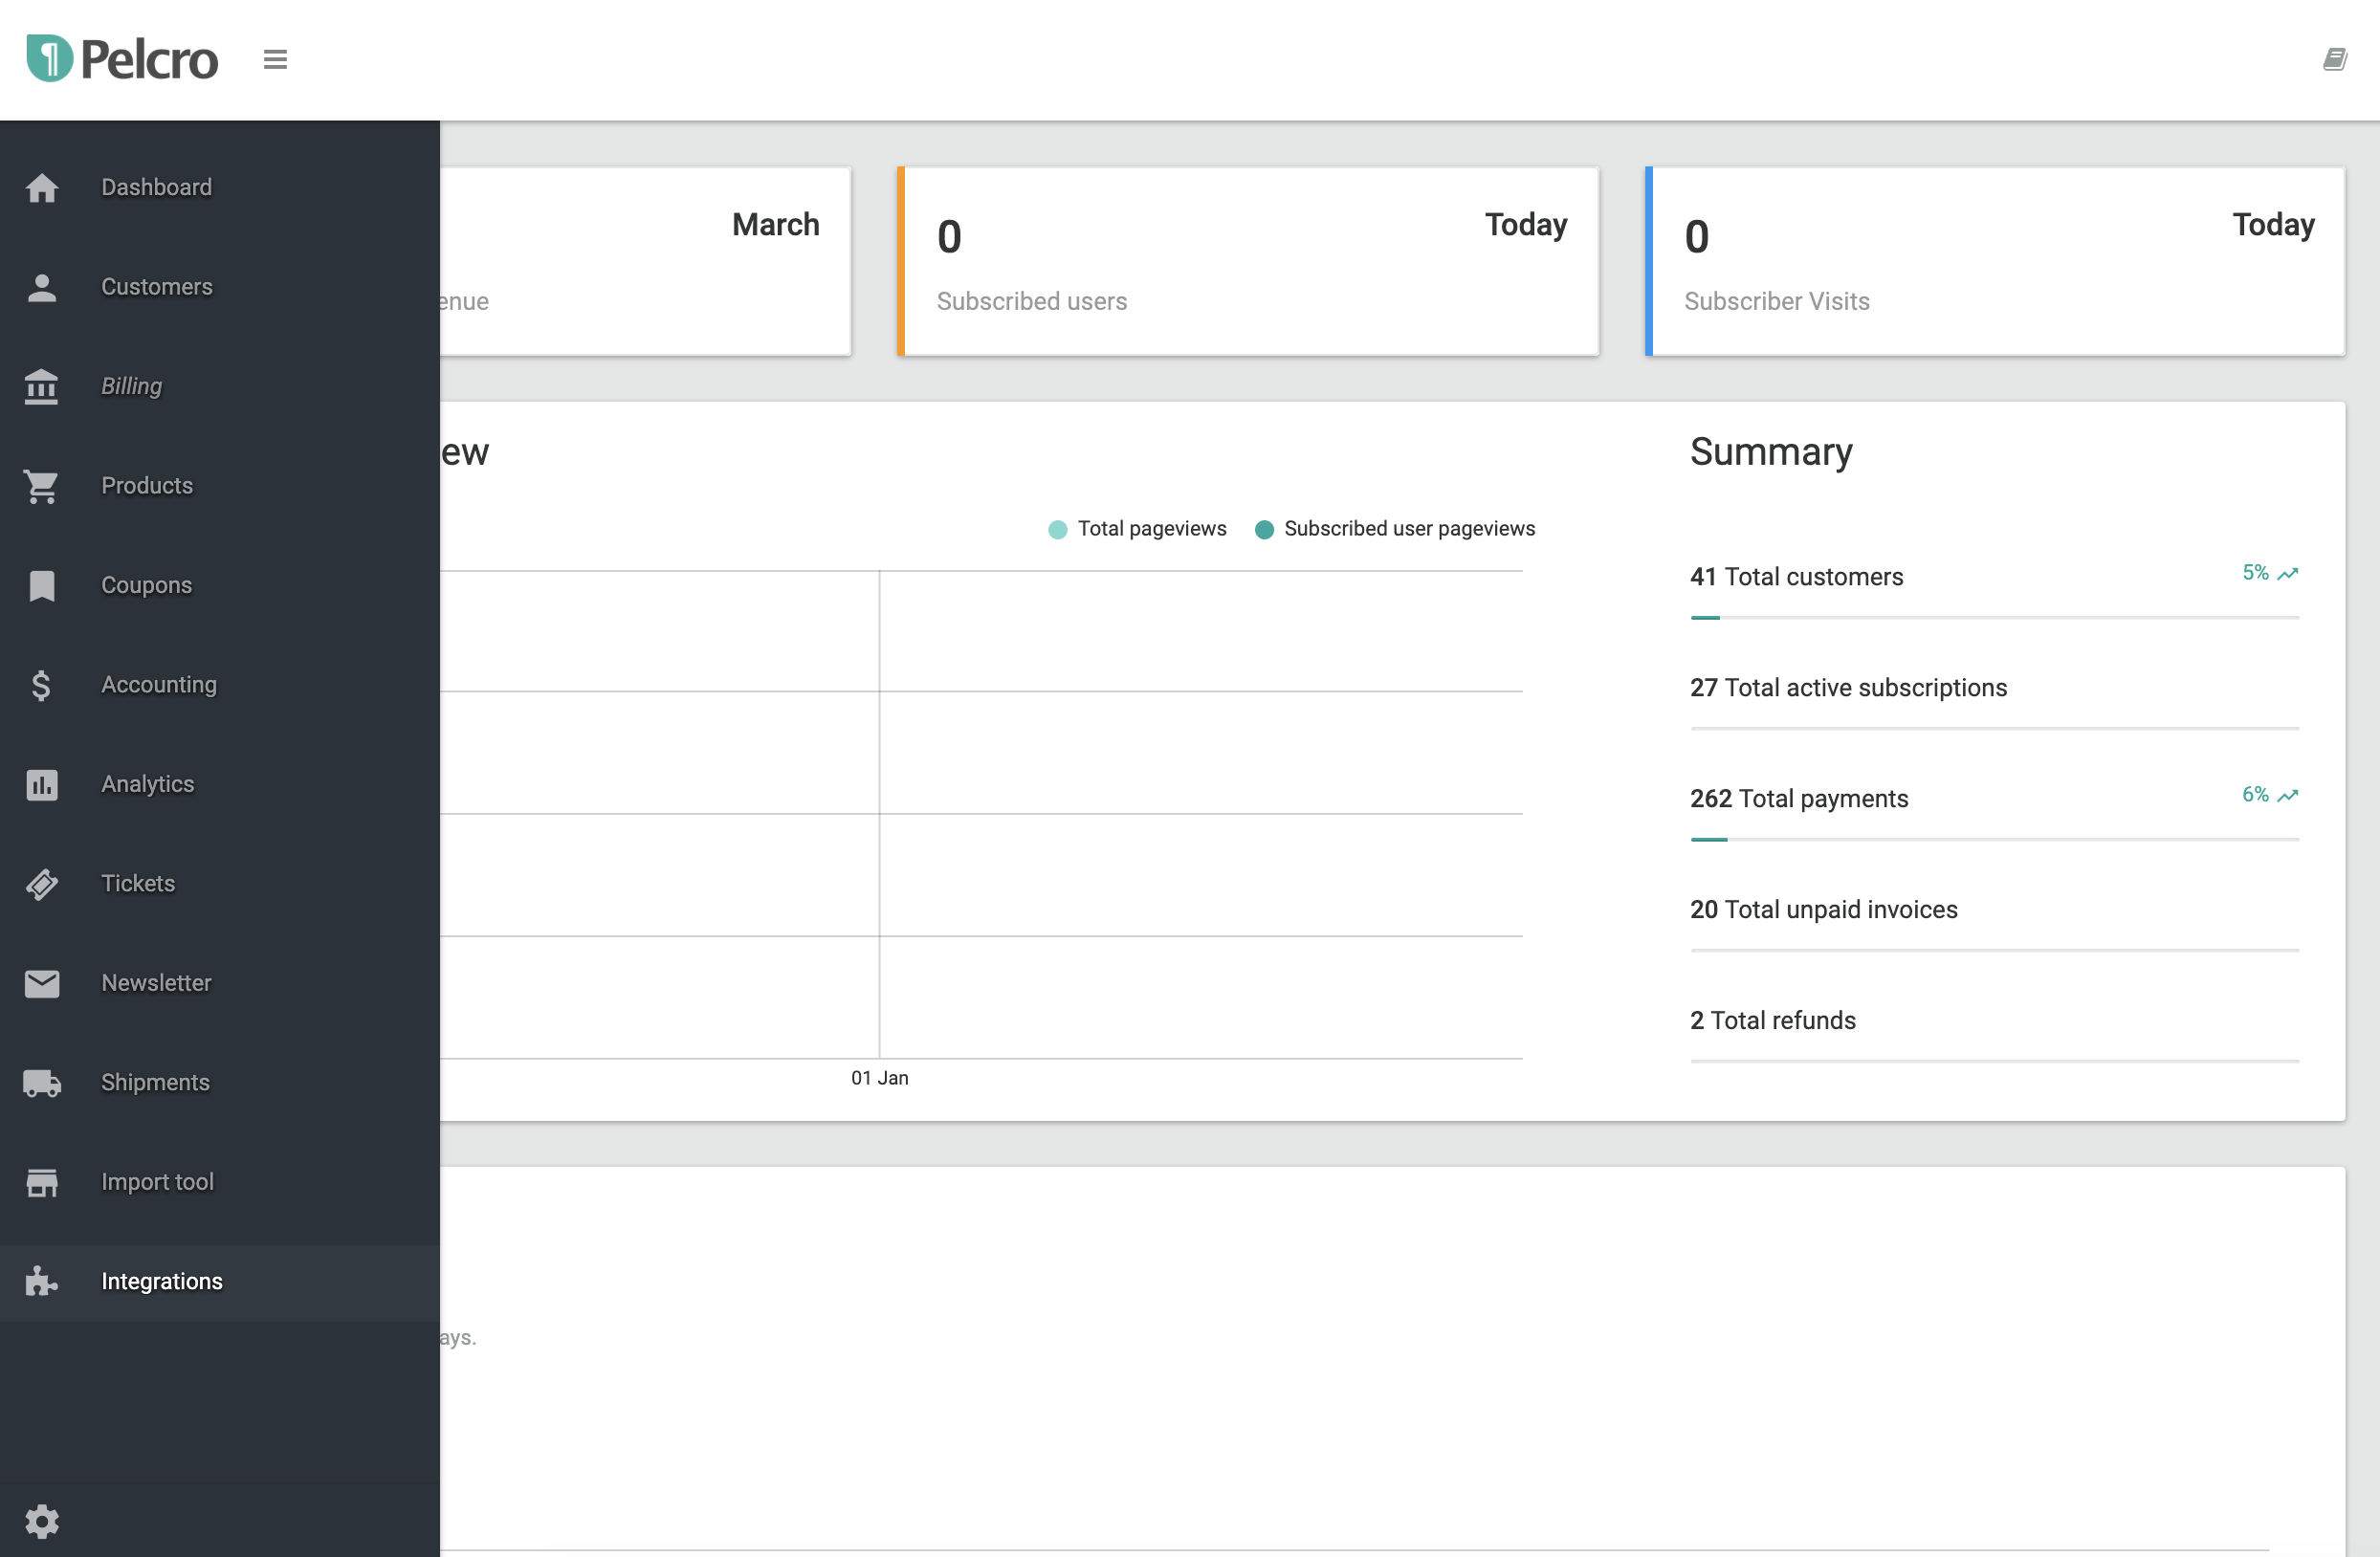
- From the Sidebar Menu, click Integrations
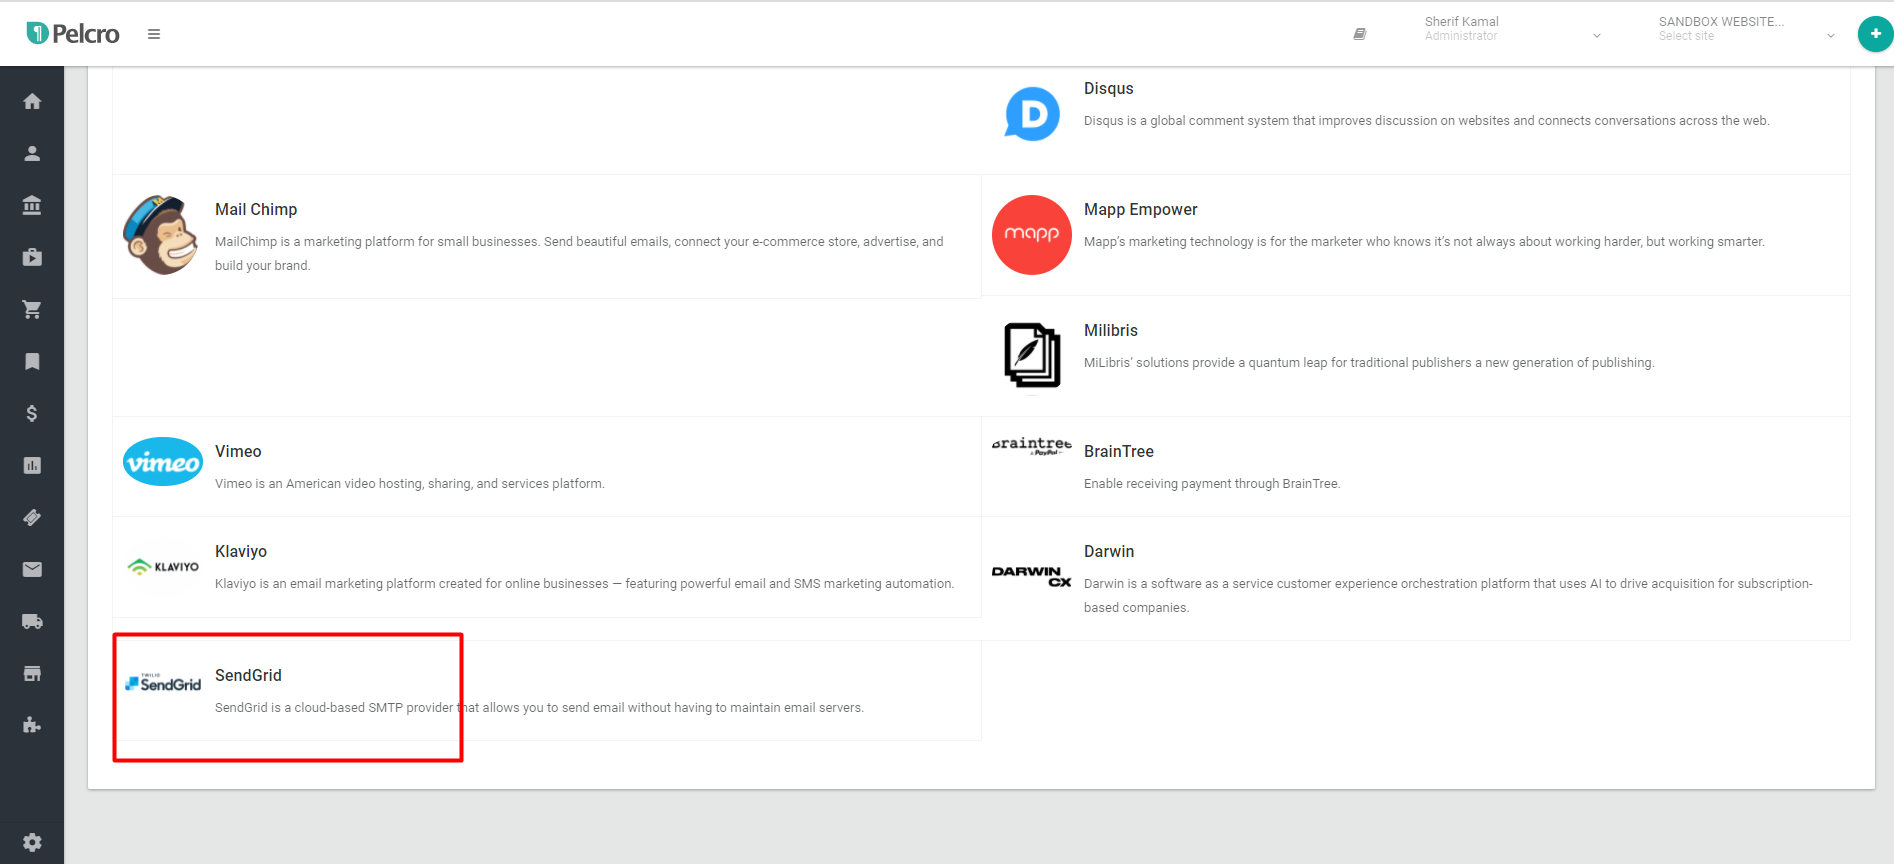
- Choose 'SendGrid' to setup your new SendGrid Integration.
- Once you arrive at the SendGrid Integration page, paste the previously copied API Key into the API key field.
- Make sure to check the checkbox under Integration status section to ensure the Integration is enabled.
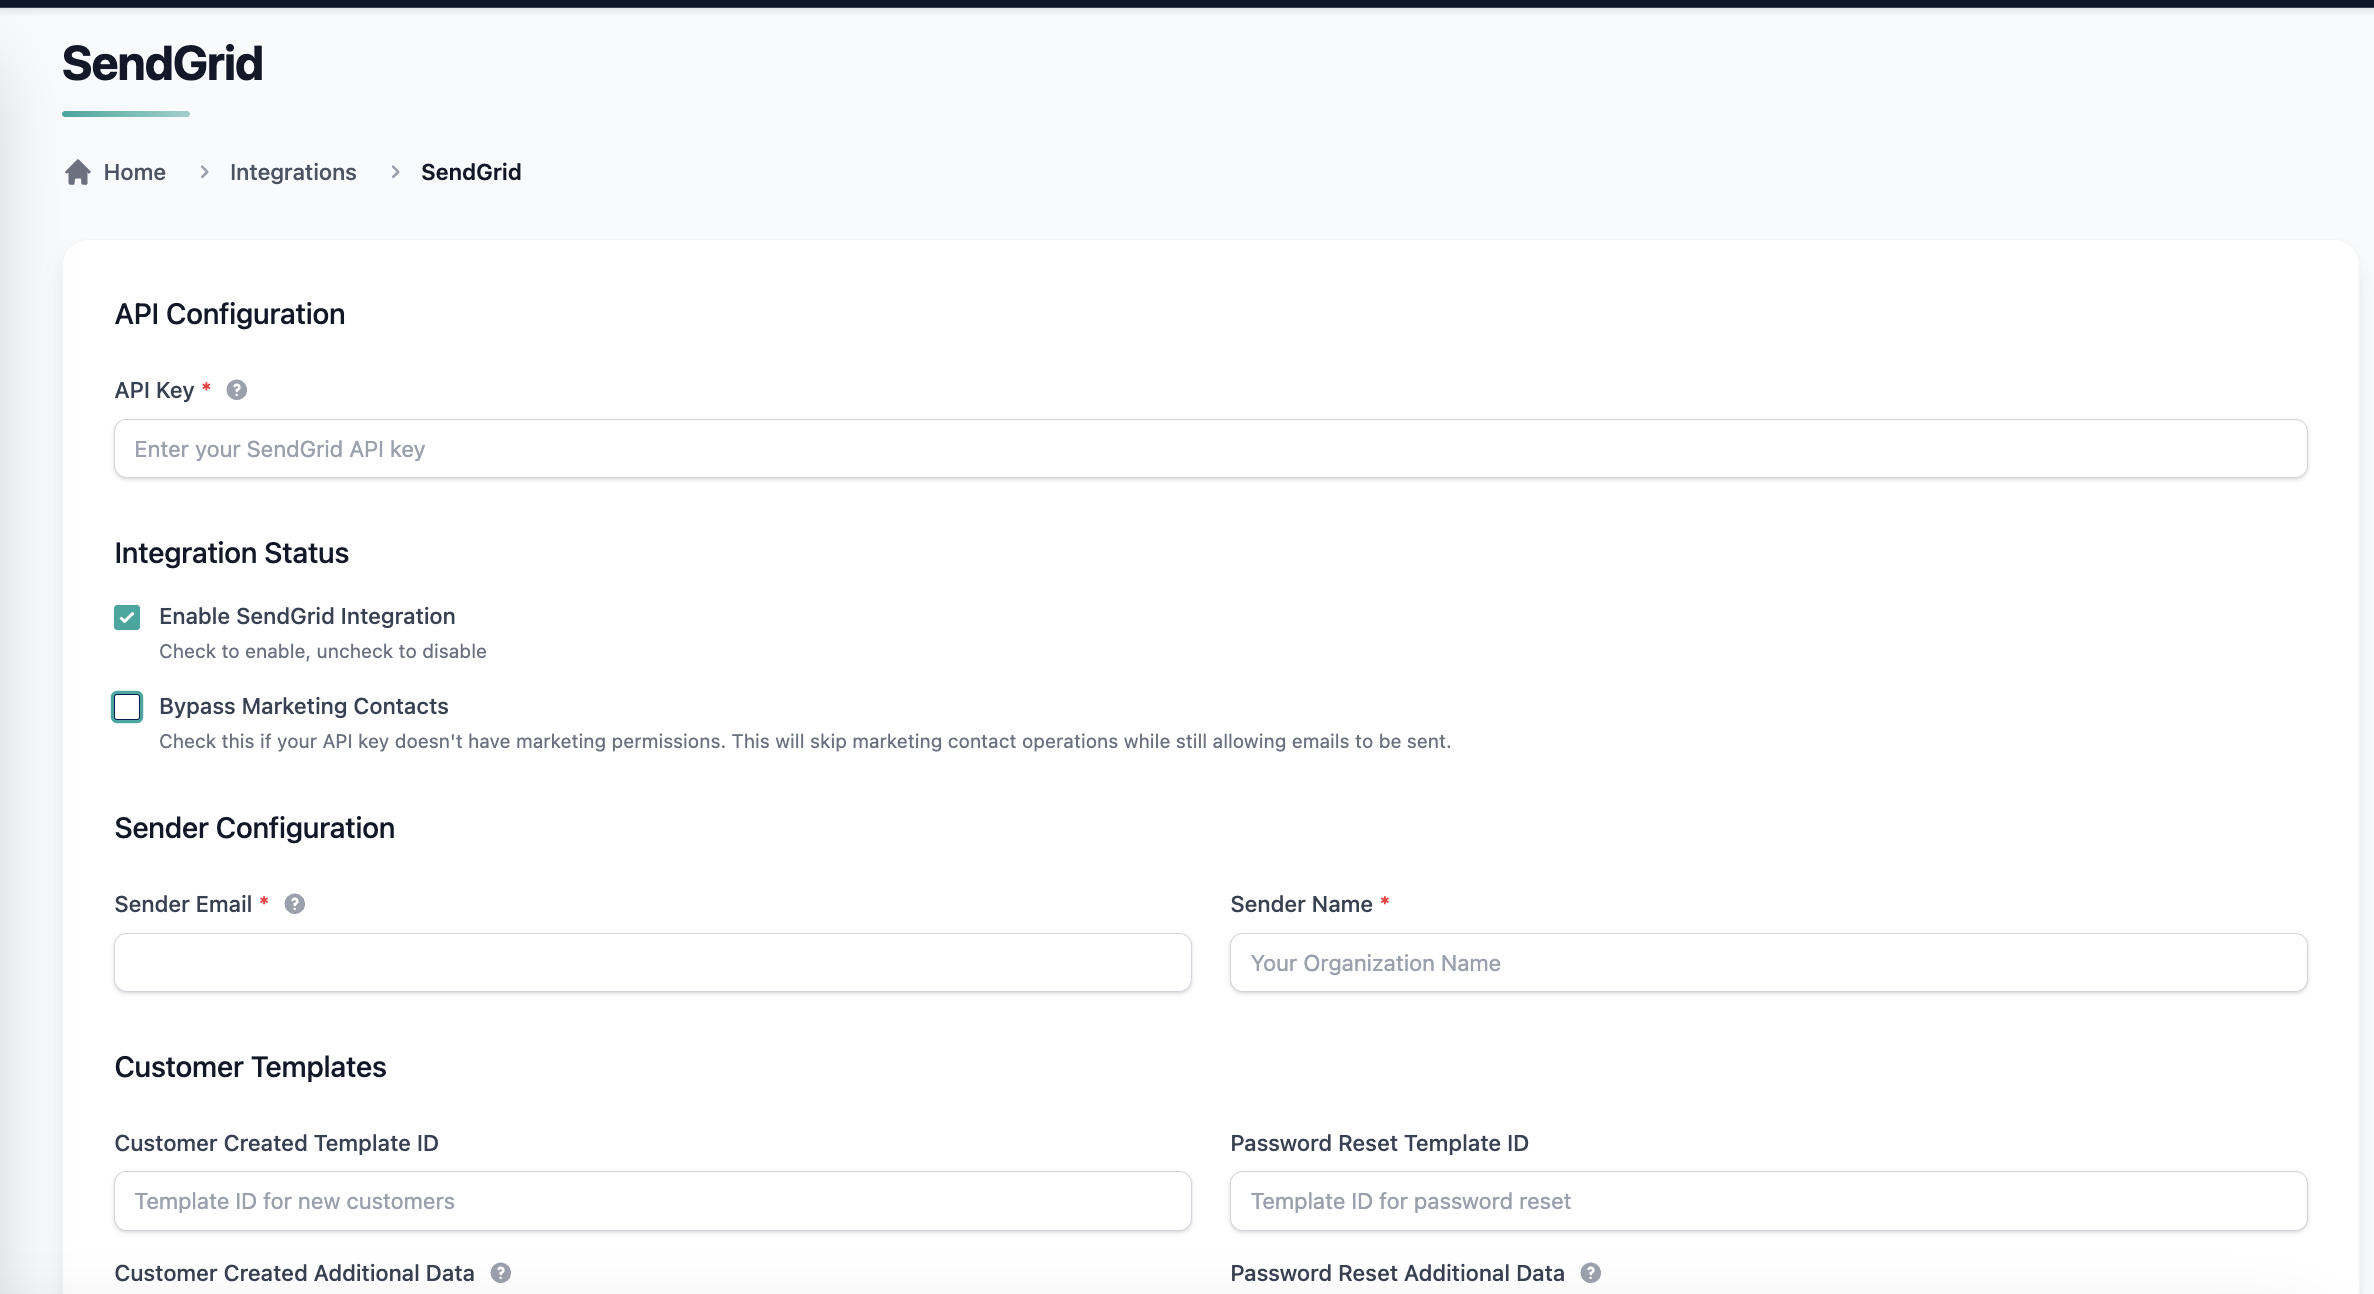
- Fill in the email address for 'Sender email' (this needs to match the one you've used on the SendGrid side), then fill in your 'Sender name' in the required fields.
- Scroll down and click 'Update SendGrid' button to the bottom right to save the information.
- Et Voila! Your SendGrid Integration is now ready for business.
Note:If your SendGrid API key does not have Marketing Campaigns permissions, make sure to enable the Bypass Marketing Contacts option in your SendGrid integration settings.
This will skip marketing contact operations while still allowing all transactional emails (e.g., invoices, receipts, password resets) to be sent successfully.
Usage Examples
1 - Sending Customized Email Templates
How does it work?
Pelcro Events
We create an "Event" each time any of your customers does an activity on the Pelcro CRM. When the SendGrid Integration has been configured, these Events are then sent to your SendGrid account, which you can leverage to build emails, generate statistics and create different feedbacks on top of them. Using Pelcro, you'll be able to trigger automated emails on SendGrid using SendGrid's API /mail/send endpoint, whenever any of the following Pelcro events below is triggered.
Note:
If a customer has a billing email defined, all billing-related events (such asinvoice.created,charge.succeeded, etc.) will be sent to that billing email.
If no billing email is defined, these notifications will be sent to the customer’s primary email address.
Handlebars
- Pelcro sends the needed information from the Pelcro.events as handlebars under 'dynamic_template_data' ), once the required information for given endpoints from the user on the platform is collected.
Let's assume you want to welcome your newly registered customer Mr. John Doe:
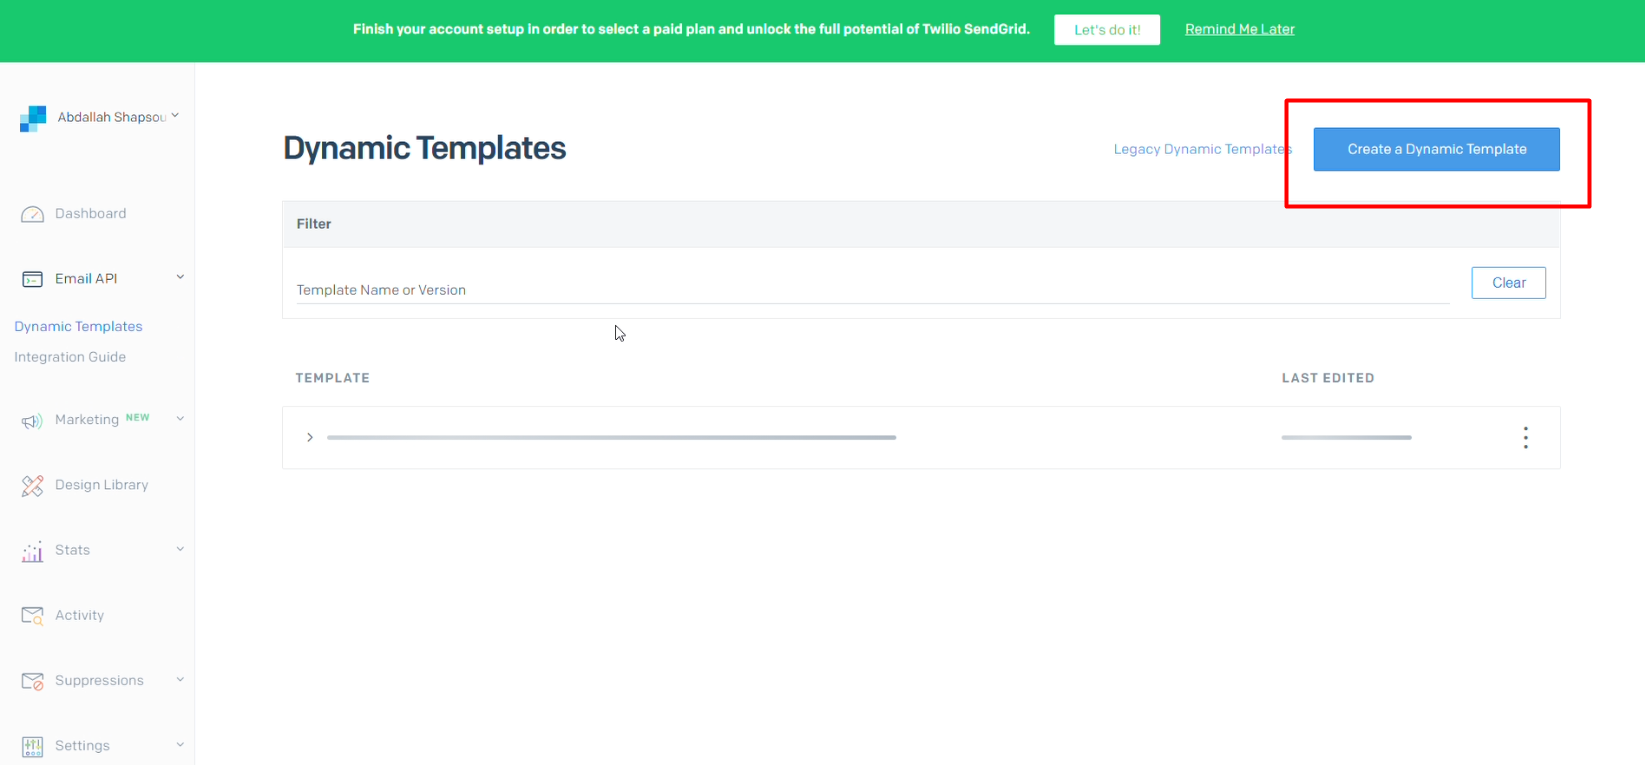
- First, go to your SendGrid account and navigate to the 'Dynamic Templates' page.
- Click 'Create a Dynamic Template' button to the top-right corner of the screen.
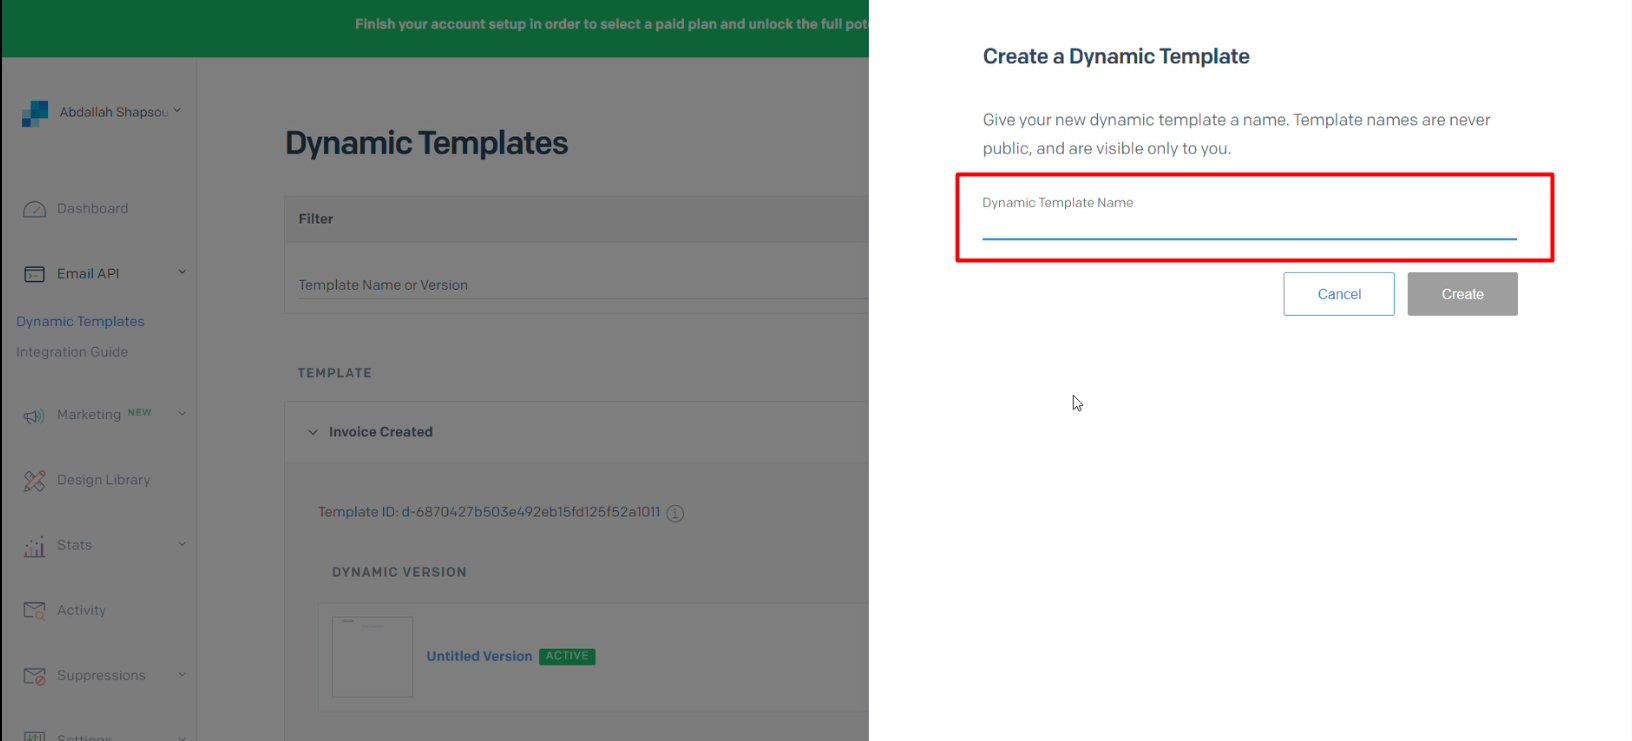
- Give your Dynamic Template a name (e.g. Customer Welcome Template), then click 'Create'.
After you've completed the setup for your Dynamic Template on SendGrid, you'll need to:
- Copy the Template ID from the SendGrid Template Screen
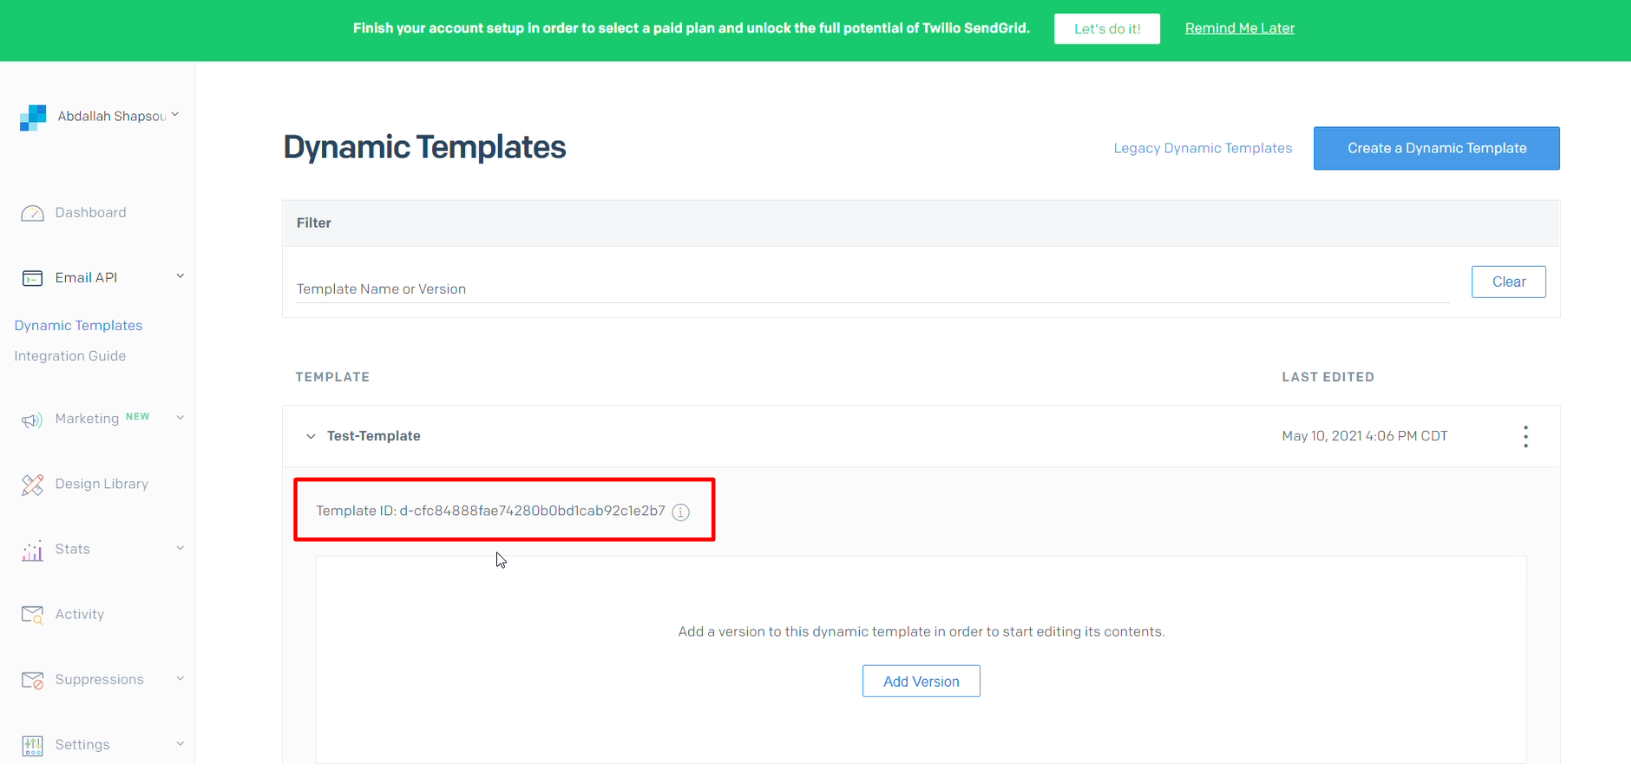
- Finally, paste the Template ID into the corresponding Customer Template field.
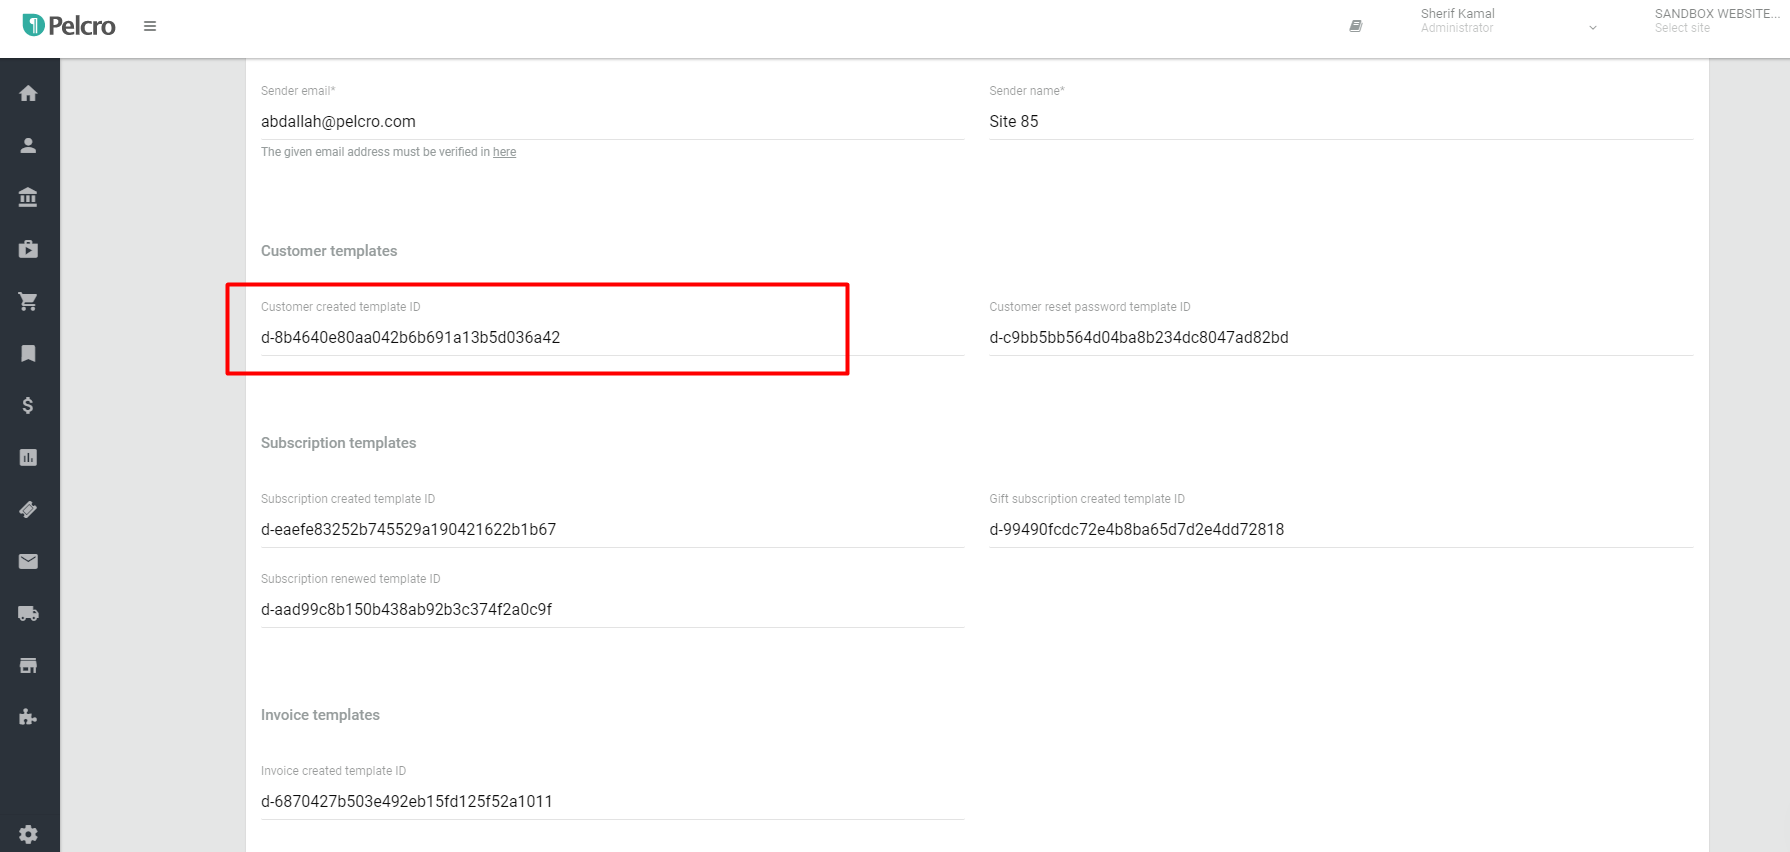
- Submit your updates; once you have added the right template ID and clicked on the green 'add new' button. Your integration will start to work immediately.
Event Handlebar Reference
CUSTOMER CREATED
event name: customer_created
usage: This means this customer has been created.
handlebars:
'email',
'first_name',
'last_name',
'phone_number',
'address_line_1',
'address_line_2',
'city',
'country',
'postal_code',
'state_province_region',
'id',
'display_name',
'phone',
'language',
'balance',
'salutation',
'title',
'currency',
'metadata'
CUSTOMER PASSWORD RESET
event name: customer_reset_password
usage: This means that the customer has requested a password reset and you need to send him a link that contains the password token. Below is an example of how you should build the link based on the user email and the password token.
example: https://www.yourdomain.com?view=password-reset&email={$email} &token={$token}
handlebars:
'email',
'password_reset_token',
'first_name',
'last_name',
'phone_number',
'address_line_1',
'address_line_2',
'city',
'country',
'postal_code',
'state_province_region',
'id',
'display_name',
'organization',
'phone',
'language',
'balance',
'salutation',
'title',
'currency',
'metadata'
source: On the integration page, you can select when the customer reset password event gets synced into SendGrid based on the source of the event.
- SDK API: Event originating from your end-user
- CORE API: Event originating from your team using the Core API
- Platform: Event originating from an action on the platform
SUBSCRIPTION CREATED
event name: subscription_created
usage: This event is triggered when a new subscription has been created for a customer.
handlebars:
All customer attributes listed in CUSTOMER CREATED and:
'id',
'address_id',
'address_required',
'billing',
'cancel_at',
'cancel_at_period_end',
'canceled_at',
'created',
'current_period_end',
'current_period_start',
'cancel_reason',
'days_until_due',
'ended_at',
'quantity',
'status',
'start',
'trial_end',
'trial_start',
'is_gift_donor',
'is_gift_recipient',
'due_date',
'gift_code',
'is_redeemed',
'shipments_remaining',
'apple_iap_receipt',
'expires_at',
'renews_at',
'subscription_plan',
'subscription_product'
GIFT SUBSCRIPTION CREATED
event name: gift_subscription_created
usage: This event is triggered when a new gift subscription has been created for a customer.
handlebars:
All customer attributes listed in CUSTOMER CREATED and:
'id',
'address_id',
'address_required',
'billing',
'cancel_at',
'cancel_at_period_end',
'canceled_at',
'created',
'current_period_end',
'current_period_start',
'cancel_reason',
'days_until_due',
'ended_at',
'quantity',
'status',
'start',
'trial_end',
'trial_start',
'is_gift_donor',
'is_gift_recipient',
'due_date',
'gift_code',
'is_redeemed',
'shipments_remaining',
'apple_iap_receipt',
'expires_at',
'renews_at',
'subscription_plan',
'subscription_product',
'donor_first_name',
'donor_last_name',
'donor_email',
'gift_recipient_first_name',
'gift_recipient_last_name',
'gift_recipient_email'
SUBSCRIPTION RENEWED
event name: subscription_renewed
usage: This means this customer has renewed their subscription.
handlebars:
All customer attributes listed in CUSTOMER CREATED and:
'id',
'address_id',
'address_required',
'billing',
'cancel_at',
'cancel_at_period_end',
'canceled_at',
'created',
'current_period_end',
'current_period_start',
'cancel_reason',
'days_until_due',
'ended_at',
'quantity',
'status',
'start',
'trial_end',
'trial_start',
'is_gift_donor',
'is_gift_recipient',
'due_date',
'gift_code',
'is_redeemed',
'shipments_remaining',
'apple_iap_receipt',
'expires_at',
'renews_at',
'subscription_plan',
'subscription_product'
INVOICE CREATED
event name: invoice_created
usage: This means this customer has a new invoice.
handlebars:
All customer attributes listed in CUSTOMER CREATED and:
'id',
'amount_due',
'amount_paid',
'amount_remaining',
'auto_advance',
'billing',
'currency',
'default_source',
'description',
'discount',
'due_date',
'hosted_invoice_url',
'invoice_pdf',
'paid',
'subscription_id',
'sub_total',
'status',
'tax',
'total',
'created_at',
'updated_at'
MEMBER CREATED
event name: member_created
usage: This means a member invitation was created.
handlebars:
'id',
'subscription_id',
'user_id',
'invitation_email',
'address_id',
'status',
'created_at',
'updated_at'
Note: if the invited member also has a customer record on the platform, then this payload will also include all customer attributes listed in CUSTOMER CREATED.
MEMBER ACTIVATED
event name: member_activated
usage: This means the membership for the new member is now activated.
handlebars:
All customer attributes listed in CUSTOMER CREATED and:
'id',
'subscription_id',
'user_id',
'invitation_email',
'address_id',
'status',
'created_at',
'updated_at'
2 - Lists & Contacts
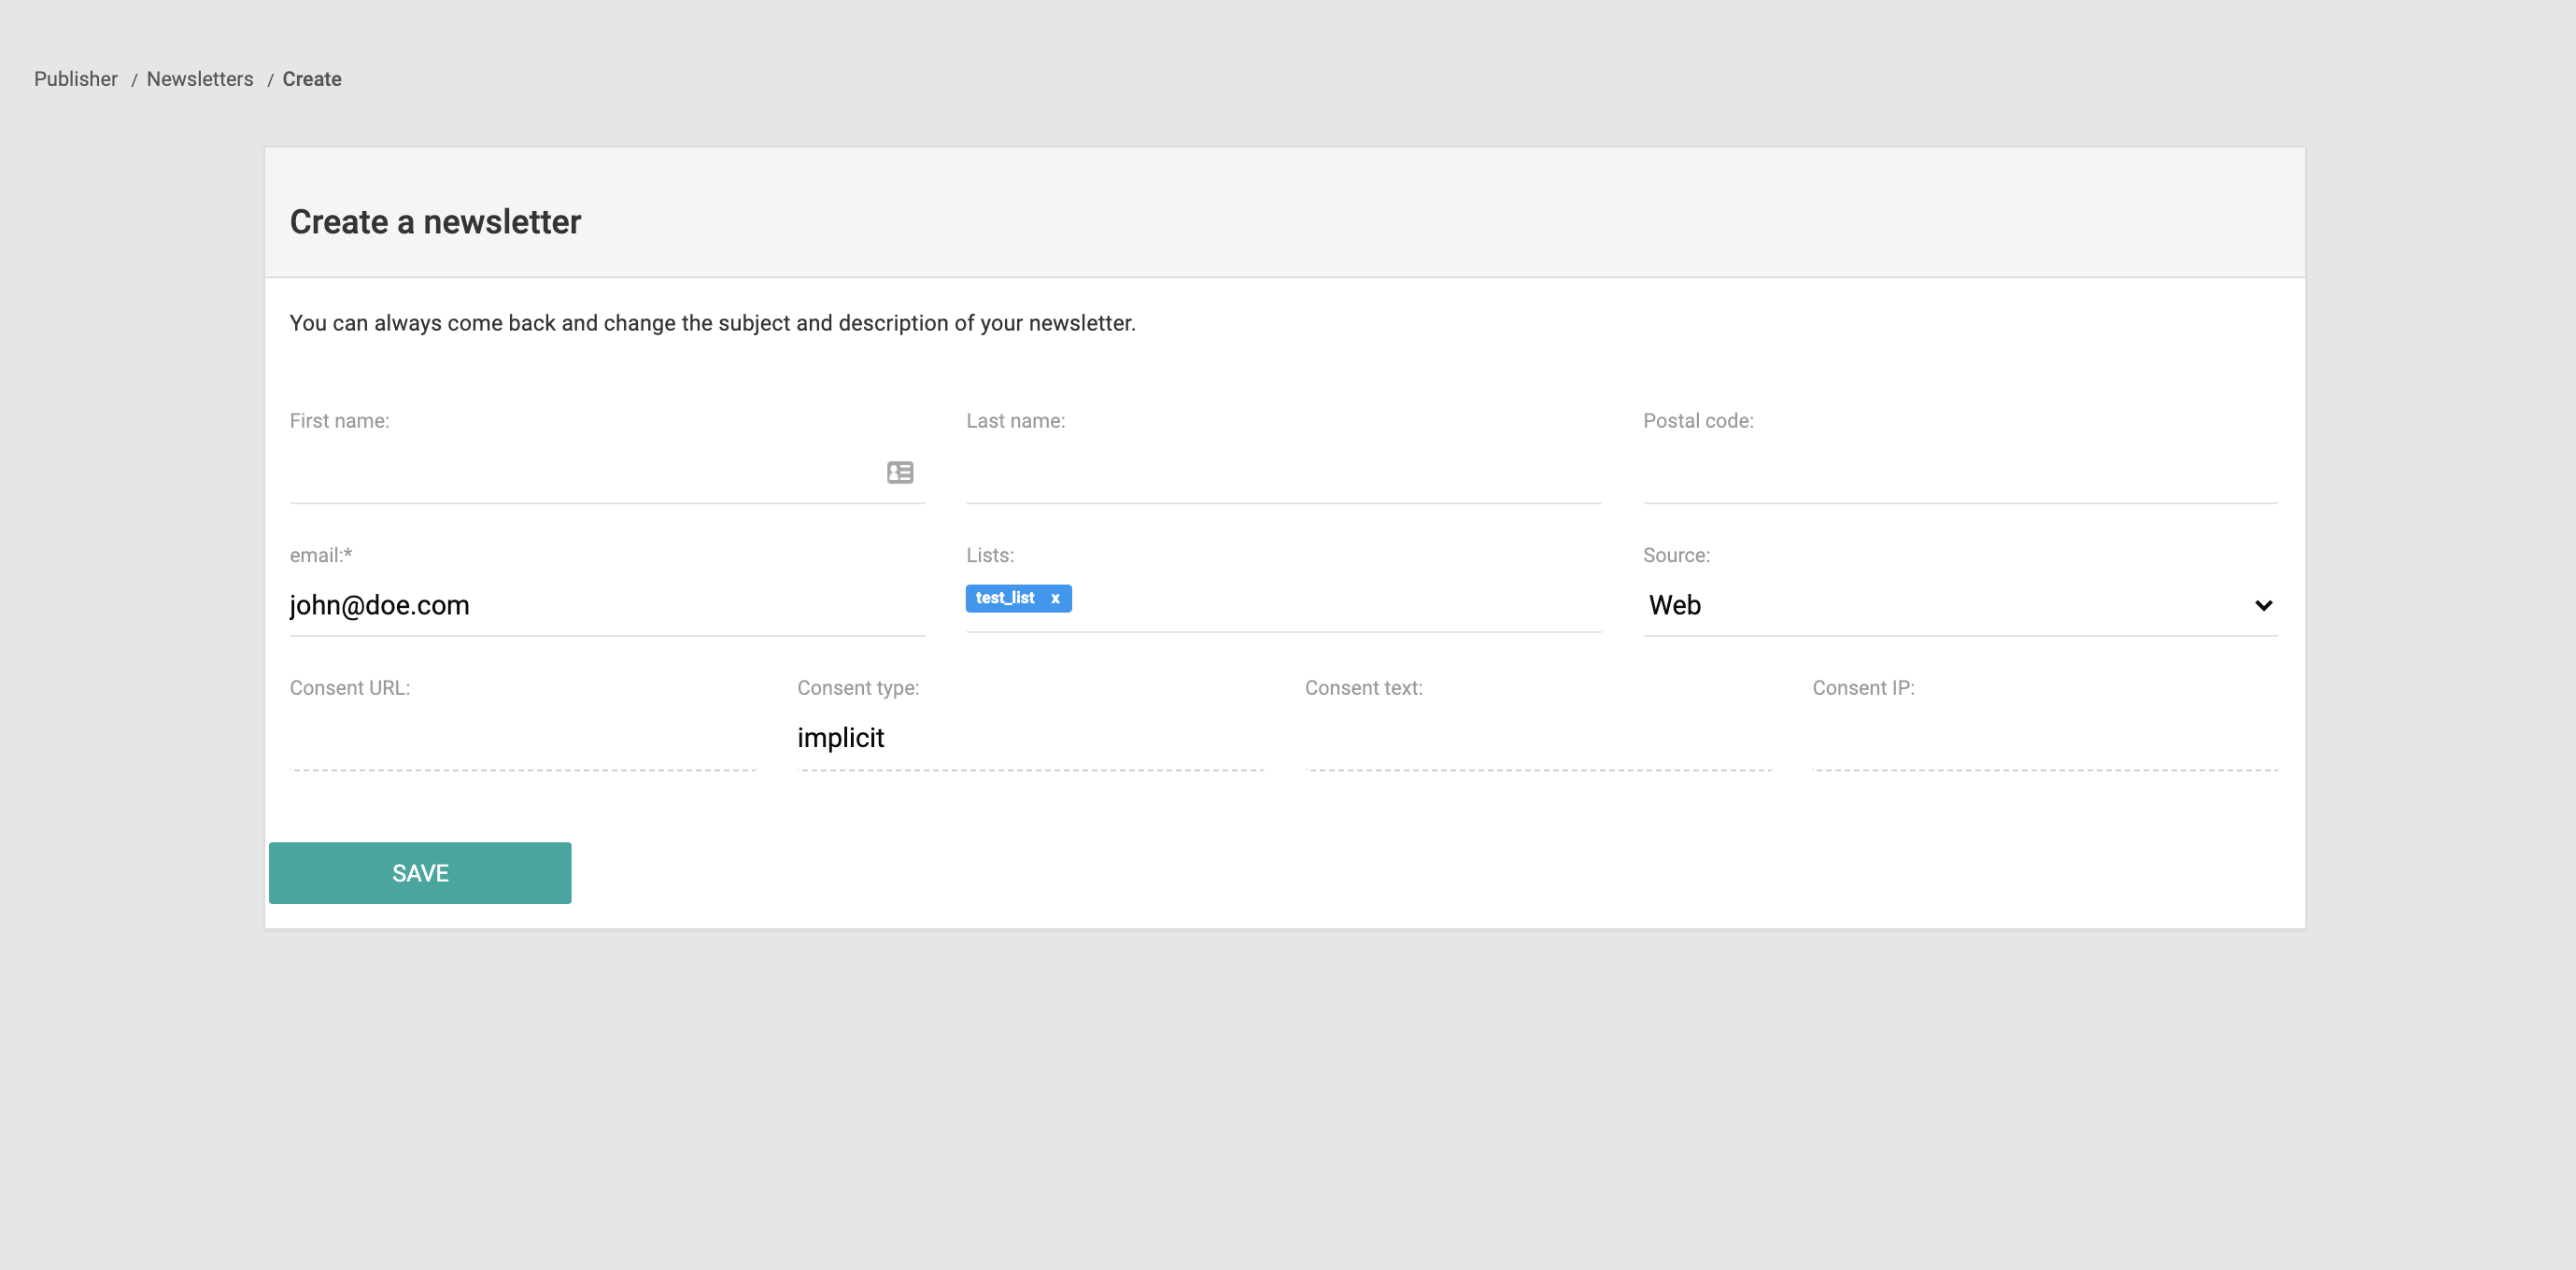
You can sync newsletter objects from Pelcro into SendGrid. On the SendGrid dashboard, click on 'Marketing' > 'Contacts' on the left-hand side and then click on 'Create' > 'New List' on the top-right corner. Give a name to your list and hit 'Save List'. This list is now ready for use on the Pelcro platform and via our SDKs.
For example, if you named your list 'test_list', here is how it would be reflected on the Pelcro platform newsletter object.
Updated 3 months ago
