Omeda
Introduction to Omeda
Omeda is an end-to-end audience management solution designed to help businesses streamline handle audience targeting, improve retention rate, and manage revenue streams via a unified platform. It enables organizations to activate audiences in real-time with built-in marketing automation and customer data platform (CDP). It lets professionals engage customers on multiple channels including email, print, web, social media, mobile, or events. Omeda is an enterprise solution that unifies disparate data to drive revenue for the client base across multiple brands.
You can visit the Omeda website for more information on Omeda's solutions, tools, and capabilities.
Are you using Omeda for your integrated database marketing services. Pelcro integrates with Omeda to automatically sync all of your Pelcro customer and newsletter data directly into your Omeda information elements, so that there isn't any hassle in doing so manually.
Setting Up
Omeda's Side:
-
Login to your Omeda dashboard and retrieve your Omeda brand abbreviation (used in most web service URLs). Typically, your brand abbreviation will be found in the base URL: https://ows.omeda.com/webservices/rest/brand/**{brandAbbreviation}**/comp/*
-
Contact your Omeda account team to retrieve your Omeda API credentials, you'll need to have:
a. API Key (x-omeda-appid)
b. Input ID (x-omeda-inputid)
Pelcro's Side:
- Login to your Pelcro CRM Dashboard
- From the Sidebar Menu, click Integrations
- Choose 'Omeda' to setup your new Omeda Integration
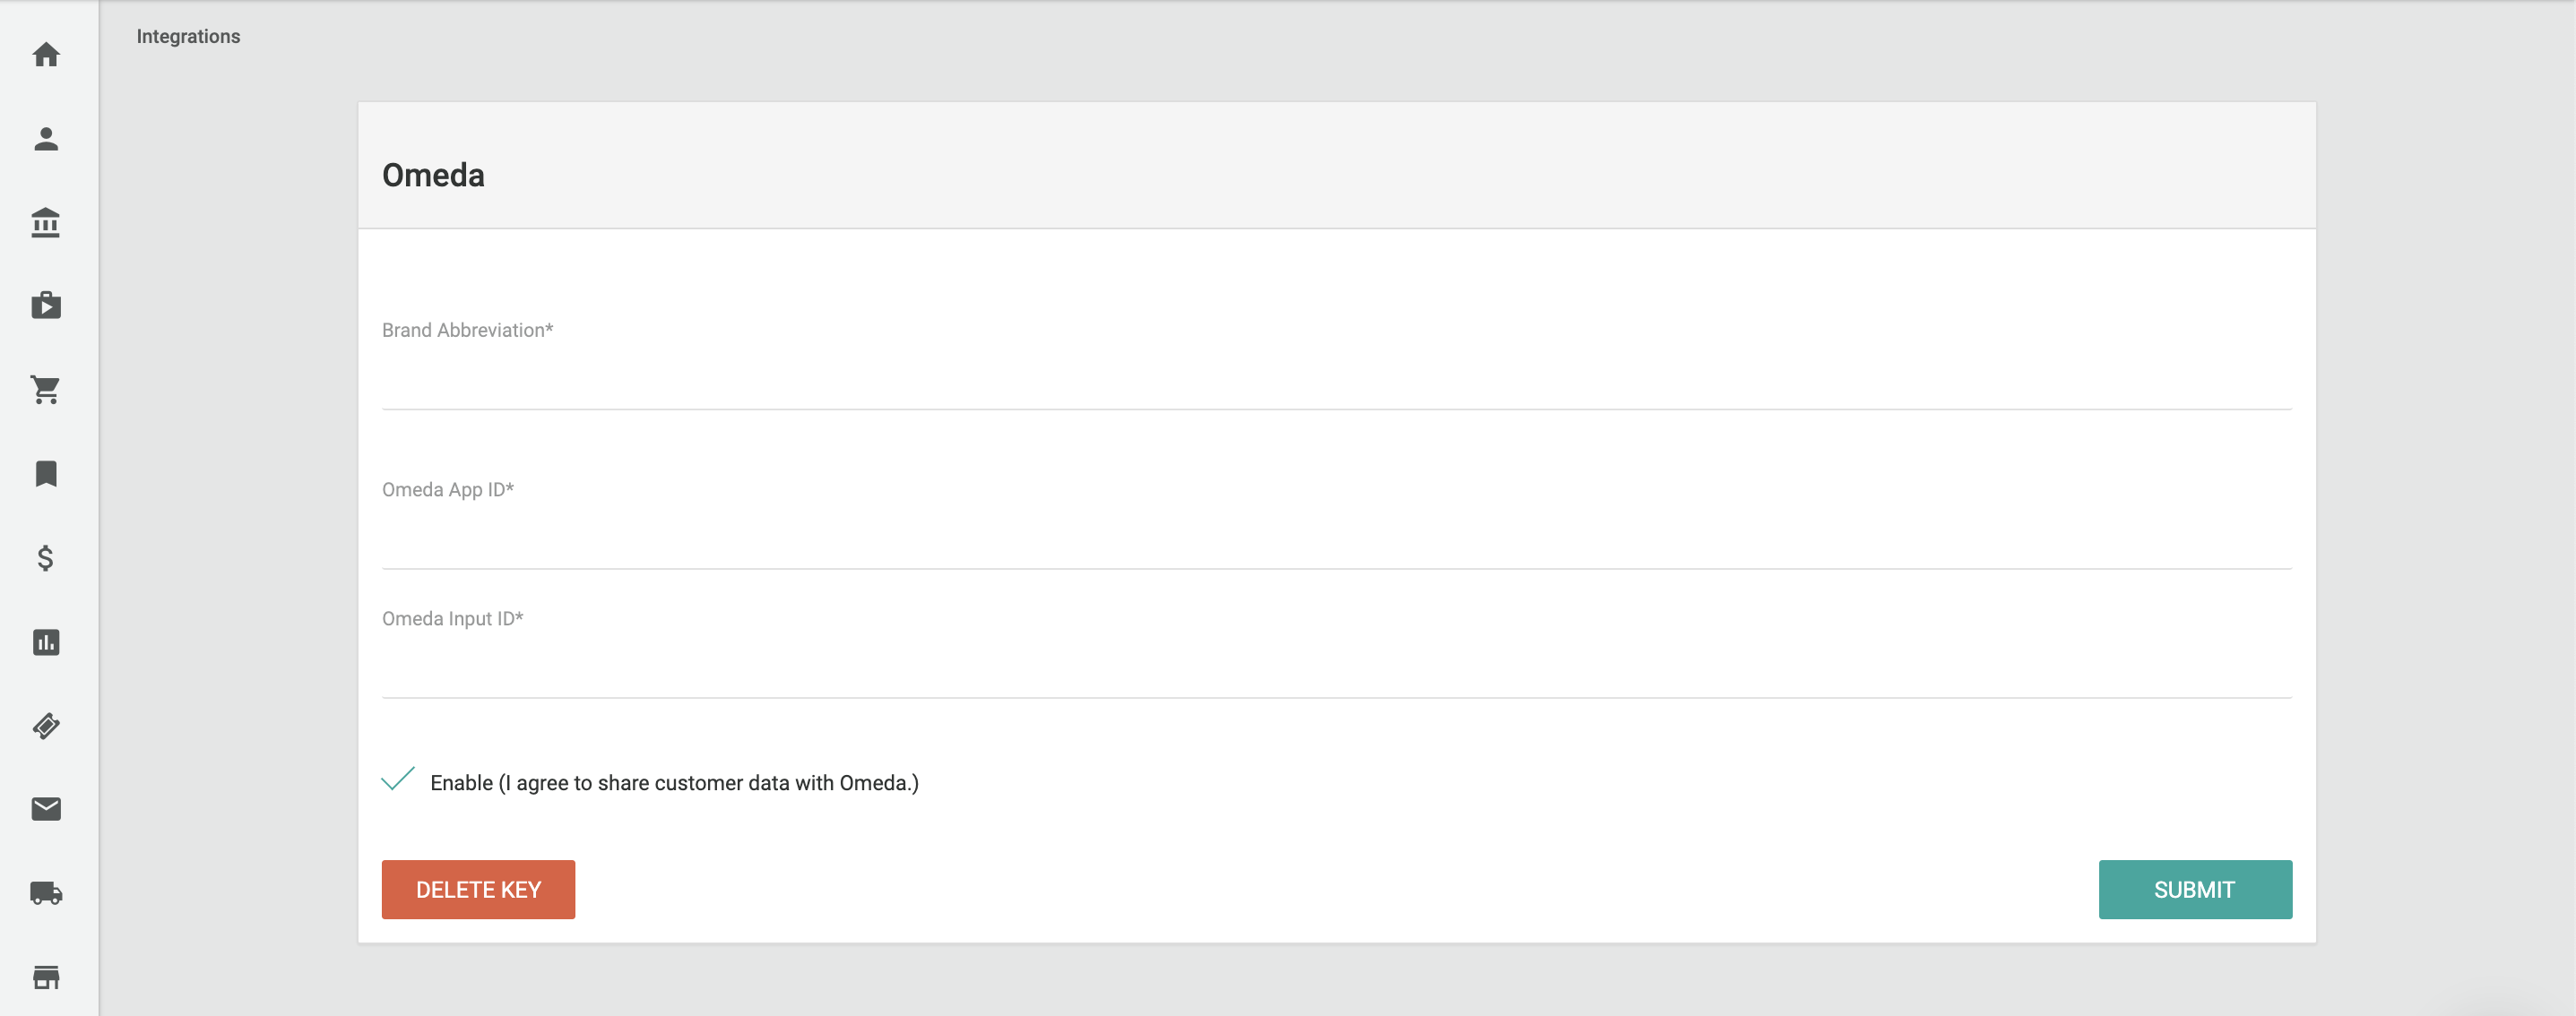
- Once you arrive at the Omeda Integration page, paste the previously copied Brand Abbreviation, API Key, and Input ID into their corresponding fields.
- Make sure to check the checkbox under Integration status section to ensure the Integration is enabled.

Usage Examples
Syncing Existing Pelcro Customers
When you connect Pelcro to your Omeda Environment, Pelcro syncs all information which are tied to your customers into your Omeda Customer elements automatically. Customer attributes which are synced from Pelcro into it's counterpart on Omeda include:
- Omeda Customer ID
- Salutation
- First Name
- Last Name
- Title
- Customer Creation Date
- Address Information
- Company
- Address Line 1
- Address Line 2
- City
- State
- Postal Code
- Country
- Phone Information
- Customer Phone Number
- Phone Numbers tied to addresses
- Email Address
Syncing Newly Created Pelcro Customers
When a new customer is created on Pelcro, either by signing up to your website, subscribing to your products, or added through the platform, Pelcro will sync information which are tied to said customer into your Omeda customer elements in real time. This is done via Pelcro's customer.created webhook event.
Syncing Modifications to Pelcro Customers
When you modify or update any information related to your customers on Pelcro, Pelcro will ensure these changes are synced into your Omeda Customer elements automatically in real time. This is done via Pelcro's customer.updated webhook event.
Syncing Existing Pelcro Newsletters
When you connect Pelcro to your Omeda Environment, Pelcro syncs all information which are tied to your newsletters into your Omeda Customer elements automatically. Newsletter attributes which are synced from Pelcro into it's counterpart on Omeda include:
- Email Address
Syncing Modifications to Pelcro Newsletters
When you modify or update any information related to your newsletters on Pelcro, Pelcro will ensure these changes are synced into your Omeda Customer elements automatically in real time. This is done via Pelcro's newsletter.updated webhook event.
Syncing Customer Metadata into Omeda
If there are any additional types of information which are tied to your customer that you'd like to keep track of on your Omeda database, you can use Pelcro's customer metadata to also sync your customer metadata into your Omeda Customer elements. Here's what you'll need to do:
- Contact your Pelcro account manager, making sure you have a list of information items which you would like to sync into Omeda.
- Review Omeda's documentation to decide on which fields you would like to sync this information to.
Updated 8 months ago
