

Refunds
Page type: How-to guide
Overview
This guide walks you through issuing refunds in Pelcro for charges made to a customer's credit card or through offline payments. By the end, you will be able to:
- Issue full or partial refunds
- Process offline refunds
- Learn about proration behavior
- Manage refund statuses (mark as processed or canceled)
- Export refund data
Prerequisites:
- At least one completed payment or active subscription to refund.
Pelcro supports two types of refunds:
- Full refund — the entire payment amount is returned to the customer.
- Partial refund — only a portion of the payment amount is returned.
Common reasons for refunds include:
- Incorrect charges
- Subscription cancellations
- Unsatisfactory services
You can either refund a payment directly or cancel a subscription and refund the prorated amount.
Online refunds typically take 1–3 business days to appear on the customer's credit card. Offline refund timelines depend on your business's process.
Online Refunds
Refund an online payment
Refund an entire payment without affecting the associated subscription:
- Navigate to the customer profile and open their list of payments.
- Click the three-dot menu on the payment you want to refund.
- Select Refund payment.
This action only refunds the payment. It does not cancel the subscription or trigger any other changes.

Refund online while canceling a subscription
The steps below apply only to subscriptions using "Automatically charge a payment source on file" — not "Invoice the customer" (see Offline Refunds for that workflow).
This workflow has three stages: create the subscription, cancel it immediately, then choose a refund destination (credit card or customer balance).
Step 1: Create a subscription that is automatically billed
Create new subscription and in the "Payment Method" section, choose "automatically charge" as shown below,
If the payment method option is not available, verify that the customer has a valid payment source on file.

Step 2: Cancel the subscription
Once the subscription is created:
- Navigate to Billing > Subscriptions in the toolbar.
- Locate your subscription, click the three-dot menu, then click View subscription.
- On the top right, click the three-dot menu and select Cancel subscription.

Step 3: Refund
Refund to Credit Card
- In the popup window, choose Immediately and click Cancel subscription.

- In the next popup, click Refund customer.

- Review the refund details in the final popup and click Process refund.

To verify the refund, go to Billing > Refunds > Succeeded.
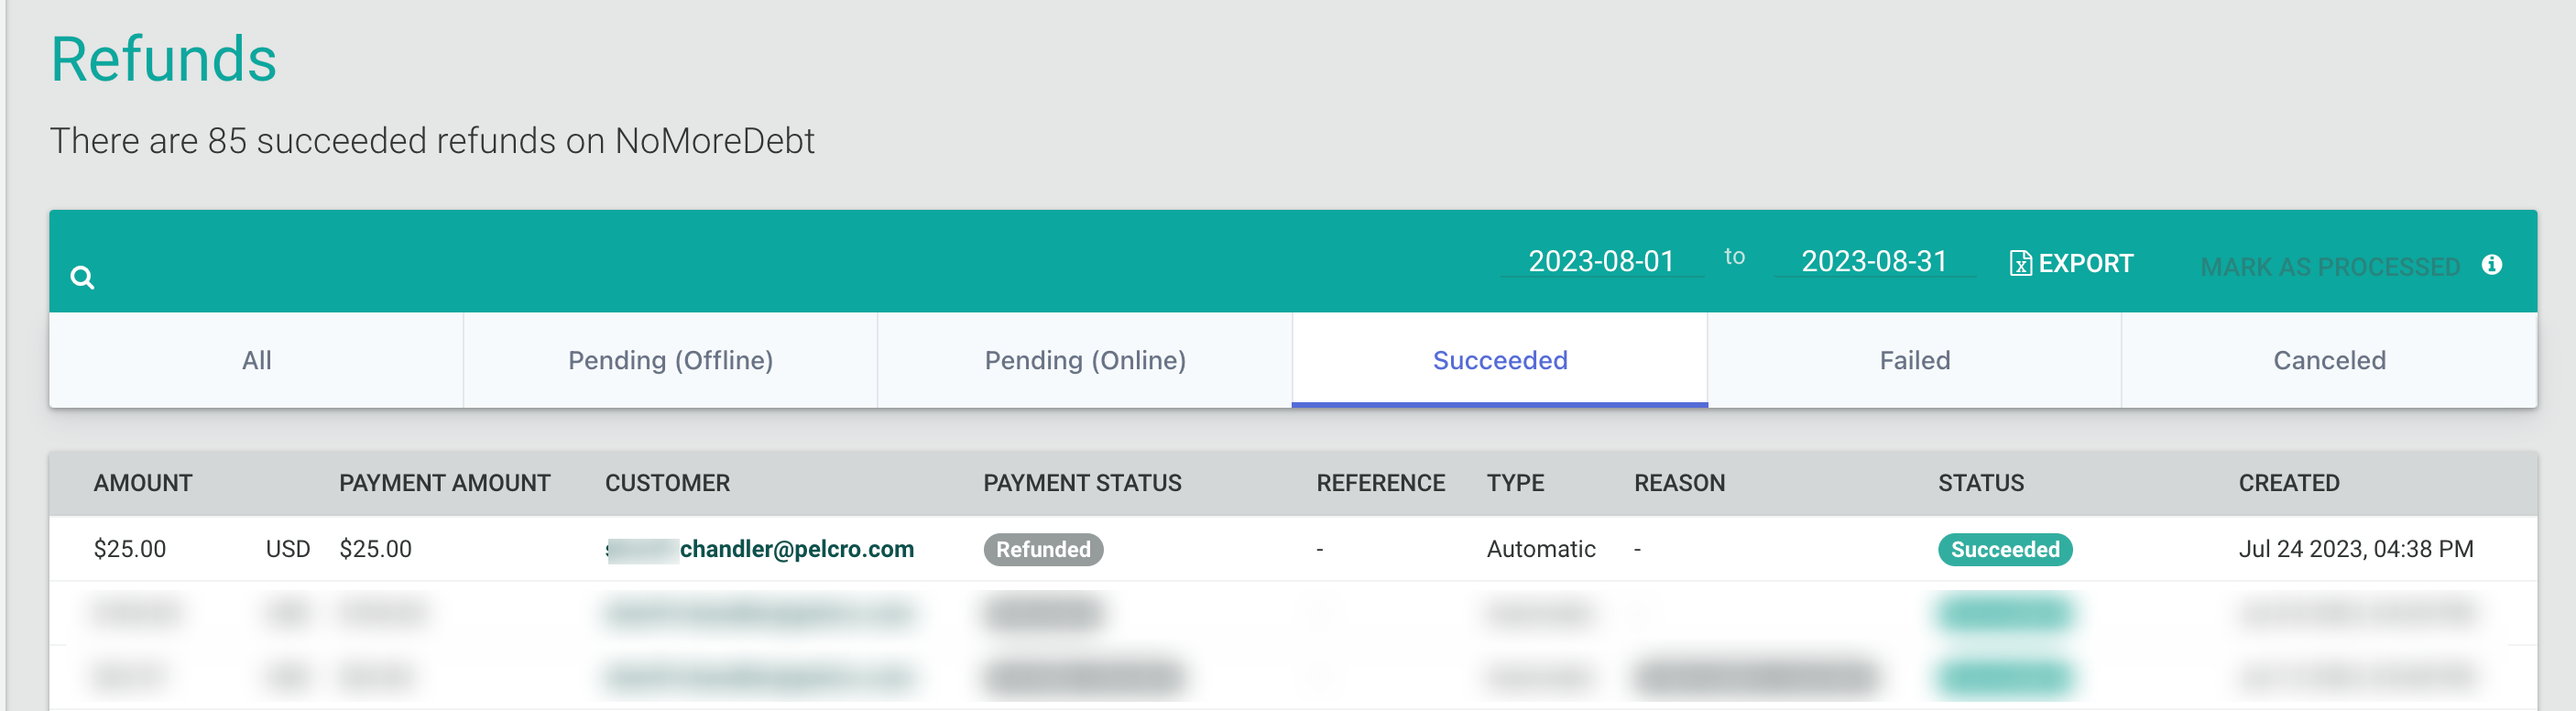
The refund amount is automatically returned to the customer's credit card. If the refund does not appear under Succeeded after a few minutes, check the Pending tab to confirm it is still processing.
Refund to customer balance
Instead of refunding to a credit card, you can credit the refund amount to the customer's balance:
- Follow Step 1 and Step 2 above.
- In the cancellation popup, choose Immediately and click Cancel subscription.
- When prompted, select the option to credit the customer's balance instead of refunding to the credit card.
- Confirm the refund. The credited amount appears on the customer's profile under their balance.
How customer balance works
Customer balance is automatically applied to subsequent invoices before other payment methods are charged. The balance can cover a new invoice in full or partially.
Refund customer balance back to a credit card
Pelcro supports refunding funds from a customer’s balance back to the original payment method when the original online payment was credited to the customer balance.
Available only when the original payment was made using a card and its destination was customer balance.
How It Works
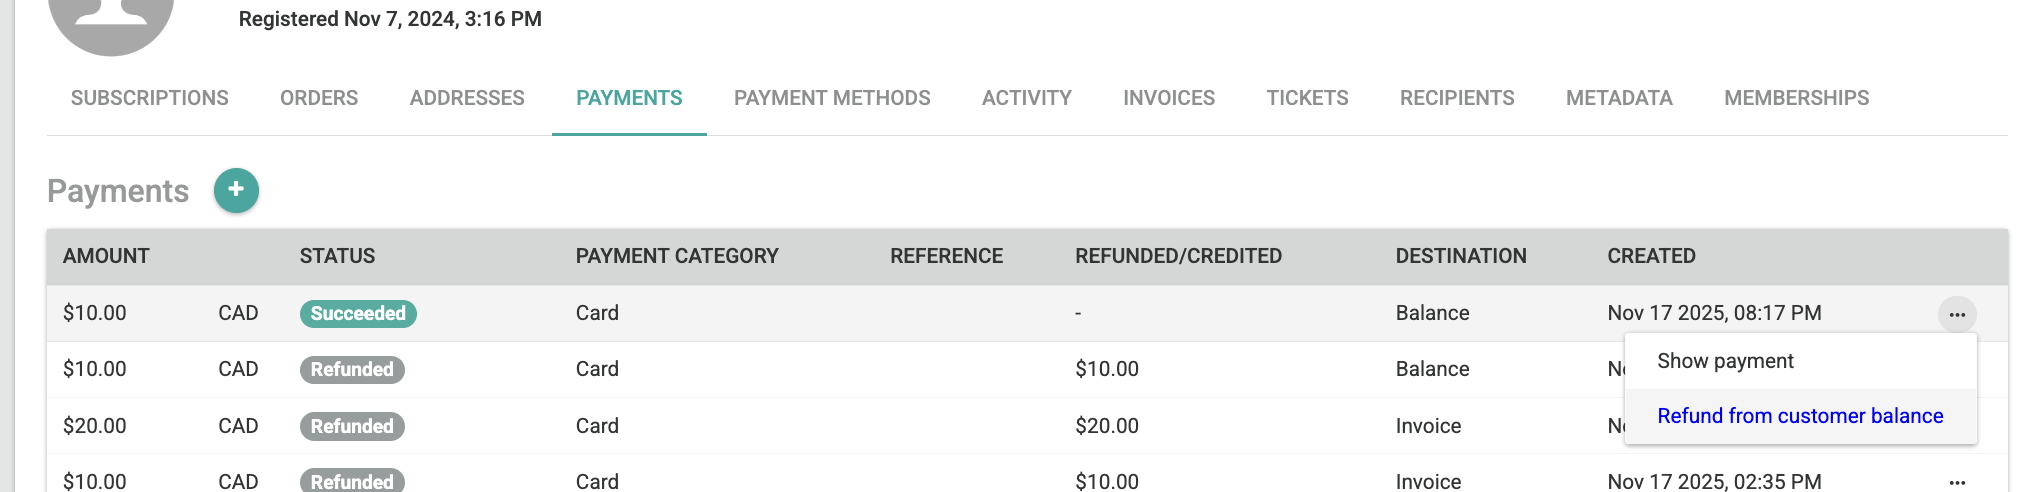
If a payment was originally processed from a card and credited to customer balance:
- Navigate to the Payment record.
- Click the three-dot menu (⋯).
- Select Refund from Customer Balance.
Pelcro automatically validates the available balance before processing the refund. Once confirmed, a debit adjustment is created on the customer balance.
Refund Logic
- If customer balance ≥ charge amount → full refund issued.
- If customer balance < charge amount → partial refund issued.
- Refunds cannot exceed the original charge total.
Example Scenarios
| Scenario | Charge Amount | Customer Balance | Refund Processed |
|---|---|---|---|
| Balance ≥ Charge | $50 | $80 | $50 refunded |
| Balance < Charge | $50 | $10 | $10 refunded (partial refund) |
This ensures accurate reconciliation and prevents over-refunds while maintaining consistency between Pelcro and the payment processor.
Offline Refunds
This section covers refunding payments made through invoices or other offline methods.
Refund an offline payment
You can refund an offline payment directly without canceling the subscription. The invoice associated with the payment must have a Paid status for it to appear under Billing > Payments.
If the payment does not appear in the list, verify the invoice status under Billing > Invoices. Only invoices marked Paid generate refundable payment records.

- Navigate to Billing > Payments and locate the offline payment.
- Click the three-dot menu and select Refund payment.
- Choose a reason for the refund from the dropdown and confirm.

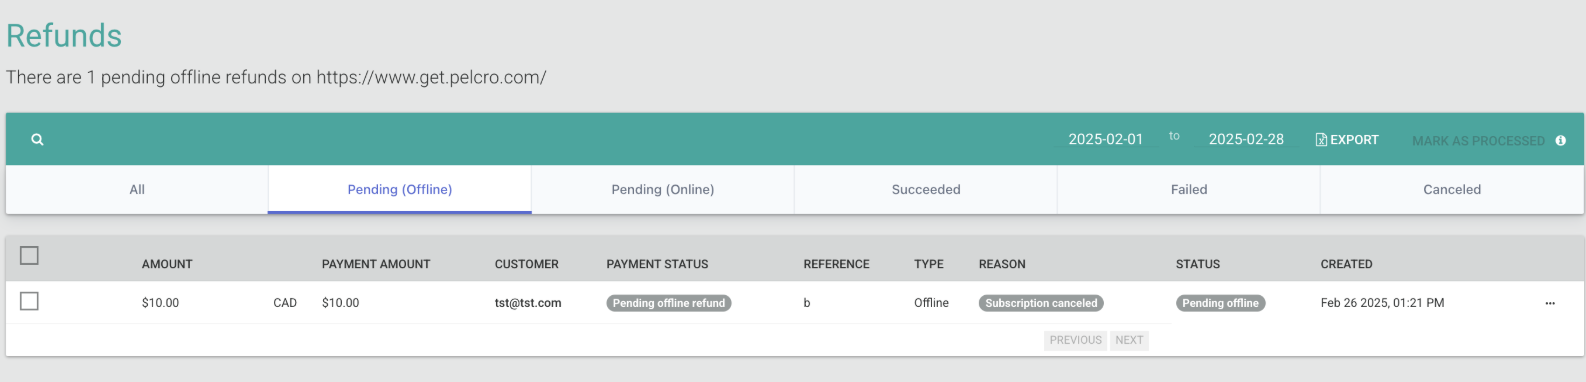
Process an offline refund
To mark a refund as processed:
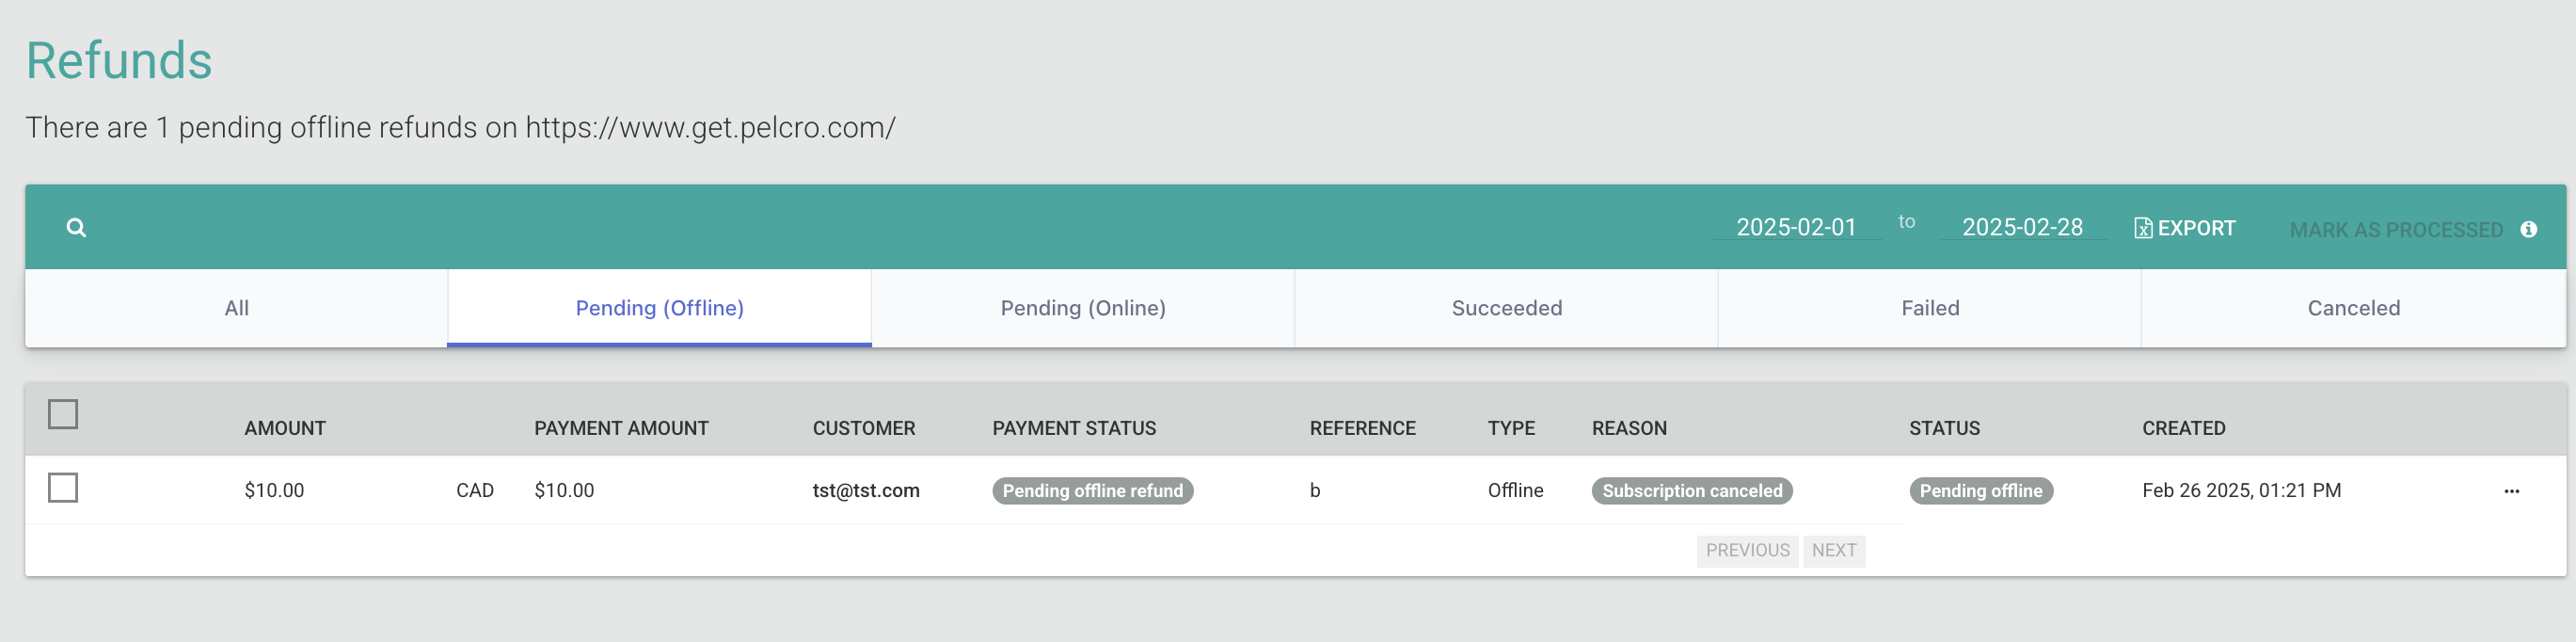
- Go to Billing > Refunds > Pending Offline.
- Select the refund by marking its checkbox.
- Click the Mark as Processed button in the top right.
Refund offline while cancelling a subscription
The steps below apply only to subscriptions using "Invoice the customer" — not "Automatically charge a payment source on file" (see Online Refunds for that workflow).
This workflow has three stages: create an invoice-billed subscription, cancel it immediately, then issue the offline refund.
Step 1: Create a subscription that is sent directly to the customer
Create a new subscription and in the "Payment Method" section, choose "invoice the customer" as shown below.

Step 2: Cancel the subscription
Once the subscription is created:
- Navigate to Billing > Subscriptions in the toolbar.
- Locate your subscription, click the three-dot menu, then click View subscription.
- On the top right, click the three-dot menu and select Cancel subscription.

Step 3: Refund
- In the popup window, choose Immediately and click Cancel subscription.

- In the next popup, click Refund customer.

- Review the refund details in the final popup and click Process refund.
Mark refund as processed
Once you're ready to finalize the refund:
- Select the checkbox on the exported row.
- Click the Mark as Processed button (it becomes clickable after selecting a row).
- Confirm the action in the popup that appears.

Mark refund as canceled
Cancel pending refunds that haven't been processed yet:
- Select the refund(s) you want to cancel.
- Click Mark as Canceled to stop them from being issued.

Proration Behavior
When a subscription is canceled immediately and a refund is issued, Pelcro can calculate a prorated refund amount based on the portion of the subscription that has already been consumed.
Proration behavior depends on three factors:
- The subscription plan type (time-based or shipment-based)
- Your Billing settings configuration
- The refund type selected by a collaborator during the refund flow
Proration During Platform Refunds (Collaborator Action)
When a collaborator cancels a subscription from the Pelcro platform and initiates a refund, proration is applied only if explicitly selected.
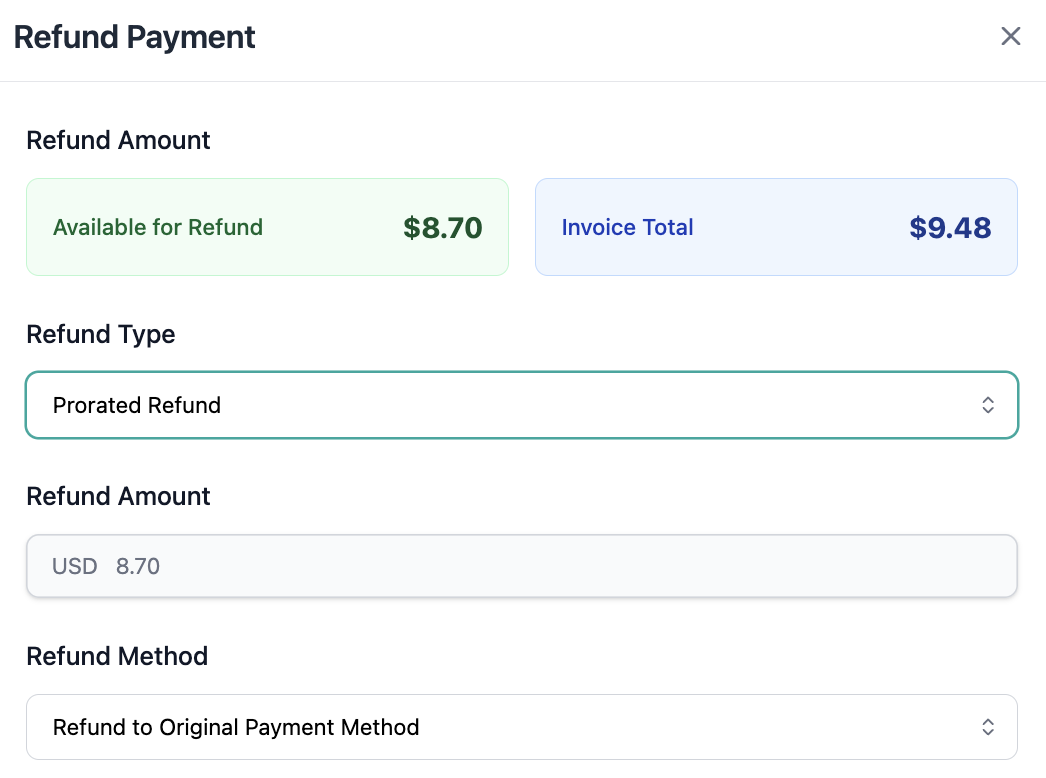
During the refund flow, collaborators must choose:
Refund Type → Prorated Refund
If Full Refund is selected instead, Pelcro refunds the entire payment amount and no proration calculation is applied.
This ensures administrators retain full control over refund outcomes during manual operations.
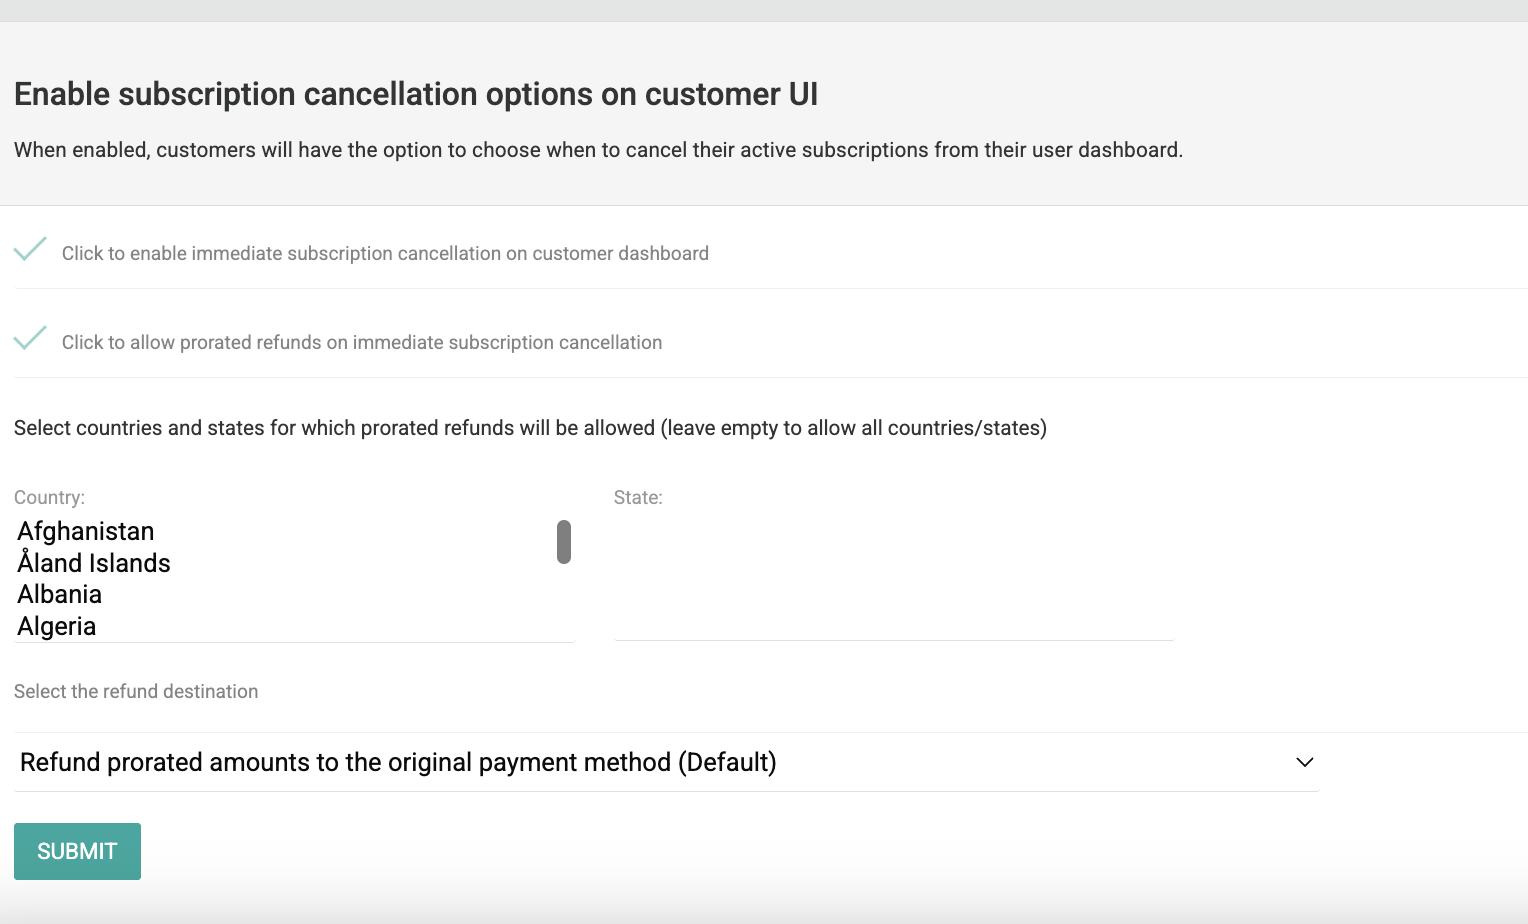
Controlling Proration from Customer UI
You can control whether customers are allowed to trigger immediate cancellation and prorated refunds directly from their dashboard.
Navigate to:
Settings → Billing → Enable subscription cancellation options on customer UI
This setting allows administrators to:
- Enable customers to cancel subscriptions immediately from their dashboard.
- Allow or prevent prorated refunds when cancellation happens immediately.
- Restrict prorated refunds by country or state (leave empty to allow all regions).
- Define the default refund destination (for example, original payment method).
If prorated refunds are disabled in this setting, immediate cancellations from the customer dashboard will not generate prorated refunds automatically.
How Proration Is Calculated
The calculation method depends on the plan type associated with the subscription.
Time-Based Plans
For time-based subscription plans, the refund amount is calculated according to how much of the billing period has elapsed.
Proration formula (time-based):
Prorated Amount = Invoice Total × (Consumed Period in Seconds / Total Invoice Period in Seconds)
How it works:
- The system measures the elapsed time between the subscription start date and the cancellation time.
- The consumed portion of the billing period is calculated.
- The unused time determines the refundable amount.
Example:
- Invoice total: $100
- Billing period: 30 days
- Used time: 10 days
Refund = $100 × (10 / 30)
Shipment-Based Plans
For shipment-based subscription plans, proration is calculated based on fulfilled shipments rather than elapsed time.
Proration formula (shipment-based):
Prorated Amount = Invoice Total × (Consumed Shipments / Total Shipments in Plan Period)
How it works:
- Pelcro evaluates how many shipments were delivered within the billing period.
- The consumed shipment ratio determines the refundable portion.
Example:
- Invoice total: $120
- Total shipments per period: 12
- Shipments delivered: 3
Refund = $120 × (3 / 12)
Important Notes
- Proration applies only when cancelling a subscription immediately and issuing a refund.
- The calculated prorated amount is automatically displayed during the refund flow.
- Administrators can choose whether the refund is issued to:
- the customer’s payment method, or
- the customer balance.
- The proration calculation follows the subscription’s configured plan type.
Export
Export refund records for external review or record-keeping:
- Navigate to Billing > Refunds.
- Click the Export button on the right to send all refund data in the table to your email.
A confirmation message appears: "Your export request is now queued for processing. We'll send an email to your address as soon as your export is ready."
After the export completes, the Exported column displays a timestamp and a checkbox appears for that row.
Troubleshooting
Refund option is not visible for a payment
Verify that the payment has a Succeeded status. Refunds can only be issued against completed payments. For offline payments, the associated invoice must also have a Paid status.
Refund is stuck in Pending Offline
Offline refunds require an administrator to export them and then mark them as processed. Check that the export step has been completed and that the Exported column shows a timestamp before clicking Mark as Processed.
Customer has not received the refund
Online refunds typically take 1–3 business days to appear on the customer's credit card statement. If the refund still doesn't appear after that period, verify the refund status under Billing > Refunds > Succeeded. For offline refunds, confirm the refund has been marked as processed and that the cheque or transfer was issued.
Canceling a subscription did not trigger a refund
Refunds during cancellation are only prompted when you cancel Immediately. If you chose to cancel at the end of the billing period, no refund is offered. Cancel the subscription again with the Immediately option to trigger the refund flow.
Partial refund amount is incorrect
Partial refund amounts are calculated based on the prorated remaining time on the subscription. If the amount looks incorrect, verify the subscription's billing cycle dates and the cancellation date under Billing > Subscriptions. Contact support if the discrepancy persists.
Next steps
Updated 5 months ago