

Products
What is a Subscription Product?
Subscription Products refer to an underlying item or service that you are offering on your website, which your customers can subscribe to on recurring basis, either at a defined interval, or open-ended. Your customers will then get billed on a recurring schedule. Some examples can be that you are selling digital access, demand entertainment, and/or one-day shipping.
An important distinction to make is that through Pelcro, you offer products, but you sell subscriptions. These subscriptions give your customers access to the content or products, and therefore, you must first create and setup your products before you can sell anything on your site. Products can optionally also include set-up fees and trial periods.
Create a new Product
From the toolbar, go to "Products". You'll be redirected to the main page allowing you to view all existing products.
To create a new product, click on the "New" button on the top right-hand side. You'll be redirected to a new page, where you'll be prompted to enter all of your product information. Note that the first product you create will be on the top of the product list in the user interface on your site.

To create a new product, you'll need to enter the following information:
- Product Name: Name that will appear on the website, receipts and invoices.
- Product Internal Name: Internal reference name for the product (not visible to public).
- Product Description: Description of your product that will appear on your paywall.
- Statement Descriptor: Name that will appear on your customer's bank statement.
- Image: Allows you to upload a picture that will illustrate the product.
- Address Required: A checkbox that requires customers to enter their address when selecting this product. This is typically used when the product needs to be shipped to a customer. Note that even if this field is not checked but the taxes are enabled on the account, the customer will be asked to provide their address information as well.
- Site Selling this product: In case you have many websites on your Pelcro platform, you can select which websites you'd like to sell your products on
Note: Products can be configured to be available across multiple sites under the same Pelcro account. When enabled, a subscription to that product on one site will automatically grant access to all associated sites.
- Product only Available in these countries: Allows you to restrict the country list to which your product is available. If a customer attempts to subscribe to a product and their address is not included in the list of countries you assigned to the product, the subscription will fail to get created.
- Product only Available in these ZIP Codes: Allows you to restrict the ZIP/postal codes where your product is available. If a customer attempts to subscribe to a product using an address outside the assigned ZIP/postal codes, the subscription will fail to be created.
- Revenue Recognition Strategy: you’ll find a dropdown labeled Revenue recognition strategy with two options:
- Invoice-creation-based (default):
- This option preserves Pelcro’s existing accounting behavior which is revenue recognition is based on the invoice creation date.
- Invoice-payment-based:
-
This option enables payment-anchored revenue recognition.
Behavior:
- Revenue is recognized only for invoices with status = paid
- Unpaid or failed invoices are automatically excluded from revenue reports
- Revenue recognition begins at
invoice.current_period_start invoice.current_period_startis set to the invoice payment date (invoice.paid_at)invoice.current_period_endis calculated asinvoice.paid_at + plan interval- When payment succeeds:
- The subscription becomes active
- Subscription
current_period_startandcurrent_period_endmatch the invoice period - Subscriber access begins at
current_period_start
- Renewal periods align to the payment date. All existing products default to Invoice-creation-based, preserving default accounting behavior unless explicitly changed to this setting instead.
-
- Invoice-creation-based (default):
Finally, once you've entered all of your product details, you can create it by clicking on the "Create Product" button. Once your product has been created, it will appear on the "Products" page, in a list view.
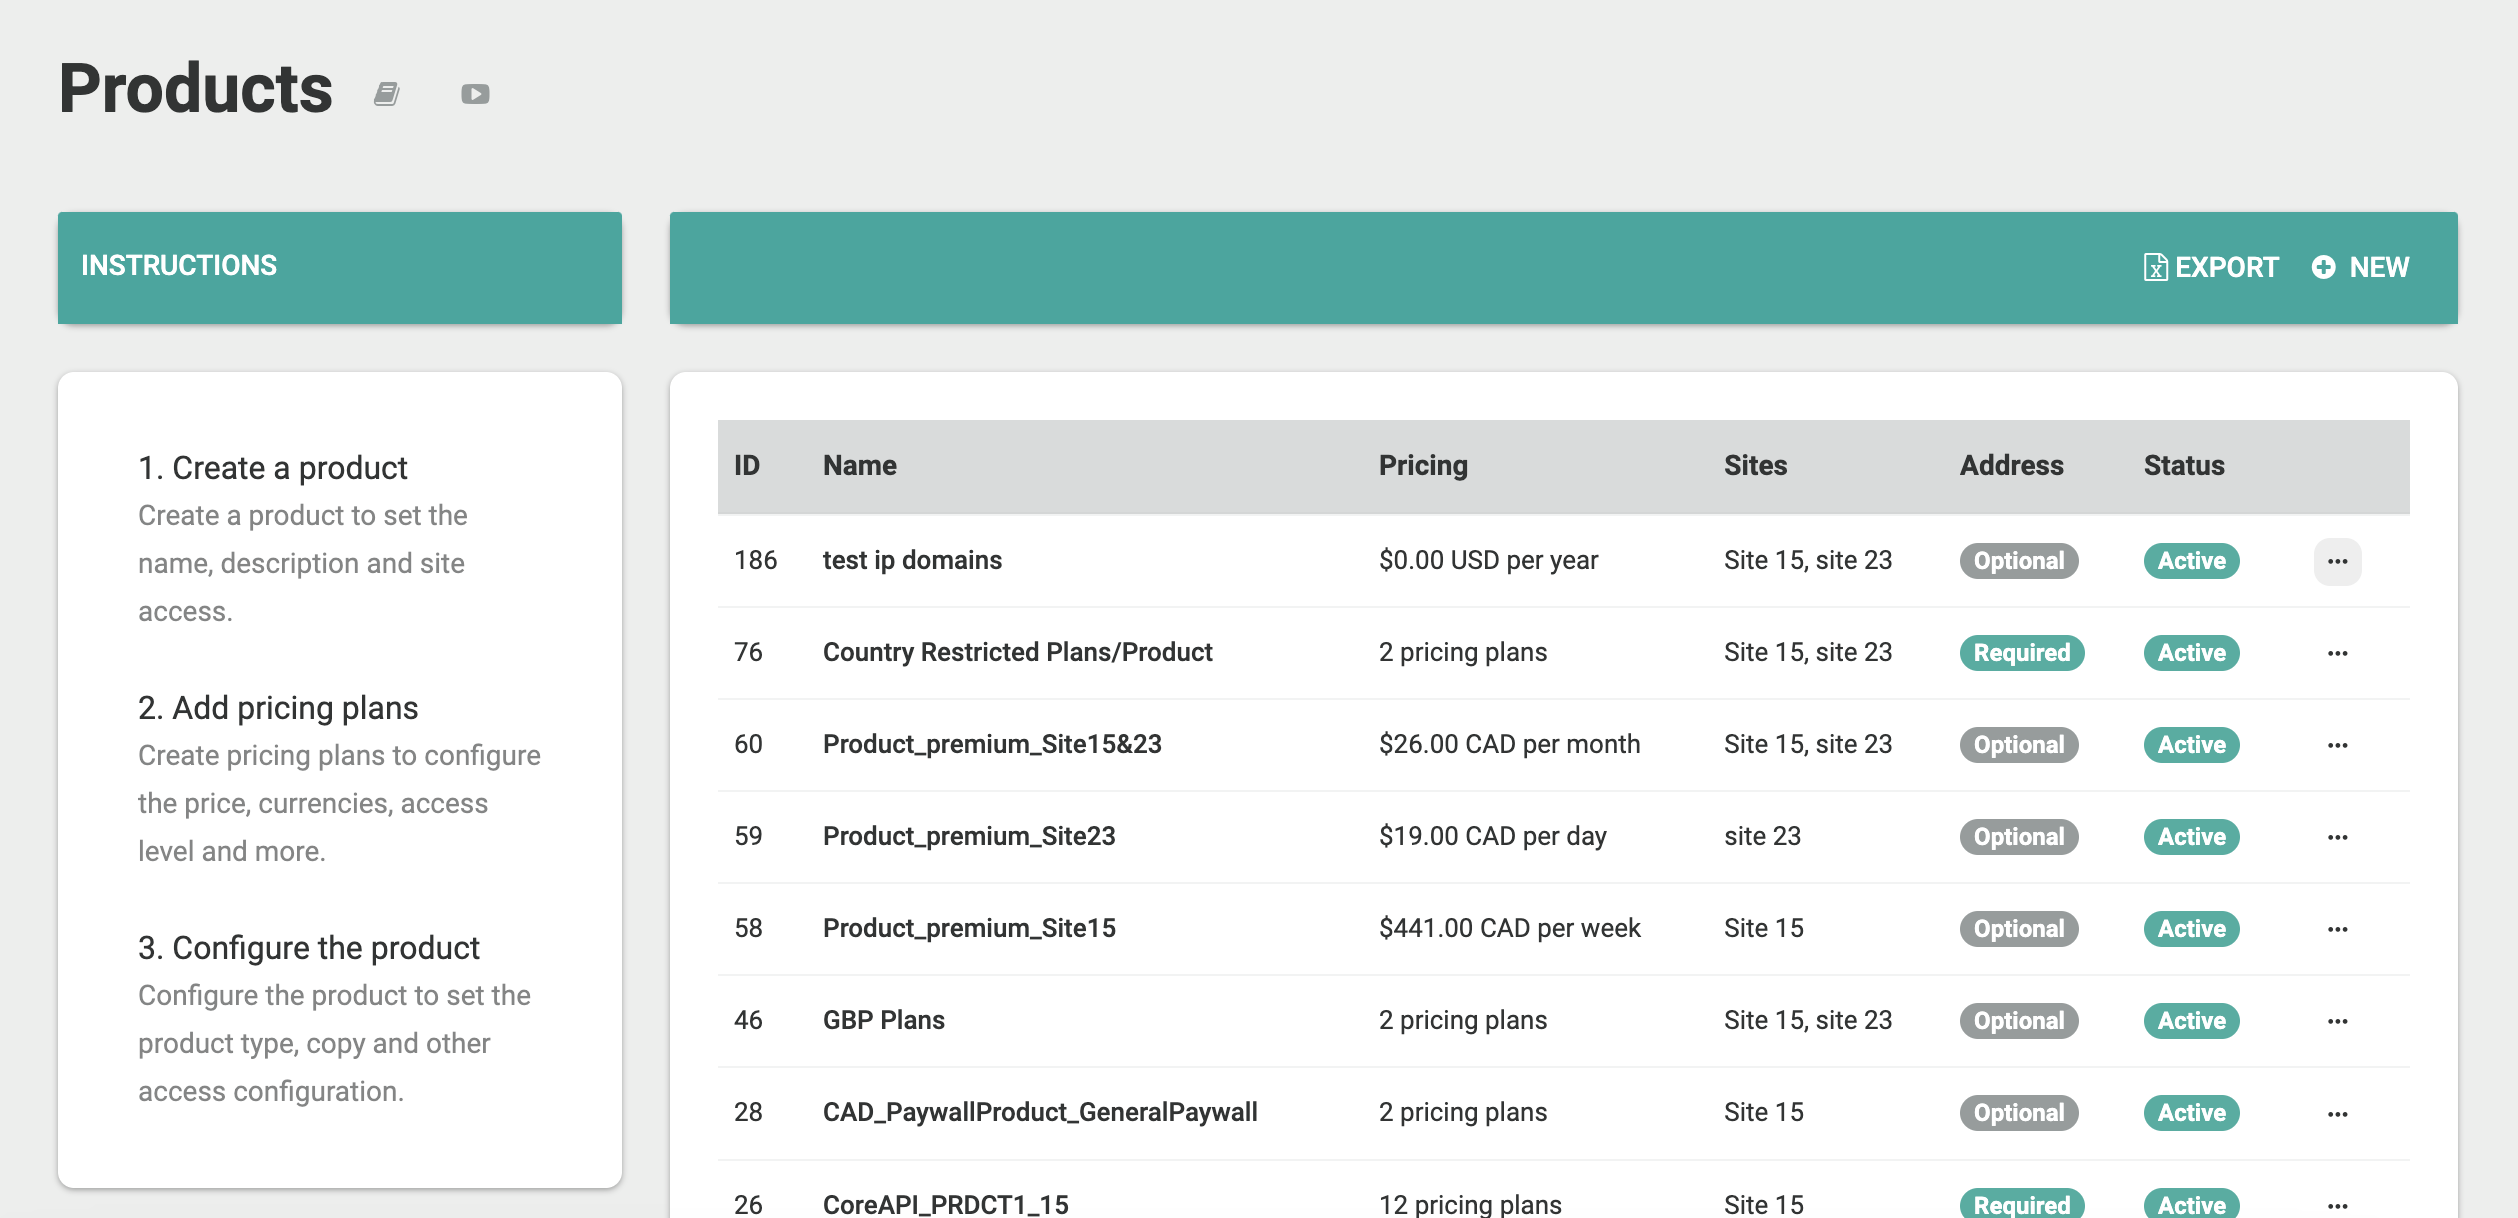
View an existing product
On the Products page, you can find a list view, listing all of your existing products you have created. On each line level, you have a button that allows you to view all of the product details.
Once you've clicked on the view button, on the line level of the product, you'll be redirected to another page that displays the product details in the first section, and the plans linked to that product in the second section

Edit an existing product
From the "View" mode of a product, you can edit the product by clicking on the "Edit" button on the top right corner. That will take you to the product edit page. From there you can update any of the product related fields.
Once you've completed updating the product information, click on "Update Product" to save your changes.

Configure a product
Next step, after creating your product, you will be able to configure your product for it to be displayed on your website/paywall. For that, click on the 'Create' button below 'Configure' on the line level, next to the product you wish to configure. If a product has already been configured, you can edit the configuration of that product by clicking on the "Edit" button below 'Configure'.

Next step will be to determine the different parameters linked to your product configuration.
Step 1: Target
You'll have to select:
- Type
- Target

Within your product type, you'll have to select one of the following options:
Paywall Product : is a product that triggers the metered paywall on your webpage Regular Product : is a regular product that is displayed on your paywall once configured.
Within your Target Audience, you'll have to select one of the following options:
Target Everyone : which applies to anyone visiting your website Target Segments below : will narrow down to audience that will be able to view that product, based on specific criteria. (like Countries, platforms, adblockers & MetaTags)
In case you're planning to use metatag targeting, please make sure to understand how metatag targeting works before proceeding to step 2.
Step 2: Meter (Skip if you've previously selected "Regular Product")

You'll have to set:
- Number of Free Articles: Gives a number of free articles to your users before hitting the Paywall
- Paywall renewal interval (in days): which determines when the free article count resets
- Meter title: title being displayed on the metered paywall
- Meter subtitle: other text being displayed on the metered paywall of your webpage.
Step 3: Select
You'll have to set:
- Select Title: Allows you to set the title that appears on the product selection modal
- Select Subtitle: Allows you to set the subtitle that appears on the product selection modal
Step 4: Newsletter (Skip if you've previously selected "Regular Product")
You'll have to set:
- Allow users to get free articles by entering their Email
- Number of extra free articles
- Newsletter title
- Newsletter subtitle
Step 5 Registration
You'll have to set:
- Registration title
- Registration subtitle
Step 6 Payment
You'll have to set:
- Subscribe title
- Subscribe subtitle
Step 7 Success
You'll have to set:
- Success title
- Success subtitle
Step 8 Confirmation
This is where you save your product configuration, and that your product will be displayed on your paywall.
Delete an existing product
Deleting an existing product, will completely delete the product from your Pelcro instance.
As much as we do NOT recommend the deletion of a product, you can still perform this action as an Admin
Archive an existing product
Archiving a product, allows you to remove the product from your list view, while still keeping it in your Pelcro database. That way it can't be used to create new subscriptions. Existing subscriptions are still billed as usual until canceled.
To Archive a product, you will need to go to the "View" page of the product. Then click on the three dots "..." on the top right corner and click on "Archive product".
In the case you'd like to unarchive a product, click on the "Unarchive" button on the product view page.
Export Products
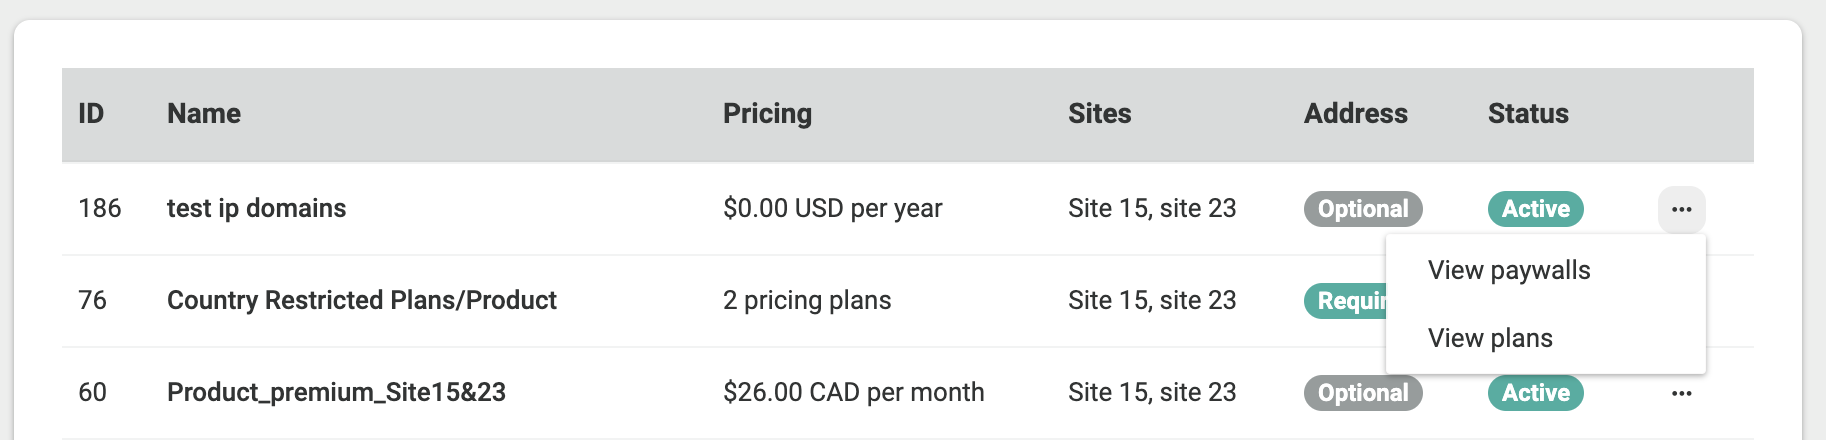
- You can export your products list, along with all their listed details into CSV format, by clicking on the export button to the top right-hand side of your products list page.

- You can also export information related to the plans associated with each product, by clicking on the right-hand side ellipsis icon, and choosing the "Export plans" option.

Updated 2 months ago