Style Overrides: Add CSS Specificity
You can restyle Pelcro’s UI by loading your own CSS on your site and targeting the same elements with more specific selectors. Pelcro scopes all UI under .pelcro-root and exposes stable classes/IDs so you can override safely without !important.
How it Works (in 30 seconds)
-
Pelcro scopes all user interface Every component lives under
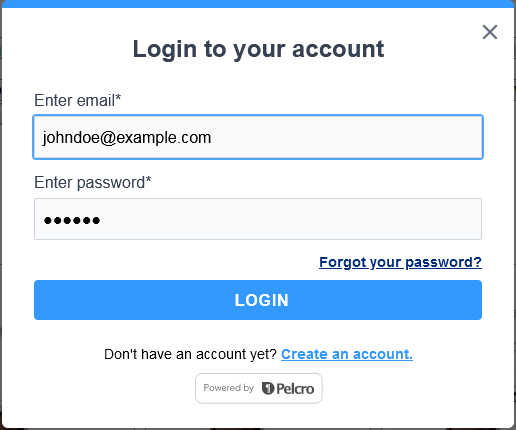
.pelcro-rootand many nodes havepelcro-…classes/IDs (e.g.,.pelcro-link,.pelcro-button-solid,#pelcro-login-view). -
You add CSS on your site In your global CSS or a
<style>tag, write more specific selectors than the defaults (e.g.,#pelcro-app .pelcro-root .pelcro-linkbeats.pelcro-link). -
Prefer specificity over
!importantIt’s cleaner, predictable, and easier to maintain.
Where to Put Your CSS
Add to your site’s global stylesheet or your HTML <head>:
<style>
  /* Example: site-level overrides */
  #pelcro-app .pelcro-root {
    --plc-primary-hue: 210;
    --plc-primary-saturation: 100%;
    --plc-primary-lightness: 60%;
  }
</style>
Tip: Target within a container you control (e.g., #pelcro-app …) to avoid accidental bleed into non-Pelcro UI.
Try It Yourself on CodeSandbox
You can experiment with Pelcro’s UI customization directly in the sandbox below.
Steps:
- Open the sandbox and go to src/styles.css.
- Try targeting any Pelcro class and overriding its default styles.
- Click the buttons on the right side of the screen to see your changes in action!
Example Explained:
/* Example: overriding Pelcro's default styles.
   The following rules hide certain Pelcro UI elements
   (product cost, plan price, gift input, and checkbox labels) */

.pelcro-root .pelcro-select-product-cost,
.pelcro-root .pelcro-select-plan-price,
.pelcro-root #pelcro-input-is-gift,
.pelcro-root .pelcro-checkbox-label {
  display: none;
}
In this example we’re hiding the following elements from the widget:
- The product cost
- The plan price
- The gift checkbox
- The checkbox label
This demonstrates how you can selectively hide or restyle Pelcro UI elements using CSS overrides — giving you full control over the widget’s appearance.
Specificity Playbook (no !important)
!important)Use one (or combine) until your rule wins:
-
Add a parent
#pelcro-app .pelcro-root .pelcro-link -
Use the provided IDs/classes
#pelcro-login-view .pelcro-input-field -
Match states
.pelcro-button-solid:hover .pelcro-input-field:focus -
Attribute or nth selectors if needed
.pelcro-input-field[type="email"]
.pelcro-modal :is(h1,h2)
Common Targets (Copy & Paste)
/* Links */
#pelcro-app .pelcro-root .pelcro-link {
  color: #3399ff;
}
#pelcro-app .pelcro-root .pelcro-link:hover {
  color: #002d7f;
}

/* Buttons */
#pelcro-app .pelcro-root .pelcro-button-solid {
  background-color: #3399ff;
  --tw-ring-color: #50a6fd; /* Tailwind ring var override */
}
#pelcro-app .pelcro-root .pelcro-button-solid:hover {
  background-color: #002d7f;
}

/* Inputs */
#pelcro-app .pelcro-root .pelcro-input-field:focus {
  --tw-ring-color: #50a6fd;
}

/* Login view only */
#pelcro-app #pelcro-login-view .pelcro-input-label {
  font-weight: 600;
}

/* Typography & font */
#pelcro-app .pelcro-root {
  font-family: "Helvetica", Arial, sans-serif;
}
Colors via CSS Variables
Pelcro exposes color tokens you can redefine at .pelcro-root:
#pelcro-app .pelcro-root {
  --plc-primary-hue: 210;
  --plc-primary-saturation: 100%;
  --plc-primary-lightness: 60%;
}
Keeps your palette centralized and Tailwind-compatible.
Load Order & Caching
- Load your CSS after Pelcro’s bundle so the cascade favors your rules.
- Bust caches when testing (add a query string to your CSS URL).
- If you use a site builder/CMS, ensure global styles are in
<head>and not lazy-loaded after the UI opens.
Debug & Verify in DevTools
- Inspect the element → Styles → confirm your rule is last/winning.
- If crossed out, increase specificity (e.g., add a parent like
#pelcro-app) or move your stylesheet later. - Check the Computed tab for final values (color, font, spacing).
- Test interactive states (
:hover,:focus,:disabled) and modal layers.
Example

overriding default styles
Updated 3 months ago
