Customers
The customer object is where it all starts. A customer is created by either creating them from the platform or if the customer registers to your services via web or mobile. The customer will be the main record containing the rest of the features and functionalities offered by the platform.
The customer object is where it all starts. A customer is created by either creating them from the platform or if the customer registers to your services via web or mobile. The customer will be the main record containing the rest of the features and functionalities offered by the platform.
When logged into a Pelcro Instance, you can create, view, edit and delete customers. All these actions can be performed under the "Customers" tab.
Let's jump into the details:
Creating a Customer
From the toolbar, go to "Customers > Customers". You'll be redirected to the main page where, as a user, you can view all existing customers, but also create a new one.
To create a new customer, click on the "New" button on the top right hand side. You'll be redirected to a new page, where you'll be prompted to enter the customer information.
In the case, you do not have the customer address, you can create the customer record simply by entering the basic details such the first and last name and the email address.
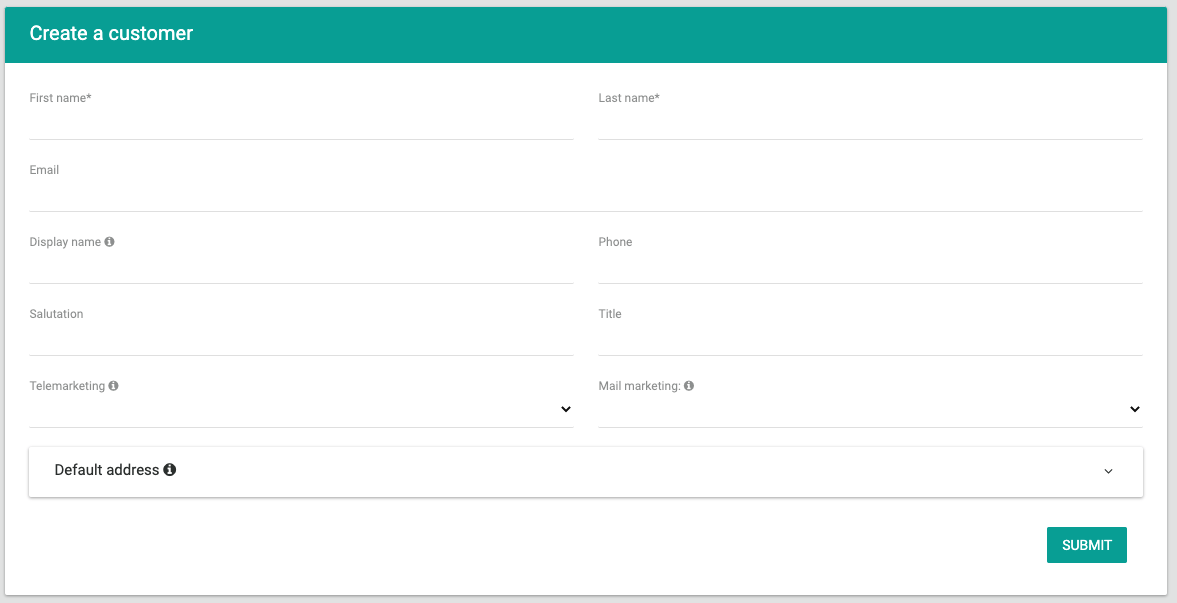
Scenario 1: Create a customer without an address
You'll need to populate the following mandatory fields:
- First Name
- Last Name
Then, enter the email address. Phone number can be added along with the shipping address details in scenario 2.
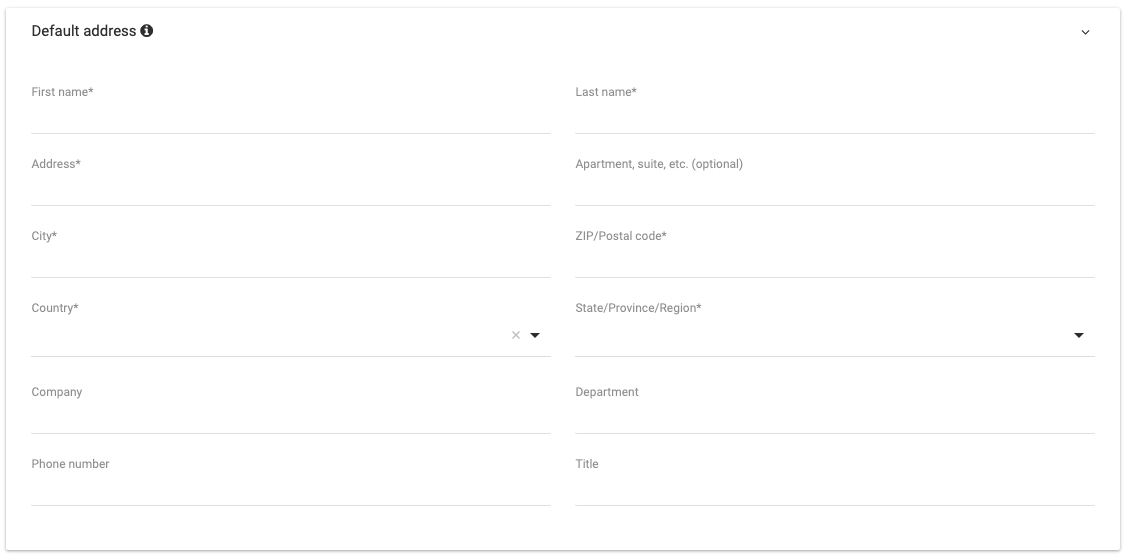
Scenario 2: Create a new customer with the shipping address information
You'll need to populate the first section ( mentioned above) then add the address details
- First Name
- Last Name
- Address
- City
- Province
- Country
- ZIP/Postal code
- Phone Numer
Click on "Submit" to create the new customer record.
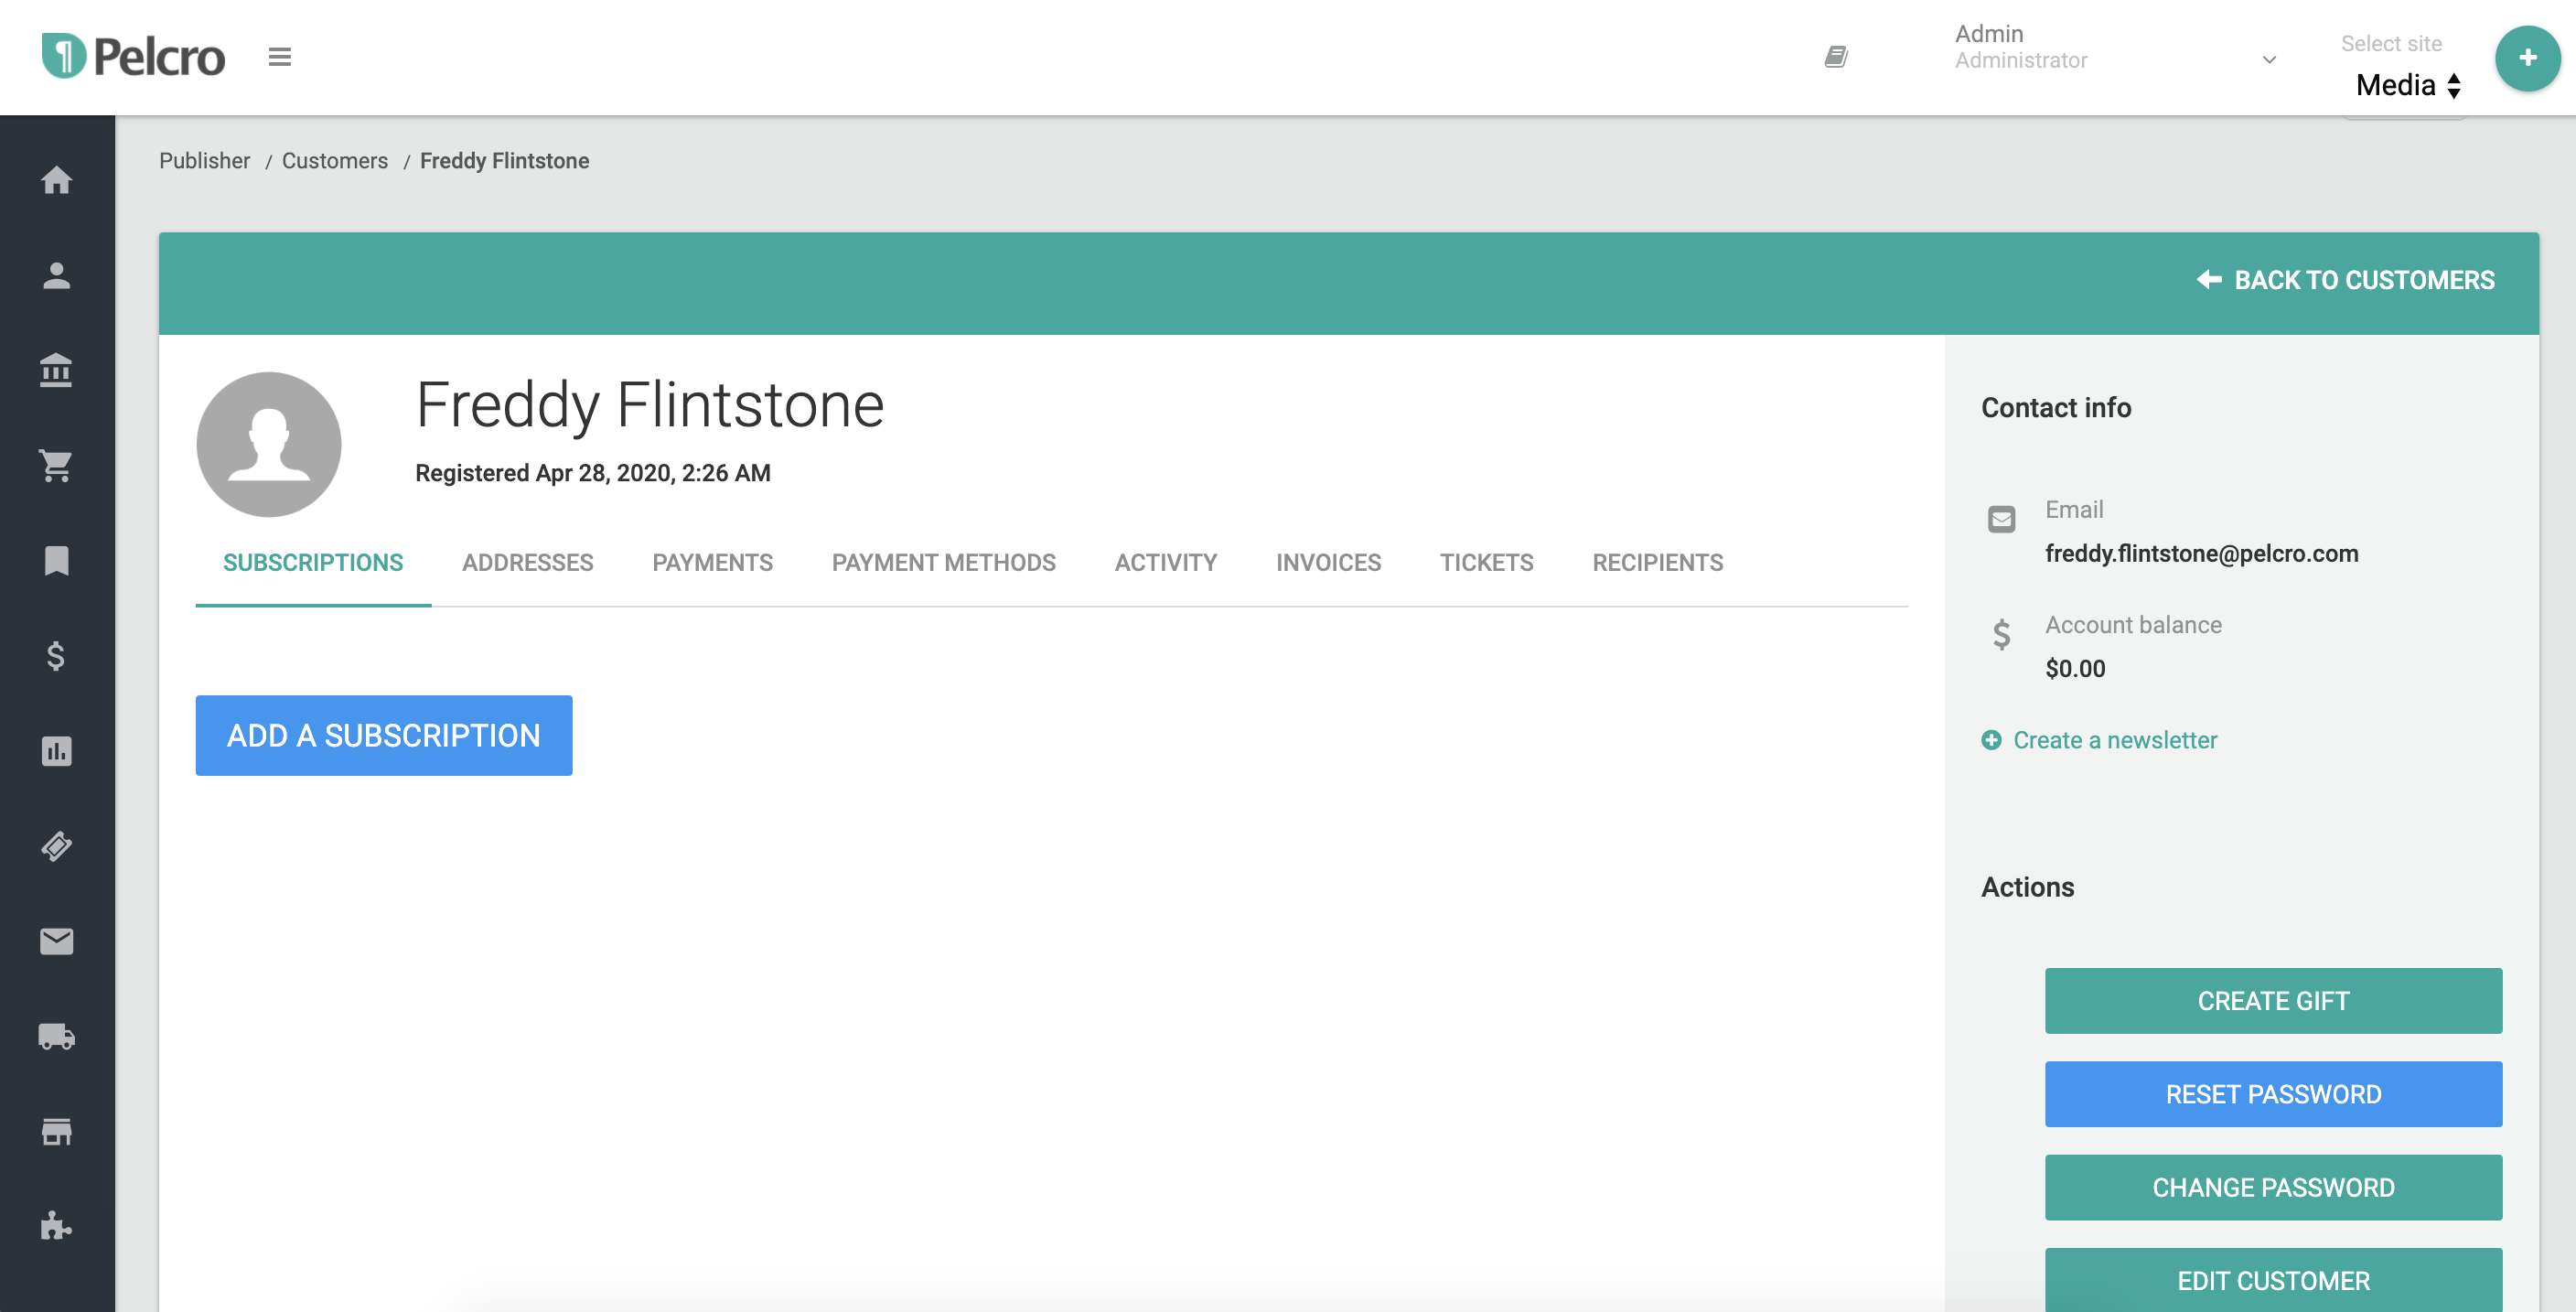
You will then be redirected to the Customer record page, in view mode which will give you access to the following customer related information:
- Subscriptions
- Addresses
- Payments
- Payment Methods
- Activity
- Invoices
- Tickets
- Recipients
- Metadata
- Orders
Listing Customers
To view your customers:
- On your Dashboard, hover over your left navigation menu. Choose "Customers" > "Customers".
- You'll be redirected to the customers page, where you can view and manage all your current customers, and create new ones.

To help navigate you through your customers, you will also find the following:
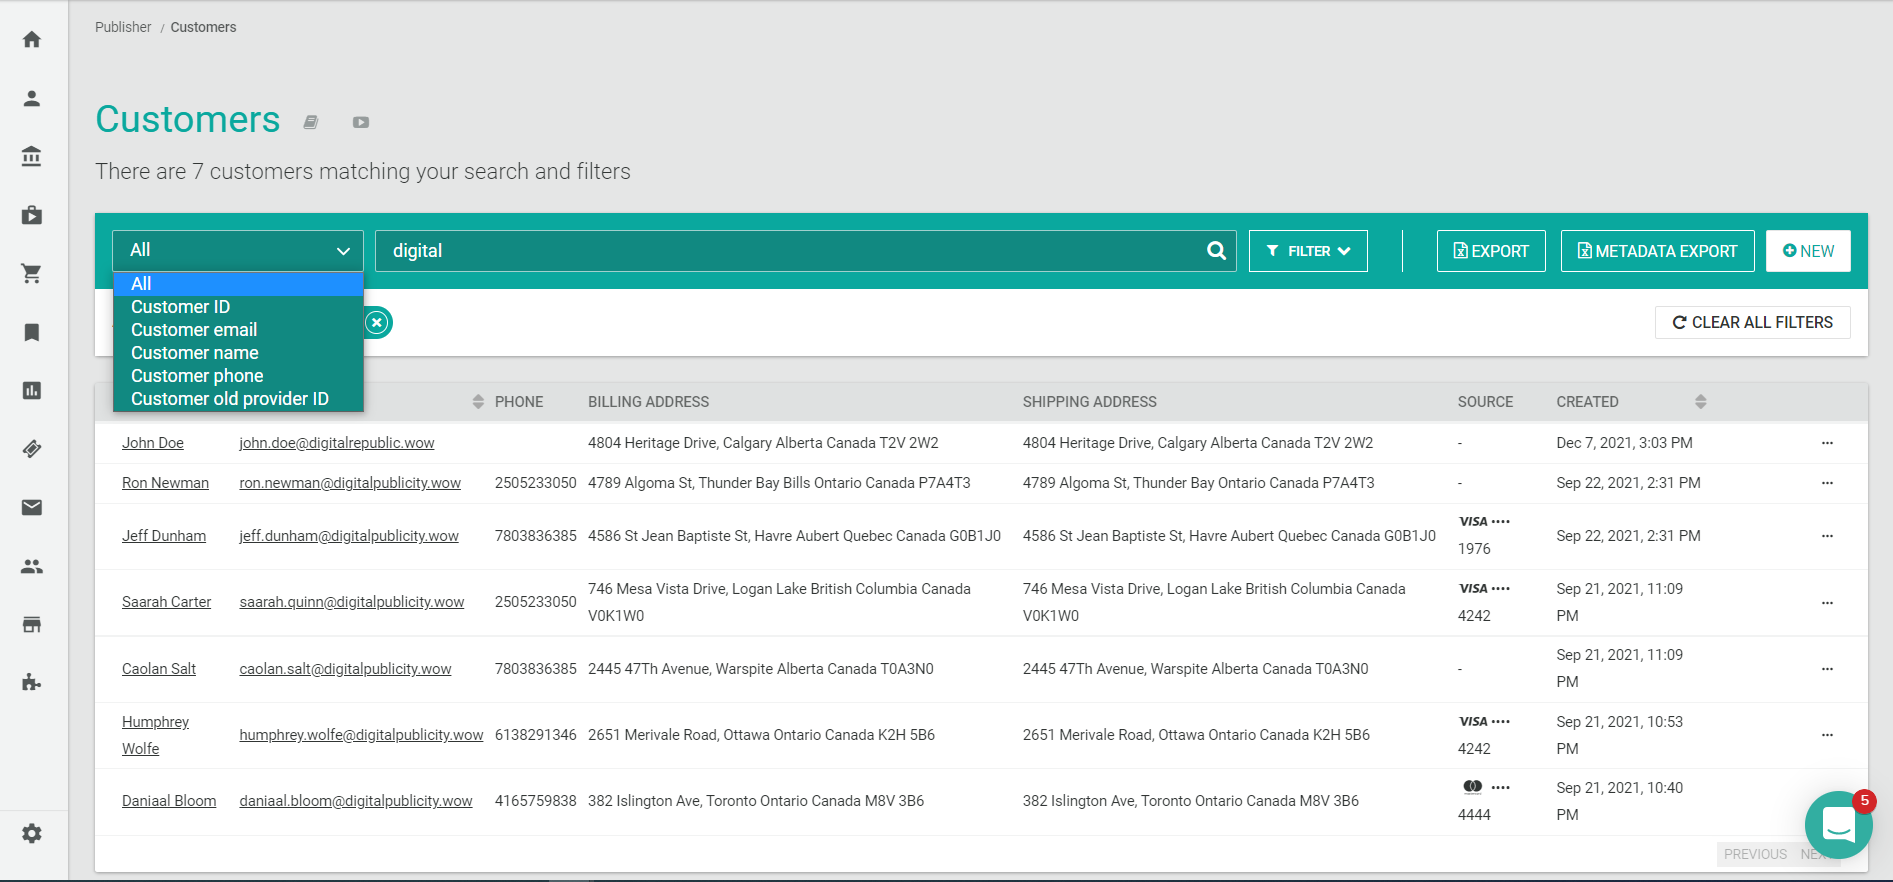
- Search bar: The search bar will allow you to directly find a customer based on a number of options. You may search customers by the customer's name, email address, organization, and phone number. Additionally, you can always use the subscription ID or the old provider ID as well. You're able to either search all of the parameters simultaneously by leaving the search dropdown to "All", or alternatively, refine your search further by choosing the specific search parameter as shown below.
-
Search filters: Additionally, you can refine your search even further by choosing one of the available search filters to the right-side of the search bar. You can filter by one or more of the following options:
- Customer creation date
Your filtered criteria will be visible under the search bar. You'll be able to remove any of the selected filters by either clicking on the 'x' button next to the filter you would like to remove. Additionally, you can reset the applied filters by clicking on the filter icon to the right side of the search bar, and choosing 'Reset', or alternatively, you can clear all filters altogether.
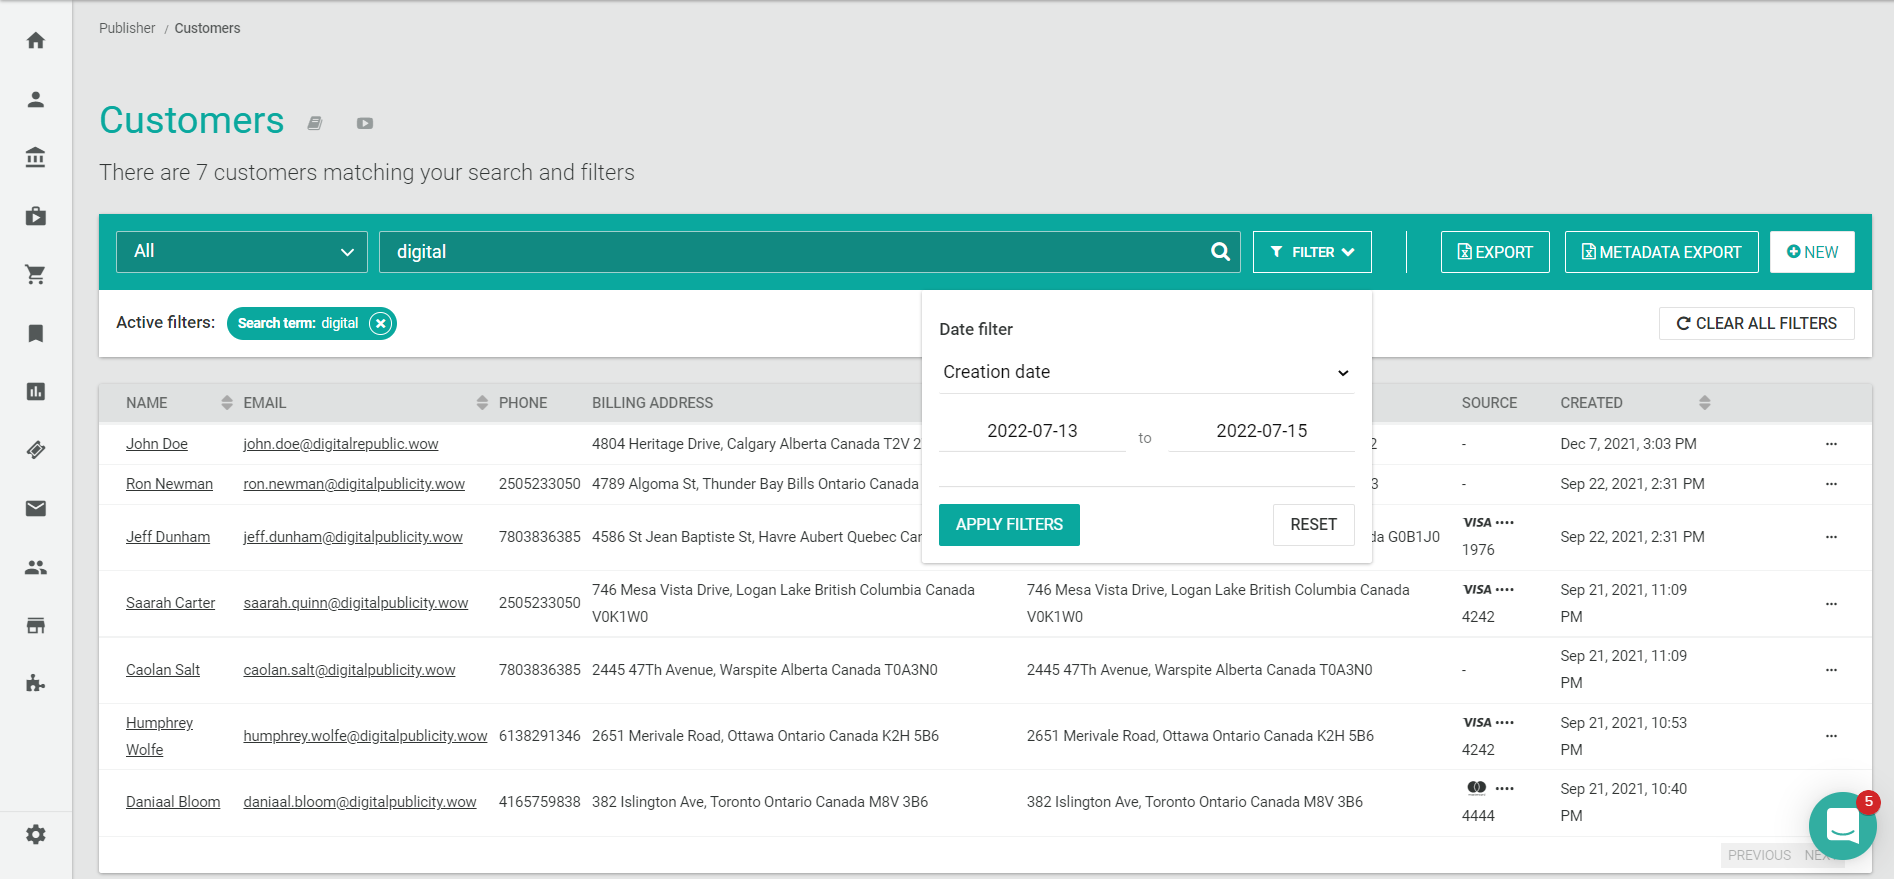
Additionally, you'll find a gear icon to the top-right corner of the table header, which you can use to show/hide specific columns on your view. This view is customizable to each collaborator independently, so the changes you make will not affect other collaborators on the same account.

Finally, you can export your customers list, along with all the listed details into CSV format. The export will take all of your specified filters into account to the exported data.
Viewing Customer Details
After you have found the customer you were looking for, you can either directly click on the customer name, or via the right ellipsis menu, click on View Customer to access all customer related information:
- Subscriptions
- Addresses
- Payments
- Payment Methods
- Activity
- Invoices
- Tickets
- Recipients
- Metadata
- Orders
Updating a Customer
From the toolbar, go to "Customers > Customers". You'll be redirected to the main page where, as a user, you can view and search all existing customers. If you wish to edit a customer, click on View Customer. You will be redirected to the customer main page, where you'll be able to edit the information by clicking on the three dots "..." followed by the "Edit Customer" button which is on the right hand side of the page under 'Actions'.
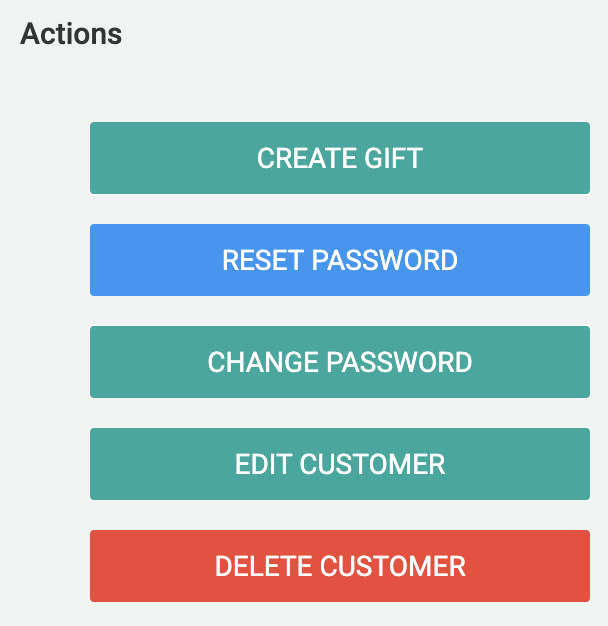
Once you've clicked on the Edit button, you'll be able to edit the customer information.
Updating customer emails associated with newsletters
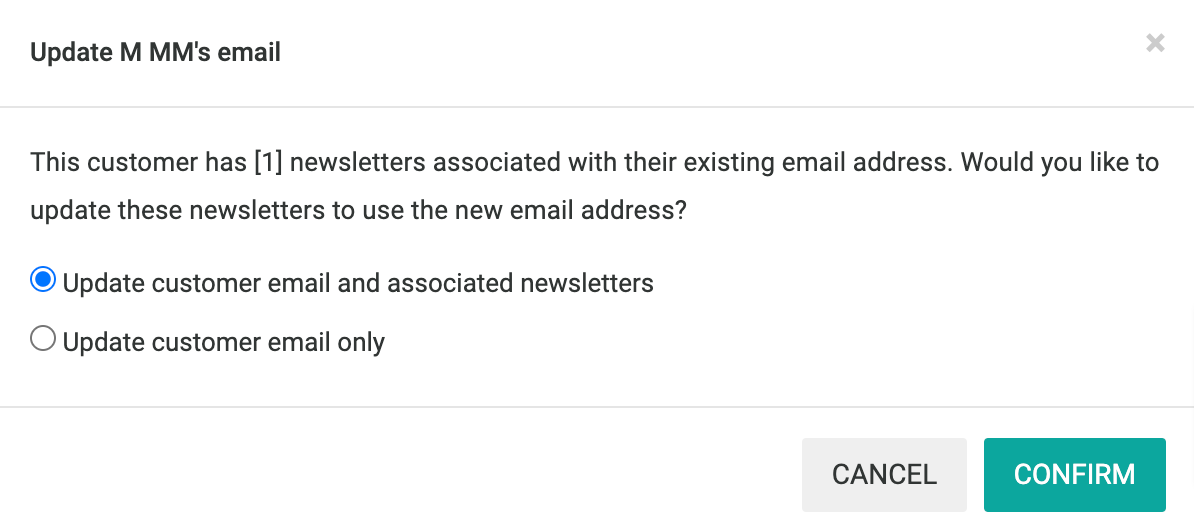
If you're updating a customer's email which is tied to existing newsletters, you'll be asked to confirm whether you want to update the customer's email only on the customer record or also cascade the update across associated newsletters as well.
Deleting a Customer
From the toolbar, go to "Customers > Customers". You'll be redirected to the main page where, as a user, you can view and search all existing customers. If you wish to delete a customer, click on View Customer. You will be redirected to the customer main page, where you'll be able to delete the customer record by clicking on the "Delete Customer" button which is on the right hand side of the page. There will be another warning pop up to make sure you want to delete the customer.
Automatic Personal Data Deletion

Pelcro supports you in maintaining compliance efforts with international privacy regulations (e.g. GDPR). When the option for "Automatic Personal Data Deletion" is enabled within Site Settings for your site, personal information related to deleted customers are automatically cleared/redacted from your records on objects which are related to the customer record, so that they can no longer be linked to the user without the use of additional data. In addition to personal information saved under the customer record, personal information saved under addresses, subscriptions, payment methods, exports, and activity log details are either cleared or redacted.
Customer Activity
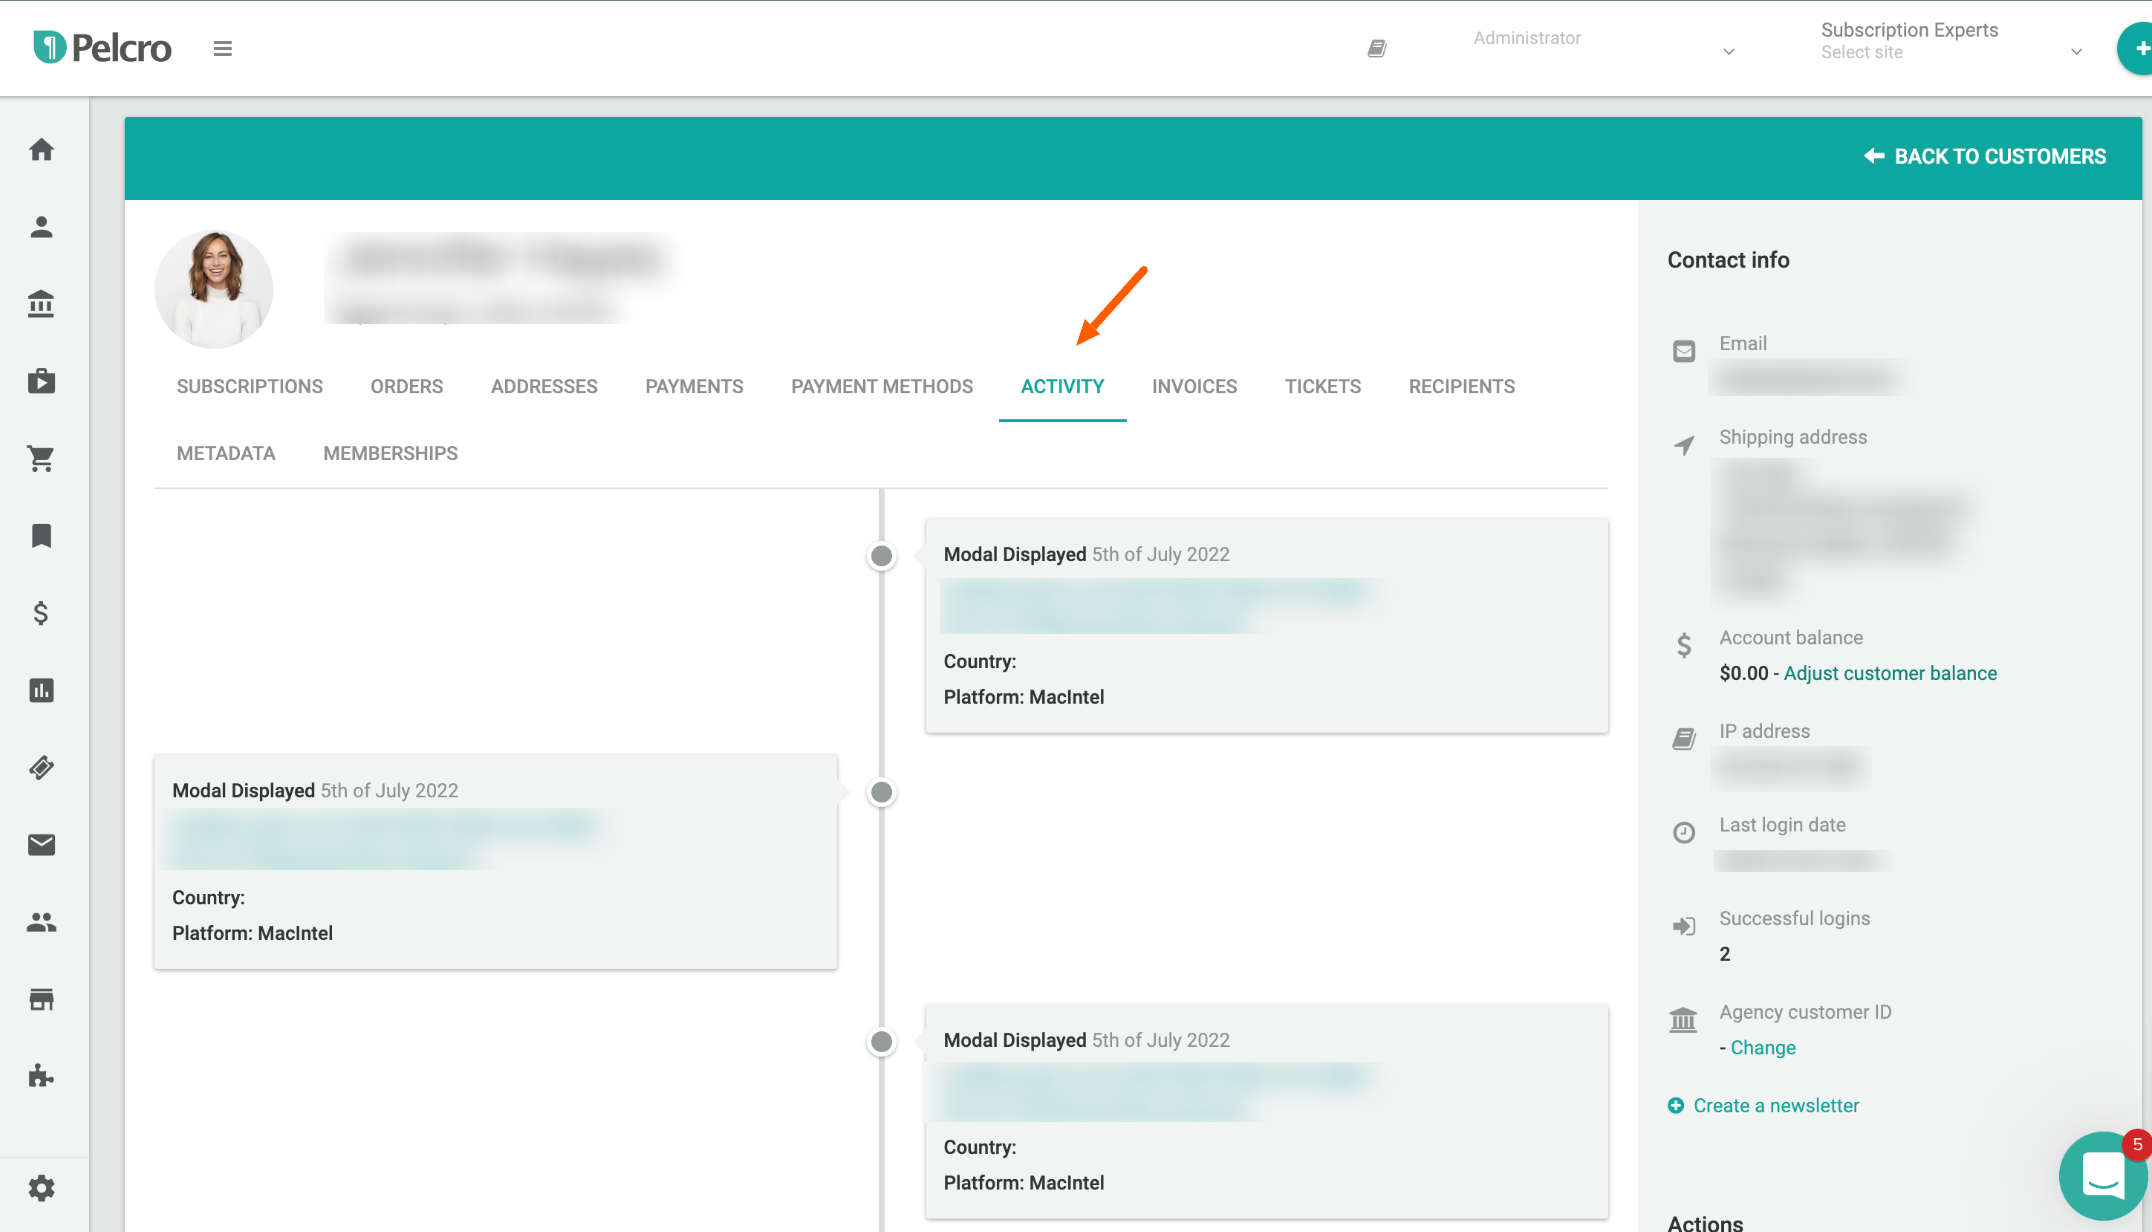
The customer activity data displays a timeline of the user's logins and their related data; modal, country and platform as shown in the below screenshot.
From the toolbar, go to "Customers > Customers". You'll be redirected to the main page where, as a user, you can view and search all existing customers. If you wish to view a customer's activity data, click on View Customer. You will be redirected to the customer main page, where you'll be able to check the customer activity data by clicking on the "Activity" button.
Updated almost 2 years ago
